Home >Software Tutorial >Computer Software >How to set shortcut keys for CorelDRAW three-dimensional tool Setting method tutorial
How to set shortcut keys for CorelDRAW three-dimensional tool Setting method tutorial
- PHPzforward
- 2024-02-15 18:30:091157browse
php Editor Banana will introduce to you how to set shortcut keys for the CorelDRAW three-dimensional tool. The three-dimensional tool is one of the commonly used functions in CorelDRAW. It can transform flat graphics into a three-dimensional effect and improve the design effect. In order to improve work efficiency, we can set shortcuts for three-dimensional tools. Setting shortcut keys can make us more convenient when using three-dimensional tools, eliminating the need to frequently click on menus. Next, let us learn the specific steps to set the shortcut keys of the three-dimensional tool!
The specific operations are as follows:
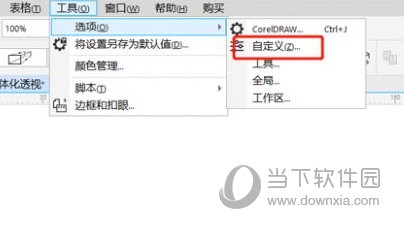
1. Open the CorelDRAW software, click [Tools] above, and then click [Options]-[Customize]

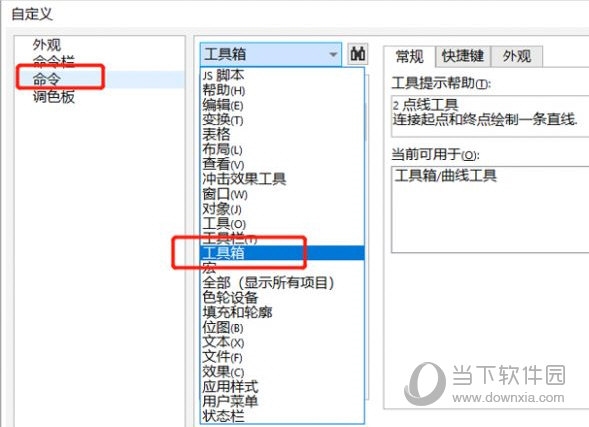
2. Click [Command] on the left side of the customization interface, and then find [Toolbox] on the right side

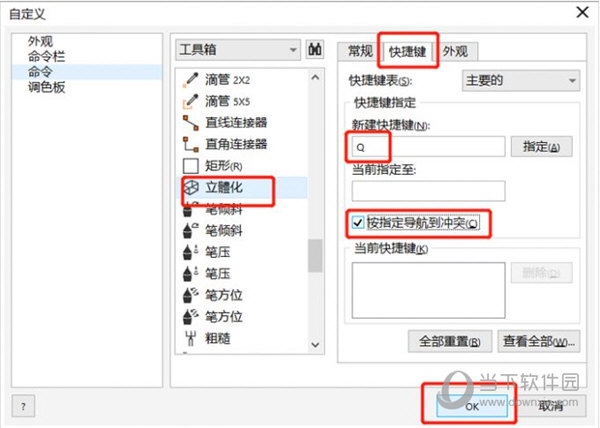
3. Then find [3D] , click [Shortcut Key], enter a shortcut key in [New Shortcut Key], check [Navigate to conflict as specified], and finally click [OK]

After the setting is successful, you can use the set shortcut keys to bring up the three-dimensional tool, which is very convenient. The above is the CorelDRAW related tutorial brought by the editor, I hope it can help everyone.
The above is the detailed content of How to set shortcut keys for CorelDRAW three-dimensional tool Setting method tutorial. For more information, please follow other related articles on the PHP Chinese website!

