
Home >System Tutorial >Windows Series >How to activate read-only mode in excel in win10 home version
How to activate read-only mode in excel in win10 home version

- 王林forward
- 2024-02-15 17:21:07945browse
php editor Apple brings you how to activate the read-only mode of Excel in Win10 Home Edition. When using Excel, sometimes we need to set the document to read-only mode to prevent others from modifying the file. However, Win10 Home Edition does not provide this feature by default, which has caused trouble for some users. However, don’t worry! We can activate Excel read-only mode and protect our files through some simple steps. Next, we will introduce the specific operation method in detail, allowing you to easily activate Excel read-only mode!
How to activate win10 home version excel
1. After opening the document, click "File" in the menu, and then select "Save As"

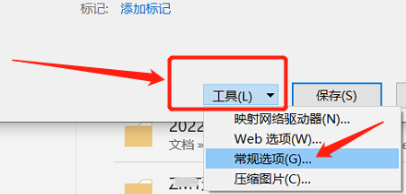
2. Then on the saved page, click "Tools" here and then click "General Options" below
3. Then enter your own here Password
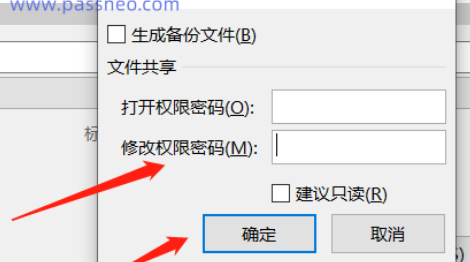
4. After saving the file and then opening it, you will be asked to enter a password. If there is no password, you can only open it in a read-only way.

The above is the detailed content of How to activate read-only mode in excel in win10 home version. For more information, please follow other related articles on the PHP Chinese website!
Related articles
See more- How to solve the problem that win10 cannot connect to the proxy server
- How to solve the problem that win10 cannot connect to this network
- What is the formula for calculating age in Excel?
- How to solve the problem that Win10 Home Edition cannot join the domain
- win10 home version cannot install cad software