Home >System Tutorial >Windows Series >How to remove network speed limit in Win7? Solution to slow network speed in Win7
How to remove network speed limit in Win7? Solution to slow network speed in Win7
- WBOYWBOYWBOYWBOYWBOYWBOYWBOYWBOYWBOYWBOYWBOYWBOYWBforward
- 2024-02-14 19:39:231677browse
How to remove the Internet speed limit in Win7? The solution to the slow network speed of Win7 is a problem that many users are concerned about. In the process of using the Windows 7 operating system, you sometimes encounter slow network speeds, which not only affects your Internet experience, but also affects your work efficiency. So, how to remove the network speed limit of Win7 and quickly solve the problem of slow network speed? This article will provide users with some practical solutions to help solve the Win7 network speed limit problem and make your network smooth.
How to remove the Internet speed limit in Win7?
1. First, start the computer and enter the windows7 system.
2. Open the start menu and search for "gpedit.msc" in the search box.
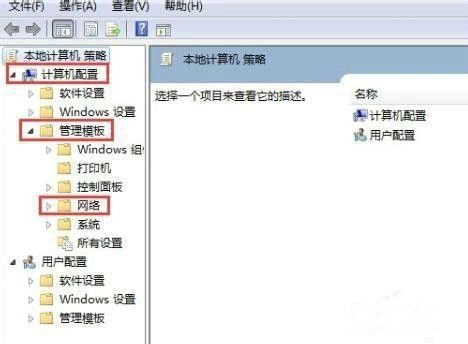
3. After clicking Open, go to the "Local Group Policy Editor" and click Computer Configuration-"Administrative Templates-"Network.

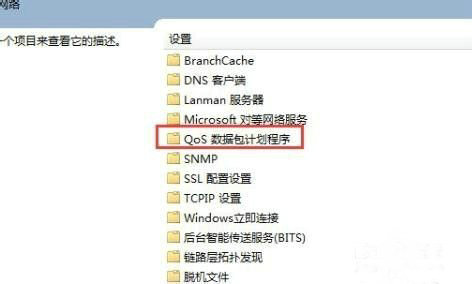
#4. Find the "QoS Packet Scheduler" in the network.

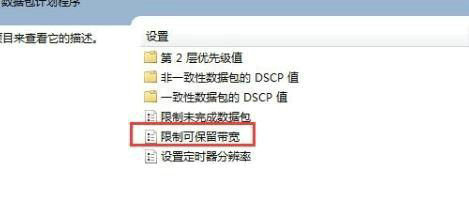
#5. Find "Limit reserved bandwidth" in the Qos packet scheduler.

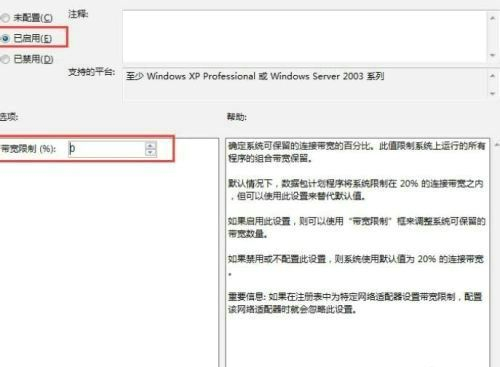
#6. Enter the restriction to reserve the bandwidth. Click "Enabled" to change the default restriction of 20% to 0%.

The above is the detailed content of How to remove network speed limit in Win7? Solution to slow network speed in Win7. For more information, please follow other related articles on the PHP Chinese website!

