Home >Software Tutorial >Computer Software >How to add right frame line in WPS2019 Detailed tutorial introduction
How to add right frame line in WPS2019 Detailed tutorial introduction
- 王林forward
- 2024-02-13 19:12:26539browse
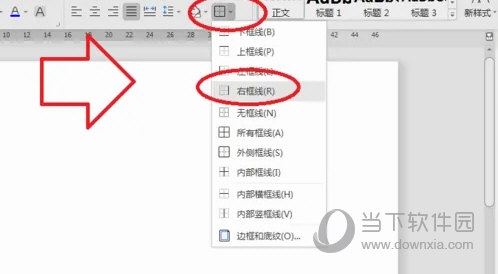
php editor Yuzai will give you a detailed tutorial on adding a right frame line in WPS2019. In WPS2019, the right frame line is a commonly used typesetting decoration element, which can effectively improve the readability and beauty of the document. Adding a right frame line is very simple, just follow the steps below. First, open the document you need to add a right border line in WPS2019, then click the Page Layout tab, find the "Border" button in the Page Layout tab, and after clicking it, the Border Settings dialog box will pop up. In the dialog box, select the Right Border option and set the desired line style, color, and thickness. Finally, click the OK button to complete the addition of the right frame line. Through this simple tutorial, you can easily add a right border line to the document in WPS2019 and improve the layout effect of the document.
Method steps:
1. Open WPS2019, click New Blank Document

2. Click Start

3. Click the right frame line

The above is the detailed content of How to add right frame line in WPS2019 Detailed tutorial introduction. For more information, please follow other related articles on the PHP Chinese website!

