Home >Software Tutorial >Computer Software >How to replace in-situ images in CorelDRAW replacement method tutorial
How to replace in-situ images in CorelDRAW replacement method tutorial
- WBOYWBOYWBOYWBOYWBOYWBOYWBOYWBOYWBOYWBOYWBOYWBOYWBforward
- 2024-02-12 16:51:041369browse
CorelDRAW is a very commonly used graphic design software. The software does not have the function of directly replacing images. If you want to replace the image in situ, you need to delete the original image, re-import the replacement image and adjust the image size. However, we can also use some tricks to achieve the effect of in-situ image replacement. That is to use powerclip to place it inside the picture and text frame.
The specific operations are as follows:
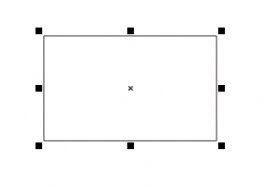
1. Open the CorelDRAW software and use the graphics tool to draw a graphic

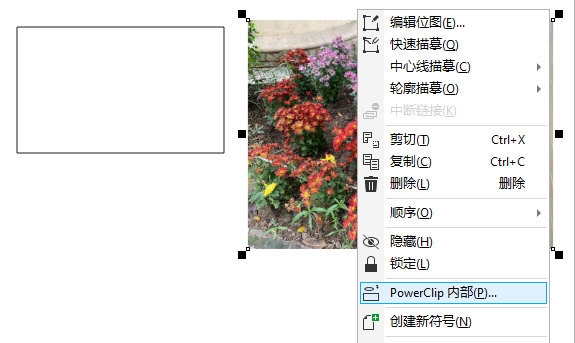
2. Import the picture and right-click Click [Inside powerclip] on the original image, click on the rectangular image after the mouse changes to an arrow, and put the image into the rectangle

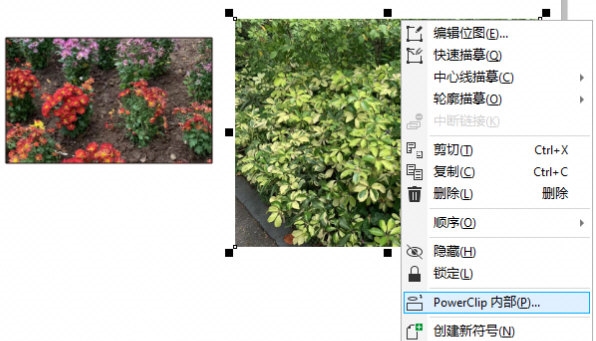
3. Import the image to be replaced, right-click and do the same Click [Inside powerclip]

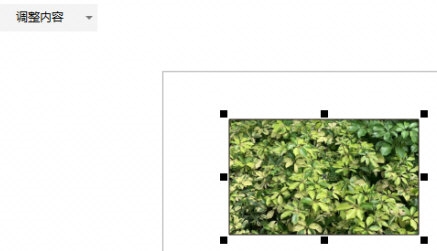
4. Click the rectangle after the mouse changes to an arrow, so that the original image can be replaced with a new image. You need to adjust the display image. For the content position, you can click [Adjust Content] above to adjust it

This method uses graphics and powerclip functions to create an image container and replace the in-situ image. , but this method will be limited by the shape of the graphics outline. The above is the CorelDRAW related tutorial brought by the editor, I hope it can help everyone!
The above is the detailed content of How to replace in-situ images in CorelDRAW replacement method tutorial. For more information, please follow other related articles on the PHP Chinese website!

