

How to use the automatic repair command prompt in win10 system?

php editor Baicao will introduce to you how to use the Win10 system to automatically repair the command prompt. When using the Win10 system, you sometimes encounter some problems, such as slow system startup, unresponsive programs, etc. At this time, you can try to use the command prompt for automatic repair. The command prompt is a powerful tool that comes with the Windows system. By entering some commands, you can fix some common system problems. Next, let’s learn more about how to use the automatic repair command prompt in Win10 system.
Automatic Repair Command Prompt Tutorial
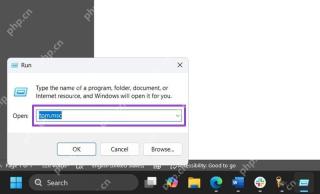
1. Press "Win R" and enter cmd to open the "Command Prompt".

#2. Enter “chkdsk” to view the repair command.

#3. If you need to view other places, you can also add other partitions such as "d".

#4. Enter the execution command "chkdsk d:/F".
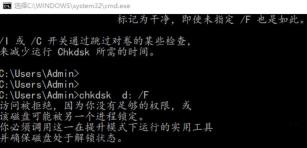
#5. If it is occupied during the modification process, you can enter "Y" to continue.

The above is the detailed content of How to use the automatic repair command prompt in win10 system?. For more information, please follow other related articles on the PHP Chinese website!

 8 Ways to Clear the Clipboard on Windows 11Apr 21, 2025 pm 12:13 PM
This guide provides multiple ways to clear your Windows 11 clipboard, ensuring your copied data remains private. Your clipboard stores various items, including text, images, and videos. Let's explore several methods to erase its contents. Method 1:
 Logitech's G515 Lightspeed keyboard is 25% offApr 21, 2025 pm 12:06 PM
Logitech G515 Lightspeed TKL Mechanical Gaming Keyboard Review The Logitech G515 Lightspeed TKL uses low profile keys and feels very similar to the Apple Magic Keyboard, but has an additional mechanical switch, which is slim overall and has a rechargeable battery. Amazon Link This keyboard is perfect for users who both work and games. Amazon currently sells for $119.99, down from its original price of $159.99, only once before it reached this price. G515 Lightspeed TKL is slim in size, 14.49 inches long and 5.91 inches wide,
 How to Enable TPM 2.0 to Get Windows 11Apr 21, 2025 am 11:17 AM
Many users with powerful desktops were initially blocked from upgrading to Windows 11 due to a simple BIOS setting being disabled by default: TPM 2.0. This guide explains how to enable it. Checking for TPM Compatibility Windows has a built-in tool t
 How to Download a Website as an App on the DesktopApr 21, 2025 am 10:37 AM
Quickly Access Your Favorite Websites: Two Methods for Adding Websites to Your Desktop Tired of hunting through bookmarks? Windows offers easy ways to add frequently visited websites directly to your desktop for instant access. This guide details tw
 8 Ways to Open the Run Dialog Box on Windows 11Apr 20, 2025 am 06:01 AM
Windows 11's Run dialog box (Run) provides a convenient way to quickly access various system features and installed applications. The way to start this dialog is simple, just use keyboard shortcuts or select menu items. This article will describe several ways to start this utility. Use keyboard shortcuts to open the run dialog The quickest way to start a Run dialog on Windows 11 is to use keyboard shortcuts. This method opens the dialog box instantly. To do this, press the Windows R key on the keyboard. No matter where you are currently on your computer, Windows 11 will immediately open the Run dialog box. You can then enter the name of the utility you want to start.
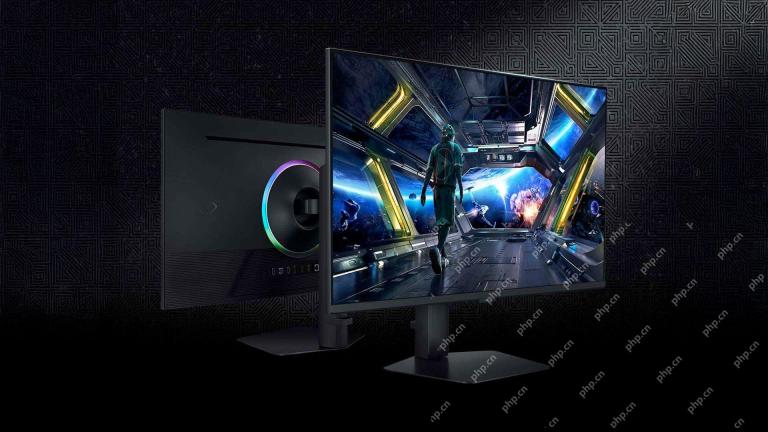 Samsung's 32-inch Odyssey G7 IPS Gaming Monitor Is $270 Off TodayApr 20, 2025 am 03:01 AM
Samsung Odyssey G7 (G70D) 32-inch Esports Monitor Special Offer! Original price is $800, current price is only $530, saving $270! This Odyssey G7 sports monitor has 4K resolution, IPS panel, 144Hz refresh rate, AMD FreeSync Premium support, and smart Tizen capabilities. Samsung's official website priced at $530 If you need a monitor that supports high refresh rate gaming, this Samsung 32-inch Odyssey G7 monitor is ideal for you. Currently on sale, priced at $530, $270 less than the original price, and comes with 4K resolution, IPS panel and smart software capabilities. 32-inch Odyss
 6 Tasks You Should Do Regularly on Your Windows ComputerApr 19, 2025 am 03:01 AM
Maintaining a Windows computer requires regular upkeep to ensure smooth operation and prevent performance issues, security risks, and unnoticed hardware problems. Here's a routine maintenance checklist to keep your computer running smoothly: 1. Run
 How to Right-Click With No MouseApr 18, 2025 pm 12:03 PM
The mouse is a vital component to getting work done on your PC. But when you’re stuck with a faulty mouse, you can run into a few problems including the inability to right-click. But the good news is that there are definitely ways t


Hot AI Tools

Undresser.AI Undress
AI-powered app for creating realistic nude photos

AI Clothes Remover
Online AI tool for removing clothes from photos.

Undress AI Tool
Undress images for free

Clothoff.io
AI clothes remover

Video Face Swap
Swap faces in any video effortlessly with our completely free AI face swap tool!

Hot Article
Hot Tools

MantisBT
Mantis is an easy-to-deploy web-based defect tracking tool designed to aid in product defect tracking. It requires PHP, MySQL and a web server. Check out our demo and hosting services.

Dreamweaver Mac version
Visual web development tools

SublimeText3 Mac version
God-level code editing software (SublimeText3)

PhpStorm Mac version
The latest (2018.2.1) professional PHP integrated development tool

WebStorm Mac version
Useful JavaScript development tools

