Home >System Tutorial >Windows Series >How to configure ICC color correction file in Win11? How to set the color profile of win11 computer
How to configure ICC color correction file in Win11? How to set the color profile of win11 computer
- WBOYWBOYWBOYWBOYWBOYWBOYWBOYWBOYWBOYWBOYWBOYWBOYWBforward
- 2024-02-11 19:30:272038browse
php editor Yuzai brings you a detailed guide to configuring ICC color correction files in Win11. In Win11 computers, you can adjust the color of the display and improve image quality by configuring the ICC color correction file. To configure, you first need to download the appropriate ICC color calibration file, and then follow certain steps to set it up. This article will introduce in detail how to set up the color profile of Win11 computers, helping you easily complete the configuration of the color calibration file, improve the display effect, and enjoy a better visual experience.
How to set the color configuration file of win11 computer
1. Move the ICC color calibration file to this path C:\Windows\System32\spool\drivers\color.
2. Press the [Win S] key combination to open the search, or click the [Search box] below, enter [Color Management] and open it.

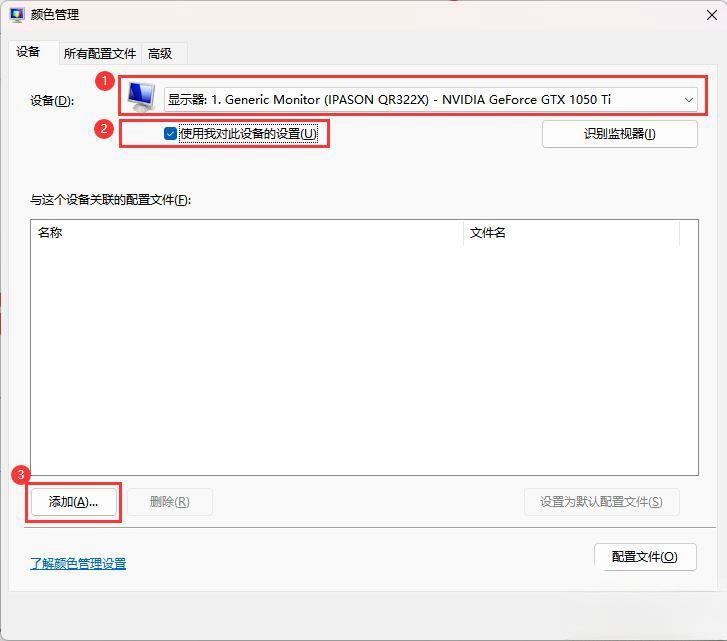
3. In the color management window, select the monitor to be calibrated, such as [Monitor: 1.Generic MMonitor (IPASON QR322X)-NVIDIA GeForce GTX 1050 Ti], and then check Select [Use my settings for this device] and click [Add].

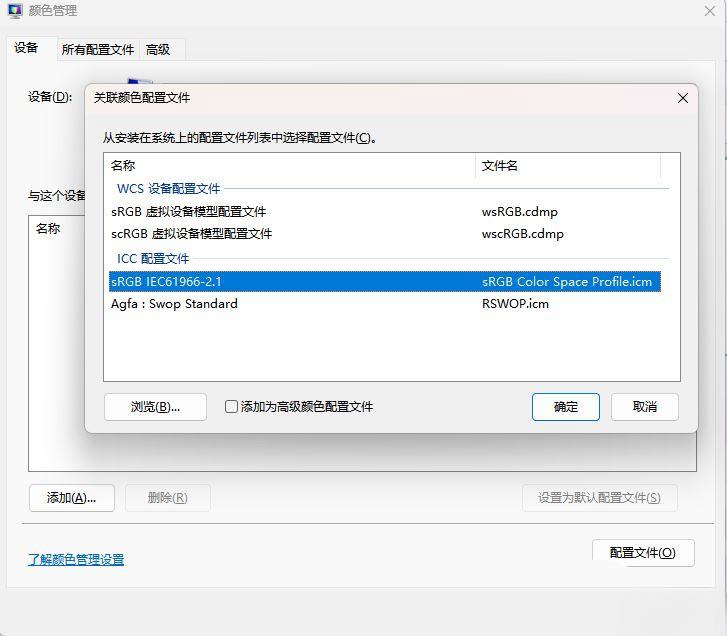
4. Select the [ICC profile] to be added, and then click [OK].

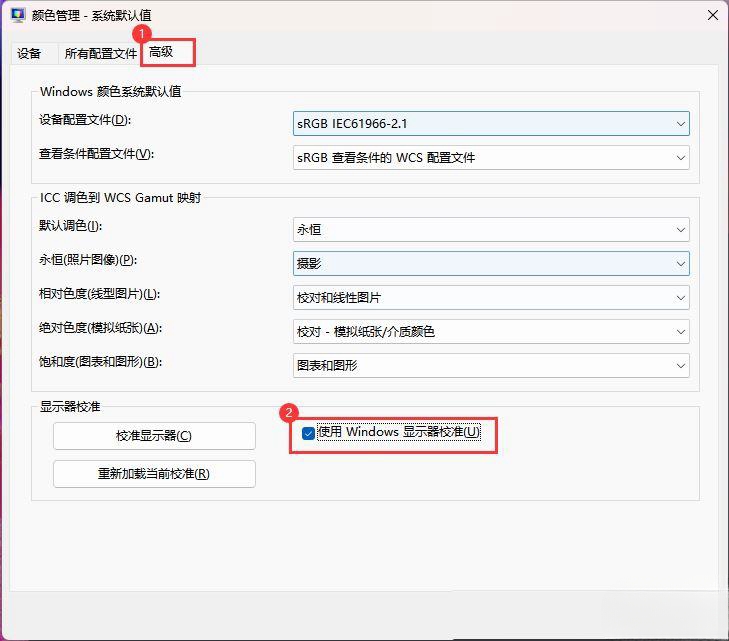
5. Switch to the [Advanced] tab, and then click [Change System Defaults].
6. Next, in the system default interface, switch to the [Advanced] tab and check [Use Windows display calibration].

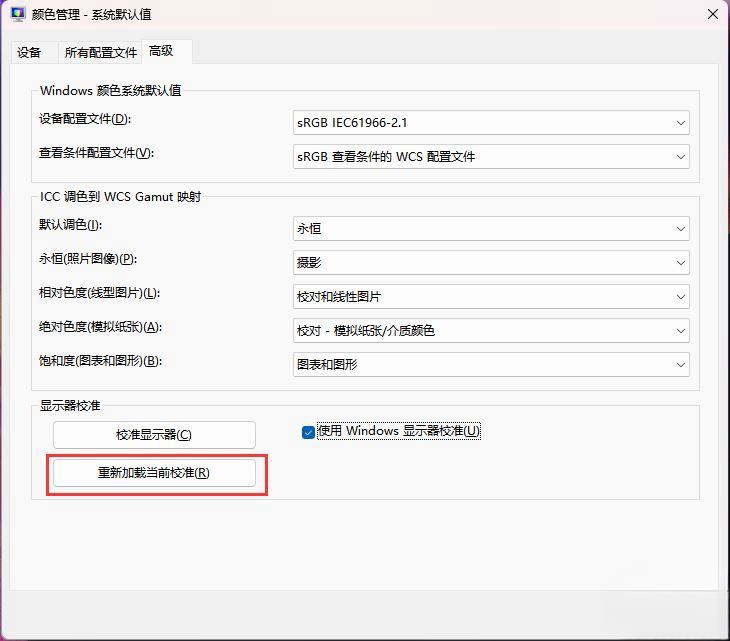
7. Then click [Reload as Calibration], and then click [Close].

#8. After setting in this way, the ICC configuration file will always be in effect, and there will be no uncorrected images due to the file suddenly not taking effect during use.
The above is the detailed content of How to configure ICC color correction file in Win11? How to set the color profile of win11 computer. For more information, please follow other related articles on the PHP Chinese website!

