Home >System Tutorial >Windows Series >How to disable a certain software from connecting to the Internet in win11? How to individually disable individual software from connecting to the Internet in win11?
How to disable a certain software from connecting to the Internet in win11? How to individually disable individual software from connecting to the Internet in win11?
- WBOYWBOYWBOYWBOYWBOYWBOYWBOYWBOYWBOYWBOYWBOYWBOYWBforward
- 2024-02-10 13:39:201307browse
php editor Xiaoxin will introduce to you how to prohibit a certain software from connecting to the Internet in Win11 and how to individually prohibit a single software from connecting to the Internet. In the Win11 system, sometimes we may want a certain software not to connect to the Internet, or only allow specific software to connect to the Internet to improve security or network traffic control. Fortunately, Windows 11 provides simple ways to achieve these goals. Next, we will introduce in detail how to complete these settings in Win11 system, allowing you to better control the software's network access permissions.
How to prohibit individual software from networking in win11
1. First, find and double-click to open the control panel.
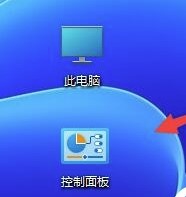
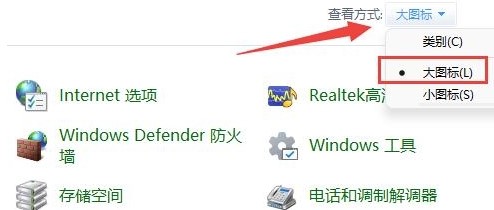
#2. In the control panel window, change the view mode in the upper right corner to large icons.
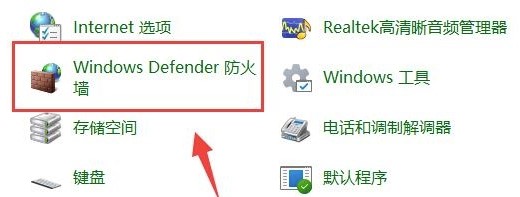
3. Find and click to open Windows Defender Firewall.
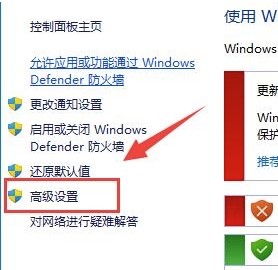
#4. In the Windows Firewall window, click Advanced Settings in the left sidebar.
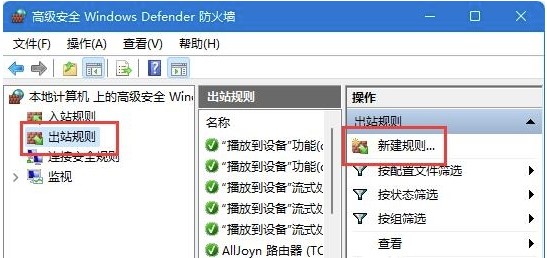
5. In the Windows Defender Firewall with Advanced Security window, click Outbound Rules on the left, and then click New Rule on the right.
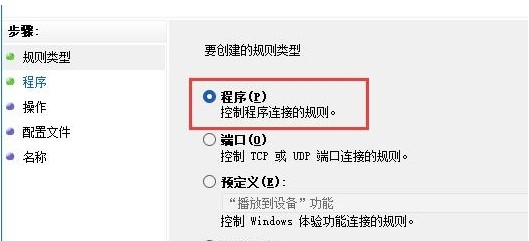
6. Rule type, select program, and click Next.
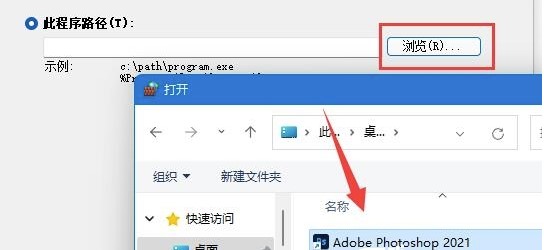
#7. For this program path, click Browse to find the shortcut of the software you want to disable the Internet.
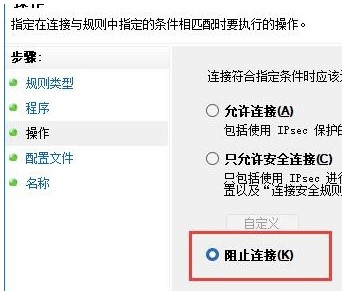
8. Operation, select Block connection and click Next.
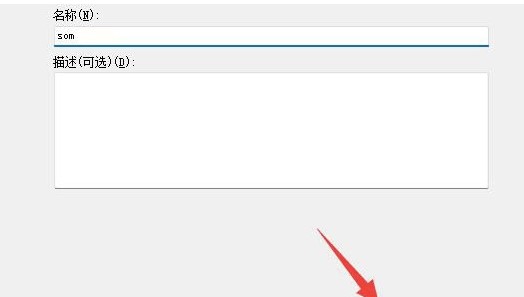
#9. Finally, there are some settings. Keep them all as default. Then set a name and click Finish to disable the application from connecting to the Internet.
Note: You need to ensure that Windows Firewall is enabled.
The above is the detailed content of How to disable a certain software from connecting to the Internet in win11? How to individually disable individual software from connecting to the Internet in win11?. For more information, please follow other related articles on the PHP Chinese website!

