


php editor Strawberry will introduce to you how to set up the Win10 full-screen menu. In Win10 system, sometimes we want to set the start menu to full screen size for a better operating experience. To achieve this function, we can adjust it through simple operations. In this article, I’ll walk you through the exact steps so you can easily master this technique. Let’s take a look!
How to set the start menu to full screen size in Win10
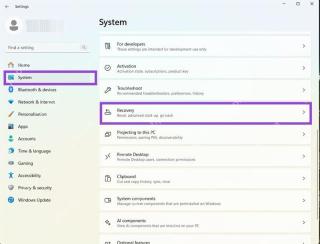
1. Click the start menu in the lower left corner and select the [Settings] option.

#2. Then click [Personalization] in the windows settings interface.

#3. Select the [Start] tab on the left in the personalized interface that opens.

#4. We find [Use "Full Screen" Start Screen] on the right side of the Start tab and turn on the switch below.

#5. This is when we open the start menu and see that it is displayed in full screen.

#6. You can also click on the upper left corner to switch between [Pinned Tiles] and [All Apps] in the menu.

The above is the detailed content of How to set the Start menu to full screen size in Win10?. For more information, please follow other related articles on the PHP Chinese website!

 I Miss the Times Computers Were Plug and PlayMay 13, 2025 am 06:03 AM
Building a new PC was once a moment of triumph. Now, it’s just the beginning, as you have to install apps, download large games, and tweak dozens of settings before it's fully set up. Let's take a look at how we got here and how things used to be.
 Why Is This Logitech Mouse on Every Tech Person's Desk?May 13, 2025 am 06:02 AM
Logitech's MX Master series of mice has become a common sight in YouTube videos or photographs of tech-savvy people's desk setups, but what makes this now-iconic mouse so special? I'm on my third MX Master mouse at this point, and, honestly, I can
 I Refuse to Buy a Keyboard Without a ScreenMay 13, 2025 am 03:05 AM
Mechanical keyboards offer a plethora of features, from switch type and keycap material to sound dampening. But one often overlooked, yet invaluable feature, is the built-in screen. Why Integrate Screens into Keyboards? The QWERTY keyboard, a staple
 The Galaxy S25 Gets Edgy, and RIP Skype: Weekly RoundupMay 13, 2025 am 03:04 AM
Tech News Roundup: Major Updates and New Releases Across the Tech Landscape This week brings a flurry of exciting tech news, from AI advancements to new gaming peripherals and significant software updates. Let's dive into the highlights: AI and Secu
 How to Rollback Windows 11 UpdateMay 12, 2025 pm 08:01 PM
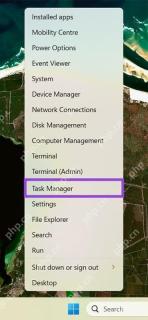
Is Windows 11 update causing system problems? Don’t panic! This article provides three methods of rollback updates to help you restore system stability. Method 1: Rollback updates through Windows settings This method is suitable for users whose update time is less than 10 days. Step 1: Click the "Start" menu to enter "Settings". You can also press the Windows key I on the keyboard. Step 2: In Settings, select System, and then click Recover. Step 3: Under Recovery Options, find "Previous Windows Versions". If the Back button is clickable, the system can be rolled back to the previous version. Step 4: The system will ask you why the rollback is
 13 Windows Keyboard Shortcuts I Couldn't Live WithoutMay 12, 2025 am 03:02 AM
Mastering Windows keyboard shortcuts isn't just about efficiency; it streamlines your entire computing experience. Windows' interface can be less than intuitive, hiding crucial settings within layers of menus. Fortunately, countless shortcuts exist
 How to Speed Up Your PC (Windows 11)May 11, 2025 pm 06:01 PM
Is your Windows 11 PC running slower than usual? Opening apps and loading websites taking an eternity? You're not alone! This guide offers three simple, no-download solutions to boost your computer's performance without complex settings adjustments
 This Mini PC Doubles as a Not-So-Great TabletMay 11, 2025 am 06:01 AM
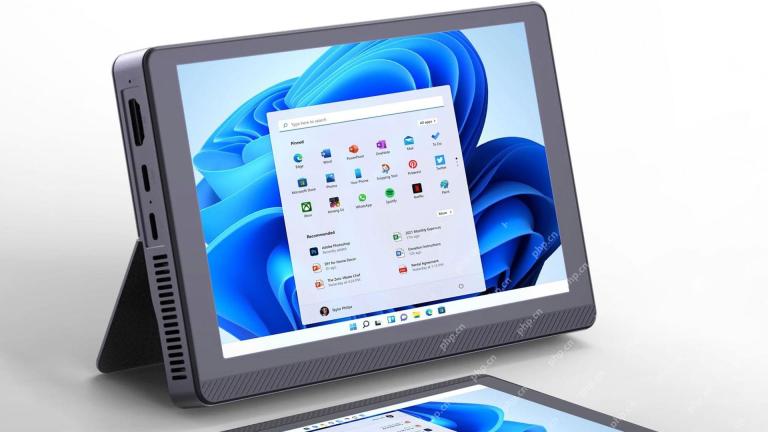
This mini PC, masquerading as a tablet, leaves much to be desired. The 7-inch, 1290x800 resolution screen is underwhelming. While some might use it for media consumption (similar to a 7-inch Amazon Fire Tablet), it's unlikely to be a primary choice


Hot AI Tools

Undresser.AI Undress
AI-powered app for creating realistic nude photos

AI Clothes Remover
Online AI tool for removing clothes from photos.

Undress AI Tool
Undress images for free

Clothoff.io
AI clothes remover

Video Face Swap
Swap faces in any video effortlessly with our completely free AI face swap tool!

Hot Article
Hot Tools

ZendStudio 13.5.1 Mac
Powerful PHP integrated development environment

SecLists
SecLists is the ultimate security tester's companion. It is a collection of various types of lists that are frequently used during security assessments, all in one place. SecLists helps make security testing more efficient and productive by conveniently providing all the lists a security tester might need. List types include usernames, passwords, URLs, fuzzing payloads, sensitive data patterns, web shells, and more. The tester can simply pull this repository onto a new test machine and he will have access to every type of list he needs.

Dreamweaver CS6
Visual web development tools

MinGW - Minimalist GNU for Windows
This project is in the process of being migrated to osdn.net/projects/mingw, you can continue to follow us there. MinGW: A native Windows port of the GNU Compiler Collection (GCC), freely distributable import libraries and header files for building native Windows applications; includes extensions to the MSVC runtime to support C99 functionality. All MinGW software can run on 64-bit Windows platforms.

Notepad++7.3.1
Easy-to-use and free code editor

