Home >System Tutorial >Windows Series >How to add printer port in win7? Introduction to how to add a printer port in win7
How to add printer port in win7? Introduction to how to add a printer port in win7
- 王林forward
- 2024-02-09 18:18:281037browse
php editor Youzi will introduce to you how to add a printer port in win7 system. Adding a printer port is a necessary operation when connecting a printer. It can help you set up the printer correctly and perform printing tasks. In the win7 system, the method of adding a printer port is relatively simple. You only need to follow certain steps to complete it. Next, we will introduce in detail the method of adding a printer port in win7 system, hoping to help you.
Introduction to the method of adding a printer port in win7:
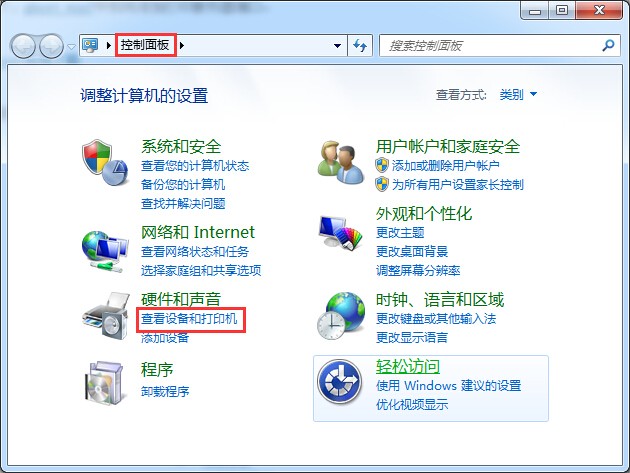
1. Click the Start menu to enter the control panel interface, and find "View Devices and Printers" in the control panel. After finding it, click to enter.

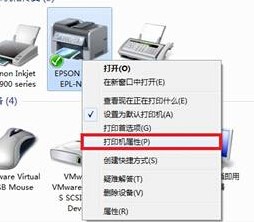
#2. Click to enter the device and printer interface. Here you can see which printer programs have been installed on your win7 system. Right-click the printer icon and select Printer Properties.

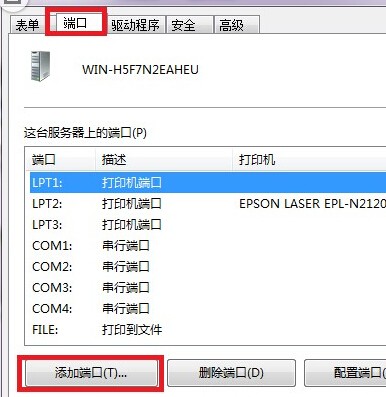
3. At this time, in the printer properties interface, we switch to the "Port" column, and then click "Add Port" below. The port type pops up. Select, here select Standard TCP/IP Port, and select the new port, followed by the next step.

4. Then you enter the printer port wizard page. At this time, you need to set the printer name or IP address. You must fill in the actual IP address according to the actual network conditions. When done, click Next to continue.

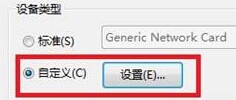
5. In the device type, we choose custom here, then click "Settings", select LPR in the protocol, and set the queue name to LP1 and Enable LPR byte counting and finally click OK.

The above is the detailed content of How to add printer port in win7? Introduction to how to add a printer port in win7. For more information, please follow other related articles on the PHP Chinese website!

