


php editor Apple brings you a detailed process and step guide on installing CentOS. CentOS is a Linux-based operating system widely used in server environments. This article will provide you with concise and concise guidance to help you easily complete the CentOS installation process. From preparing the installation media to setting up partitions and network connections, we will explain it step by step so that you can quickly get started with the CentOS operating system and enjoy excellent performance and stability. Whether you are a newbie or an experienced user, this guide will provide you with a valuable reference. Let’s get started!

Preparation
1. Download the CentOS installation image: Visit the CentOS official website and download the installation image suitable for your computer architecture.
2. Create installation media: Write the downloaded installation image to a USB flash drive or burn it to a CD so that you can start the computer from the media for installation.
Installation process
1. Start the computer: Insert the installation media into the computer, restart the computer and boot from the installation media.
2. Select the installation language: Select the language that suits you on the boot interface.
3. Select keyboard layout: Choose the keyboard layout that suits you.
4. Installation type selection: Select the installation type according to your needs. You can choose basic server installation, installation with graphical interface, etc.
5. Disk partitioning: Partition the computer's disk and allocate storage space for CentOS. You can choose to partition manually or use automatic partitioning tools.
6. Network configuration: Configure the computer’s network connection, including IP address, gateway, etc.
7. Set root password: Set a password for the root user to ensure password security.
8. Create user: Create a non-root user for daily use.
9. Start the installation: After confirming that the above settings are correct, start installing CentOS.
10. Installation completed: Wait for the installation to complete and then restart the computer.
First login and basic configuration
1. Login: Use the created username and password to log in to CentOS.
2. Update the system: Run the system update command to ensure the security and stability of the system.
3. Configure the network: If you need to configure the network in the graphical interface, you can use the network management tool for configuration.
4. Add software sources: Add additional software sources as needed to install more software.
Summary
Through the above steps, you have successfully installed CentOS. During use, you can perform further configuration and management according to your needs. I hope this article can be helpful to you. If so, If you have any questions, please feel free to consult relevant information or seek technical support.
Share with you: A little LINUX knowledge
In Linux system, you can use the command line tool "man" to view the help document of the command. Just enter "man" in the terminal, You can get the detailed description, parameters, usage examples and other information of the command. This is a very practical tool that can help you better understand and use Linux commands.
The above is the detailed content of Installing CentOS: Detailed Process and Step Guide. For more information, please follow other related articles on the PHP Chinese website!

 Mastering Text Manipulation With the Sed CommandMar 16, 2025 am 09:48 AM
The Linux command line interface provides a wealth of text processing tools, one of the most powerful tools is the sed command. sed is the abbreviation of Stream EDitor, a multi-functional tool that allows complex processing of text files and streams. What is Sed? sed is a non-interactive text editor that operates on pipeline inputs or text files. By providing directives, you can let it modify and process text in a file or stream. The most common use cases of sed include selecting text, replacing text, modifying original files, adding lines to text, or removing lines from text. It can be used from the command line in Bash and other command line shells. Sed command syntax sed
 Linux Kernel Source Code Surpasses 40 Million LinesMar 05, 2025 am 09:35 AM
Linux: The cornerstone of modern computing, from smartphones to supercomputers, can do everything. Over the years, the size and complexity of the Linux kernel has increased significantly. As of January 2025, the Linux kernel source code contains approximately 40 million lines of code! This is one of the greatest achievements in the history of open source, community-driven projects. This article will discuss the exponential growth of the number of lines in the Linux kernel source code, the reasons and how to check the current number of lines by yourself. Directory -Linux kernel history Count the number of lines of the Linux kernel source code only count C and header files Exponential trend of kernel growth Verify historical Linux kernel lines Summary Linux kernel history Since 1991 Linus Tor
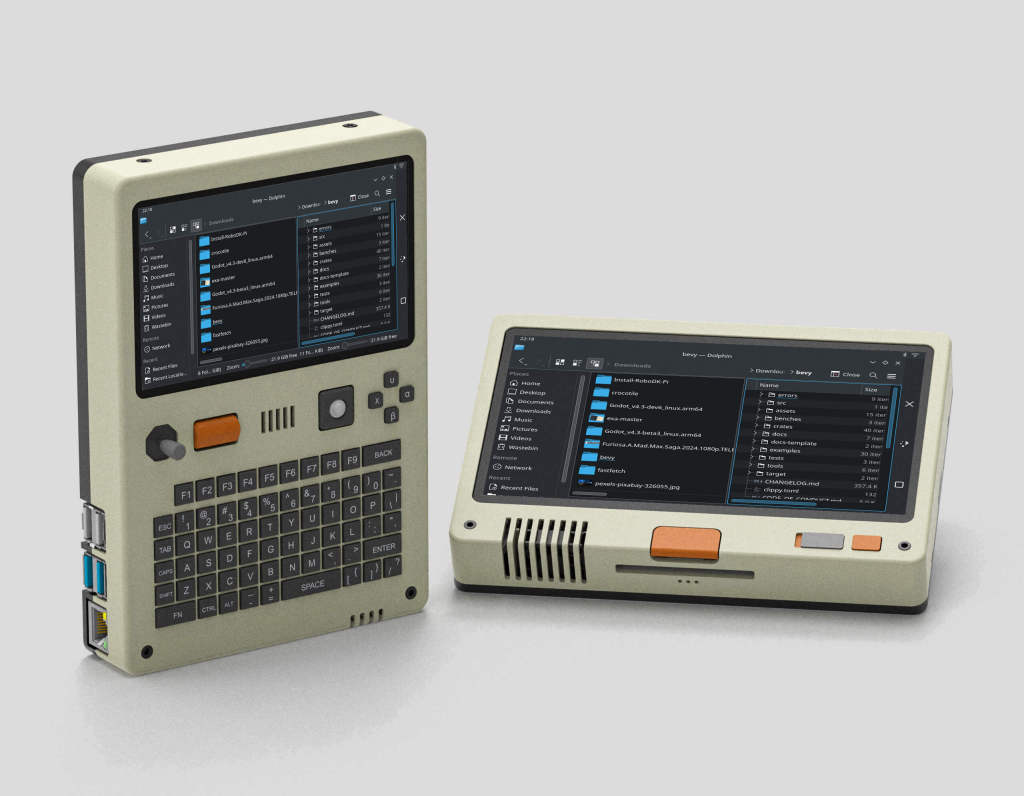 Pilet: A Modular, Portable Mini-Computer Powered by Raspberry PiMar 06, 2025 am 10:11 AM
Discover Pilet: A Retro-Futuristic, Open-Source Mini-Computer Looking for a mini-computer that blends classic style with cutting-edge technology? Meet Pilet, a modular, open-source marvel powered by the Raspberry Pi 5. Boasting a 7-hour battery life
 How To Count Files And Directories In Linux: A Beginner's GuideMar 19, 2025 am 10:48 AM
Efficiently Counting Files and Folders in Linux: A Comprehensive Guide Knowing how to quickly count files and directories in Linux is crucial for system administrators and anyone managing large datasets. This guide demonstrates using simple command-l
 The Secret Weapon to Supercharge Your Linux System With Liquorix KernelMar 08, 2025 pm 12:12 PM
Liquorix kernel: a powerful tool to improve Linux system performance Linux is known for its flexibility, security and high performance, becoming the operating system of choice for developers, system administrators, and advanced users. However, the universal Linux kernel is not always meeting the needs of users seeking maximum performance and responsiveness. This is where the Liquorix kernel comes into play—a performance-optimized alternative that promises to enhance your Linux system. This article will explore what the Liquorix kernel is, why you might want to use it, and how to install and configure it to get the most out of your system. Liquorix kernel detailed explanation Liquorix kernel is a precompiled Linux kernel designed for
 System76 Introduces Meerkat Mini PC: Big Power in a Tiny PackageMar 05, 2025 am 10:28 AM
The System76 Meerkat: A Mighty Mini PC Looking for a powerful yet space-saving computer? Meet the Meerkat mini PC from System76! This compact powerhouse is perfect for tidy desktops and demanding tasks. Table of Contents - Compact Design, Impressive
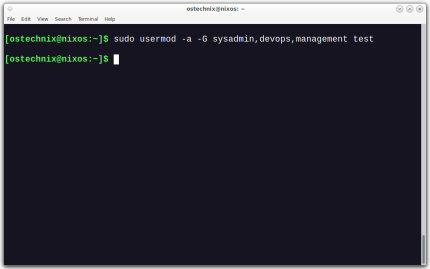 How To Add A User To Multiple Groups In LinuxMar 18, 2025 am 11:44 AM
Efficiently managing user accounts and group memberships is crucial for Linux/Unix system administration. This ensures proper resource and data access control. This tutorial details how to add a user to multiple groups in Linux and Unix systems. We
 Building Your Own Ubuntu Personal Cloud: A Step-by-Step Guide to Creating a Secure Data HavenMar 05, 2025 am 11:02 AM
In today's digital age, data is not just information, but also a part of our lives. From photos and documents to sensitive personal information, our data represents our memories, work and interests. Although cloud storage services are widely available, they are often accompanied by privacy concerns, subscription fees, and customization restrictions. That's what building a personal cloud on Ubuntu is about as a powerful alternative, which gives you complete control over your data and the flexibility to customize and scale as needed. This guide will guide you to set up a Ubuntu-based personal cloud, use Nextcloud as the primary application, and ensure your settings are secure and reliable. Why build a personal cloud on Ubuntu? Ubuntu is the most popular Linux


Hot AI Tools

Undresser.AI Undress
AI-powered app for creating realistic nude photos

AI Clothes Remover
Online AI tool for removing clothes from photos.

Undress AI Tool
Undress images for free

Clothoff.io
AI clothes remover

AI Hentai Generator
Generate AI Hentai for free.

Hot Article
Hot Tools

PhpStorm Mac version
The latest (2018.2.1) professional PHP integrated development tool

SublimeText3 Mac version
God-level code editing software (SublimeText3)

mPDF
mPDF is a PHP library that can generate PDF files from UTF-8 encoded HTML. The original author, Ian Back, wrote mPDF to output PDF files "on the fly" from his website and handle different languages. It is slower than original scripts like HTML2FPDF and produces larger files when using Unicode fonts, but supports CSS styles etc. and has a lot of enhancements. Supports almost all languages, including RTL (Arabic and Hebrew) and CJK (Chinese, Japanese and Korean). Supports nested block-level elements (such as P, DIV),

Notepad++7.3.1
Easy-to-use and free code editor

Safe Exam Browser
Safe Exam Browser is a secure browser environment for taking online exams securely. This software turns any computer into a secure workstation. It controls access to any utility and prevents students from using unauthorized resources.

