

 Computer TutorialsTroubleshootingTutorial on how to set up USB flash drive boot in Colorful motherboard BIOS?
Tutorial on how to set up USB flash drive boot in Colorful motherboard BIOS?

php editor Banana brings you a concise tutorial on setting up the BIOS of Colorful motherboard for USB boot. When the computer starts, we often need to use a USB flash drive to install or repair the system, and setting up the USB flash drive to start is a necessary step. By entering the motherboard's BIOS interface, we can easily set up USB boot settings. This tutorial will introduce in detail how to enter the BIOS interface and how to set up the U disk boot on the Colorful motherboard. Follow the step-by-step tutorial to set up, and you will be able to successfully use the USB flash drive to perform various operations, solve computer problems or perform system installation. let's start!

Tutorial on how to set up the U disk boot in Colorful motherboard BIOS?
1. First, in the computer startup interface, press the F11 button to enter the bios system.
2. Then move the cursor to the boot option in the interface.
3. Then find the Hard Drive BBS Priorities option inside and press Enter to enter.
4. Then select the Boot Option #1 option and press Enter.
5. Then select the ADATA USB Flash Drive 1100 option in the pop-up window and press Enter to confirm.
6. Finally, press the f10 key and press Enter to confirm. Then you can save the settings and restart.
How to set the hard disk boot in Colorful motherboard bios?
Colorful motherboard bios
Steps to set up hard drive startup:
1. Shut down your computer first, then press this and press at the same time.
2. Choose now, then choose.
3. Find the boot option #1 and click here on the hard drive.
4. Select your U disk on the menu. Because the USB hard disk inserted here is the USB hard disk, select this one. Choose the name of your USB flash drive.
5. Press at this time and select Yes on the menu. Set it up when booting from the USB disk
How to enter the USB boot settings for the Colorful motherboard?
Set like this:
1. First, in the computer startup interface, press the F11 button to enter the bios system.
2. Then move the cursor to the boot option in the interface.
3. Then find the Hard Drive BBS Priorities option inside and press Enter to enter.
4. Then select the Boot Option #1 option and press Enter.
5. Then select the ADATA USB Flash Drive 1100 option in the pop-up window and press Enter to confirm.
6. Finally, press the f10 key and press Enter to confirm. Then you can save the settings and restart.
How to set startup items for Colorful h510m?
1. You can set startup items. 2. Colorful h510m is a motherboard. You can set the startup items by entering the BIOS interface. Press the corresponding key (usually the Del key or F2 key) during startup to enter the BIOS interface, then find the startup options or boot options, select the startup items that need to be set, such as hard disk, optical drive or USB device, etc., and set them as preferred Startup items. In this way, when booting, the system will first try to boot from this device. 3. In addition, you can also set the startup sequence, which is the priority of the system among multiple startup items. By adjusting the boot order, you can decide which device the system attempts to boot first. This allows you to flexibly select startup items as needed. When setting startup items, you need to pay attention to selecting the correct device and making sure the device is properly connected. If you have multiple hard drives or storage devices, you can also set multiple startup items in case you need them. At the same time, different motherboard brands and models may have slightly different settings. You can refer to the motherboard's user manual or official website for more detailed operating instructions.
How to enter BIOS settings on Colorful motherboard?
1.
After the computer is turned on, press the Del hotkey quickly and intermittently. There are usually English prompts on the left and right bottom;
2.
Keyboard direction keys Move right to the "Boot" menu;
3.
In the Boot interface, move the arrow keys down to "Boot Option #1", and then press enter;
4.
Then select the U disk option and press Enter;
5.
Then press the F10 key on the keyboard to save and exit. A pop-up prompt will appear to select " YES", and then you can enter the USB disk PE system
How to set up the USB disk installation system of Colorful motherboard?
1. First, insert the USB disk that has been created with the U boot software into the USB interface of the computer, restart the computer, and after the startup screen appears, press the "del" key continuously to enter the BIOS setup main interface.
2. Then find and confirm in order: "Integrated peripherals" - "Onboard device" - "USB Configuration" - "USB2.0 Controller" (USB2.0 controller), change "Disabled" to "Enabled", then press the "F10" key to save and exit and automatically restart the computer.
3. When the computer restarts and enters the startup screen, press the Esc key to enter the first boot sequence selection menu. At this time, you will find that the only two options that you can choose from are "hard disk" and "optical drive". There are three, and there is an option for "USB" mobile devices.
4. Press the direction keys to move the cursor to USB, select it and press the Enter key. The computer will automatically restart and then enter the U boot U disk boot disk main menu interface. Then you can proceed The system is installed on the USB disk.
How to set startup items for Colorful b760m?
To set the startup items of Colorful b760m, you first need to enter the BIOS setting interface. After booting, press the Del or F2 key to enter the BIOS, then find the Boot tab, select Boot Option #1, and click the Enter key.
In the pop-up menu, select the device that needs to be set as the startup item, such as a hard disk or a USB flash drive, and click the Enter key again to confirm the selection.
Next, press the F10 key to save and exit the BIOS setup interface, and then restart the computer. If you need to change the startup items, you can repeat the above steps to set them.
Colorful computer bios startup item settings?
Different computer BIOS settings may be different. The following are generally the steps to set the BIOS startup items on Colorful computers:
1. Restart the computer and press the Del key or F2 key to enter the BIOS setup interface. If you're not sure which key to press, pay attention to the on-screen prompts when turning on the phone.
2. In the BIOS setup interface, use the arrow keys to select the "Boot" tab.
3. In the "Boot" tab, find "Boot Option Priorities" or "Boot Order" or similar options.
4. Press the Enter key to enter the "Boot Option Priorities" or "Boot Order" menu.
5. In the "Boot Option Priorities" or "Boot Order" menu, use the arrow keys to select the device you want to set as the first boot item, such as a hard disk, optical drive, USB device, etc.
6. Press Enter to select the device of your choice and move it to the top of the list to set as the first startup item.
7. If you need to set other startup items, please repeat steps 5 and 6 until you have set all the required startup items.
8. After completing the settings, press the F10 key to save and exit the BIOS setting interface.
9. The computer will restart and start in the order of the startup items you set.
Please note that the above steps are for reference only, and the specific steps may vary depending on the computer model and BIOS version. If you're not sure how to set up startup options, refer to your computer's user manual or contact your computer manufacturer's technical support.
How to install Colorful BIOS system using USB disk?
First of all, you need to make some settings on your computer to ensure that it can boot from the USB flash drive.
Then, you need to set the boot device in the Colorful BIOS system to the USB flash drive.
Next, insert the prepared U disk into the computer and restart the computer.
During the startup process, press the corresponding shortcut key to enter the BIOS setting interface and select the U disk as the boot device.
Then follow the instructions of the system installer to complete the installation process.
Finally, restart the computer to ensure that the system has been successfully installed. After completing these steps, you can successfully install the Colorful BIOS system using a USB flash drive.
The above is the detailed content of Tutorial on how to set up USB flash drive boot in Colorful motherboard BIOS?. For more information, please follow other related articles on the PHP Chinese website!

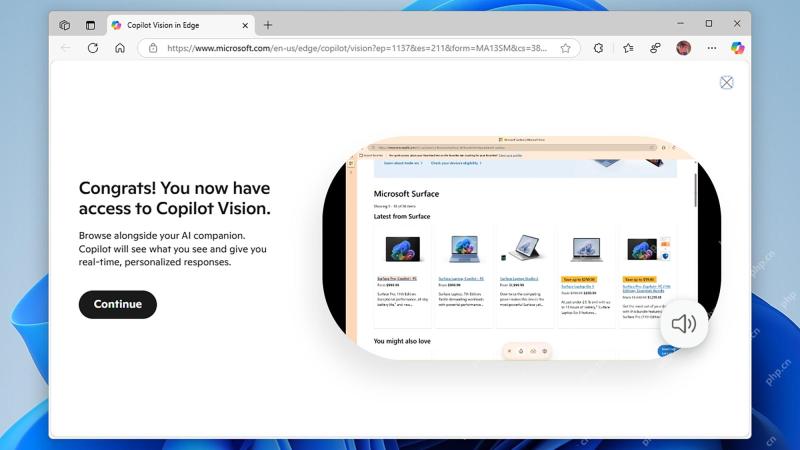 How to use Copilot Vision for free in Microsoft EdgeMay 09, 2025 am 10:32 AM
Staying current with all the new AI tools is a challenge. Many might even overlook readily available AI features. For instance, Copilot Vision is now free for all Microsoft Edge users – a fact easily missed if you don't regularly use Edge or haven't
 Discover Survival Machine Save File Location & Protect FilesMay 08, 2025 pm 08:10 PM
This guide shows you where to find and how to protect your Survival Machine game save files. Knowing the save file location is crucial for managing your game, troubleshooting issues, or adjusting settings. Finding Your Survival Machine Save Files Fo
 Effective Ways to Back up and Restore Windows CredentialsMay 08, 2025 pm 08:04 PM
This guide explains how to back up and restore Windows credentials, a crucial system mechanism for secure authentication and credential storage. We'll cover what credentials are, how to safeguard them, and recovery methods. What Are Windows Credenti
 Top 5 Proven Fixes for Sunderfolk out of Video MemoryMay 08, 2025 pm 08:02 PM
Solving Sunderfolk's Video Memory Issues: A Comprehensive Guide Sunderfolk, the engaging turn-based tactical RPG, can sometimes encounter video memory limitations. This guide provides solutions to resolve "Sunderfolk out of video memory" er
 How to fix backup error 0x81000019 in Windows?May 08, 2025 pm 08:00 PM
Windows has a built-in backup program that allows people to create system images and restore points. During this, however, some people find themselves facing th
 Among Us 3D Crashing/Not Launching: Check This Fresh GuideMay 08, 2025 pm 06:01 PM
Among Us 3D PC version failed or crashed? MiniTool provides you with practical solutions! Many players encounter startup failure, crash, black screen or KWS issues when playing Among Us 3D PC version. This article will provide several ways to help you solve these problems and improve game performance. Quick navigation: How to fix the failure or crash of the Among Us 3D PC version Summarize Among Us 3D is a 3D version of the popular multiplayer Among Us, which combines elements of teamwork and betrayal. Many players reported crashes, black screens or stuck in the initial interface when the game started. Please follow the steps below to try to resolve the issue one by one. How to fix Among
 NVIDIA OpenGL Driver Error Code 3 (Subcode 2/7), Quick Fix!May 07, 2025 pm 08:01 PM
NVIDIA OpenGL driver error code 3: Game operation obstacles and solutions On Windows 11/10 systems, NVIDIA OpenGL driver error code 3 may cause the game to fail to run. This article will provide a variety of ways to resolve error code 3 (subcode 2 or 7). OpenGL is an industry-standard graphical application programming interface (API) for rendering 3D and 2D graphics. NVIDIA supports OpenGL for its GPU to perform at its best. However, NVIDIA OpenGL driver error code 3 interrupts all operations, causing the game and video/image editing software to be unusable. The error message may be as follows: NVI
 How to fix Windows not booting after activating Secure Boot?May 07, 2025 pm 08:00 PM
Secure Boot is a built-in security function of newer UEFI firmware that helps make sure only trusted, digitally signed operating systems and bootloaders can boo


Hot AI Tools

Undresser.AI Undress
AI-powered app for creating realistic nude photos

AI Clothes Remover
Online AI tool for removing clothes from photos.

Undress AI Tool
Undress images for free

Clothoff.io
AI clothes remover

Video Face Swap
Swap faces in any video effortlessly with our completely free AI face swap tool!

Hot Article
Hot Tools

Safe Exam Browser
Safe Exam Browser is a secure browser environment for taking online exams securely. This software turns any computer into a secure workstation. It controls access to any utility and prevents students from using unauthorized resources.

SublimeText3 Linux new version
SublimeText3 Linux latest version

DVWA
Damn Vulnerable Web App (DVWA) is a PHP/MySQL web application that is very vulnerable. Its main goals are to be an aid for security professionals to test their skills and tools in a legal environment, to help web developers better understand the process of securing web applications, and to help teachers/students teach/learn in a classroom environment Web application security. The goal of DVWA is to practice some of the most common web vulnerabilities through a simple and straightforward interface, with varying degrees of difficulty. Please note that this software

SublimeText3 English version
Recommended: Win version, supports code prompts!

Dreamweaver Mac version
Visual web development tools

