
Home >Computer Tutorials >Computer Knowledge >How to start the USB disk system installation steps on HP notebook
How to start the USB disk system installation steps on HP notebook

- WBOYWBOYWBOYWBOYWBOYWBOYWBOYWBOYWBOYWBOYWBOYWBOYWBforward
- 2024-02-05 17:48:301561browse
php editor Xinyi brings you the steps on how to start the USB disk system installation on HP laptops. In this article, we will introduce in detail how to install the system through a USB flash drive to make your HP notebook look brand new. Whether you are a novice or an experienced user, you can follow these simple steps to complete the installation and get your HP notebook running normally again. Next, let us find out together!

HP ProDesk 400 G4 MT
I met an HP ProDesk 400 G4 MT two days ago The office computer system is down. I had difficulty installing the system due to issues with my mouse. To my surprise, I couldn't find any useful information when I searched online. Therefore, I decided to share this problem and its solution.
How to change the Bios settings of HP ProDesk 400 G4 MT to boot from USB disk?
First of all, for HP brand machines, you usually press the F10 key to enter the BIOS. Therefore, press F10 after booting to enter the BIOS interface. After entering the BIOS, you'll notice that it's completely different than the old computer BIOS versions we've seen before, but don't worry. Despite the changes, many of the settings are still quickly understandable. To see it more clearly, we first need to set the language to Chinese.
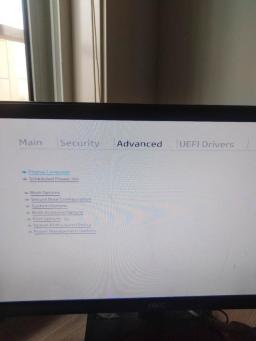
Change language
Second, as shown above, use the mouse to directly click on the advanced column, we see The first line below is the display language. Select it and the image below will appear. Then select Simplified Chinese.

Change Chinese settings
3. After the changes, we can see the familiar Chinese interface. Mandarin is easier to understand! Ha ha! It turns out that the main menu "advanced" in HP computers means advanced in Chinese.
Fourth, select the fourth Secure Boot Configuration in the advanced menu, which is the secure boot configuration, and you will enter the interface as shown below. They are English interface and Chinese interface.
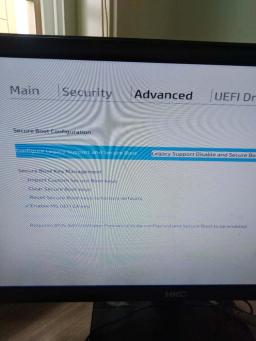
English interface
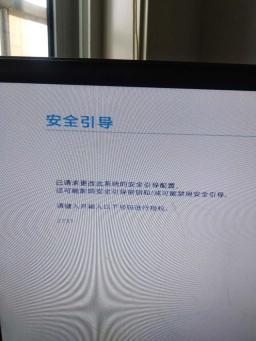
 ##Chinese interface
 6, return to advanced, select the third boot options and press Enter to set the startup sequence. As shown below, the Chinese and English interface.
 English interface

Seven, because of the above steps, the old boot method can be allowed at this time. At this time, check the box in front of the old boot sequence. If you have it, there is no need to move it. Finally, press F10 to save. At this time, our PE USB disk tool system can be fully started.
Summary:
In general, the BIOS of HP ProDesk 400 G4 MT is not too difficult. But now that the computer industry is in decline, many IT workers working at the bottom will have less and less exposure to new computers and less experience due to problems such as stocking and order volume. So sometimes it’s difficult to get a new computer. I still hope you can share more.
The above is the detailed content of How to start the USB disk system installation steps on HP notebook. For more information, please follow other related articles on the PHP Chinese website!