Home >Computer Tutorials >Computer Knowledge >How to solve the noise after connecting the win11 microphone? How to eliminate microphone noise in win11
How to solve the noise after connecting the win11 microphone? How to eliminate microphone noise in win11
- WBOYWBOYWBOYWBOYWBOYWBOYWBOYWBOYWBOYWBOYWBOYWBOYWBforward
- 2024-02-03 16:09:111876browse
When using Windows 11 system, some users may encounter the problem of noise after the microphone is connected. This situation not only affects the quality of voice calls, but also causes inconvenience to users. In order to solve this problem, PHP editor Xinyi has compiled some solutions for everyone, hoping to help users who encounter this problem. Whether through hardware settings or software adjustments, there are some operations you can try to eliminate microphone noise. Next, let’s take a look at the specific solutions.
win11 microphone noise elimination method
Method 1:
1. Right-click the sound icon in the lower right corner and open the sound settings.
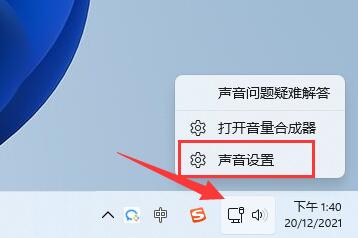
#2. Under the advanced options, open more sound settings.

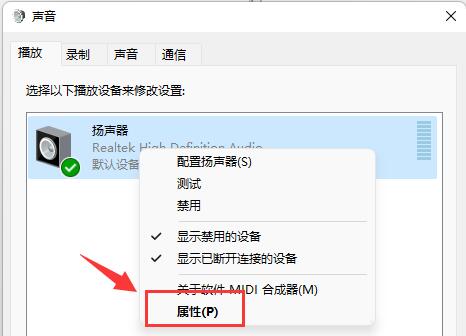
3. Right-click the speaker and open properties.
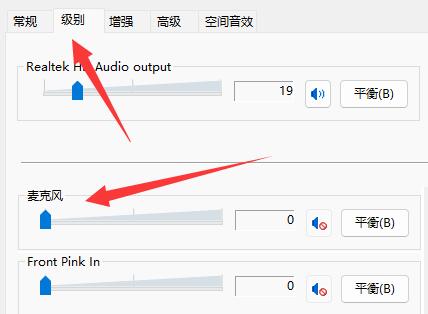
#4. Enter the level option and turn off the microphone sound.
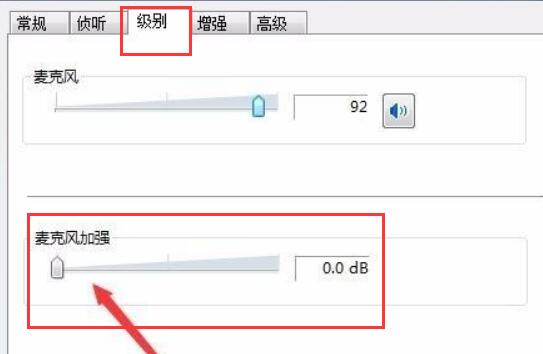
#5. Enter the recording options, right-click the microphone and open properties.
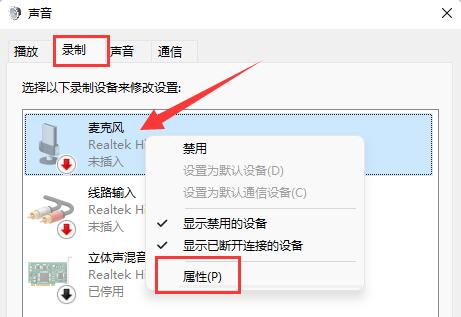
#6. Enter the level settings and change the microphone enhancement below to 0.
Method 2:
1. Some microphones have separate lines.
2. If your connection cable is not plugged in properly, there will be noise, just check it.
The above is the detailed content of How to solve the noise after connecting the win11 microphone? How to eliminate microphone noise in win11. For more information, please follow other related articles on the PHP Chinese website!

