


How to enable amd MSI in vt?
To turn on the VT function of AMD MSI motherboard, you can follow the steps below: Enter BIOS settings: Press the corresponding button (usually Del, F2 or F12) to enter BIOS settings when booting interface. The specific buttons may vary depending on the motherboard model. Please refer to the motherboard manual or check the on-screen prompts when booting. Find the Virtualization option: In the BIOS setup screen, use the arrow keys to navigate to Advanced or CPU Configuration. Enable VT: In the Virtualization or SVM (AMD-V) options, set it to Enabled or Enabled with IOMMU. Some motherboards may call this AMD-V, Intel Virtualization Technology (Intel VT), or similar options. Save settings and exit: After completing settings, press the F10 key to save changes and exit the BIOS setup interface. The system will restart. Confirm that VT is enabled: In the operating system, you can confirm that VT is successfully enabled by: In the Windows operating system, open Task Manager, switch to the Performance tab, and view the Virtualization section. If "Yes" appears next to "Enabled," VT is enabled. In the Linux operating system, you can run the following command to confirm whether VT is enabled: grep -q AMD-V /proc/cpuinfo If the command returns "1", it means VT is enabled. Please note that the above steps may vary depending on different motherboard models and BIOS versions. If you encounter problems during operation, please consult the motherboard manual or contact the motherboard manufacturer's technical support for accurate guidance.
MSI b450 mortar max bios open vt?
To enable vt on MSI motherboard, follow the following steps:
1. First, restart the computer, then press del or F2 continuously to enter the bios settings.
2. Then find the "settings" option and enter the "adanced" option.
3. Find the "Integrated Graphics Configuration" option and enter.
4. Select the "Virtu Technology" option and change "Disabled" to "Enabled" to enable it.
5. Finally, click F10 to save.
How to enable vt on MSI b660 motherboard?
The method to enable vt on MSI b660 motherboard is as follows
1. First, restart the computer, then press del or F2 continuously to enter the bios settings.
2. Then find the "settings" option and enter the "adanced" option.
3. Find the "Integrated Graphics Configuration" option and enter.
4. Select the "Virtu Technology" option and change "Disabled" to "Enabled" to enable it.
5. Finally, click F10 to save.
How to enable vt on MSI motherboard?
To enable vt on MSI motherboard, follow the following steps:
1. First, restart the computer, then press del or F2 continuously to enter the bios settings.
2. Then find the "settings" option and enter the "adanced" option.
3. Find the "Integrated Graphics Configuration" option and enter.
4. Select the "Virtu Technology" option and change "Disabled" to "Enabled" to enable it.
5. Finally, click F10 to save.
How to set the bios vt on MSI Mortar 450?
To enable vt on MSI motherboard, follow the following steps:
1. First, restart the computer, then press del or F2 continuously to enter the bios settings.
2. Then find the "settings" option and enter the "adanced" option.
3. Find the "Integrated Graphics Configuration" option and enter.
4. Select the "Virtu Technology" option and change "Disabled" to "Enabled" to enable it.
5. Finally, click F10 to save.
How to turn on vt on MSI computer?
1. After entering the BIOS page, find the "OC (or overclocking)" - "CPU Features" - "SVM Mode (or Intel Virtualization Technology)" option and change "Disabled" "Change to "Enabled (Allow/Enable)";
2. Then press the save key F10 to save and exit (Save & Exit), and VT will be opened successfully
The above is the detailed content of How to enable amd MSI in vt?. For more information, please follow other related articles on the PHP Chinese website!

 R.E.P.O. Save File Location: Where Is It & How to Protect It?Mar 06, 2025 pm 10:41 PM
Are you hooked on R.E.P.O.? Curious where your game progress is stored? This guide reveals the location of your R.E.P.O. save files and shows you how to protect them. Losing your game progress is frustrating, so let's ensure your hard work is safe
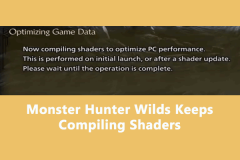 Easily Fixed - Monster Hunter Wilds Keeps Compiling ShadersMar 04, 2025 pm 08:05 PM
Monster Hunter Wilds Shader Compilation Fix: A Comprehensive Guide Many players are encountering an issue where Monster Hunter Wilds gets stuck endlessly compiling shaders. This guide provides effective solutions to resolve this frustrating problem a
 How to fix Microsoft Teams error 9hehw in Windows?Mar 07, 2025 am 12:00 AM
Understanding Microsoft Teams error tag 9hehw on Windows Microsoft Teams is a crucial communication and collaboration application by which users are able to joi
 Spotlight on KB5053606 Not Installing for Windows 10, Exact StepsMar 13, 2025 pm 08:02 PM
Windows 10 KB5053606 Update installation failed? This guide provides effective solutions! Many users are having problems trying to install the Windows 10 KB5053606 update released on Tuesday of Microsoft's March 2025 patch, such as SSH connection interruption, Dwm.exe unresponsiveness, or input method editor (IME) issues. Updates may be stuck during downloading or installation, or error codes may appear, such as 0x800f0922, 0xd000034, 0x80070437 and 0x80072efe. KB5053606 installation failure is usually caused by a variety of reasons, including Windows update component failure, system file corruption, and disk
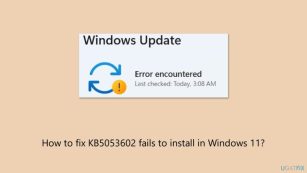 How to fix KB5053602 fails to install in Windows 11?Mar 13, 2025 am 10:00 AM
The KB5053602 patch, released on March 11, 2025, targets Windows 11 editions 22H2 and 23H2, elevating the OS to OS Builds 22621.5039 and 22631.5039, respectivel
 All Fixes for Monster Hunter Wilds Fatal D3D Error on PCMar 05, 2025 pm 06:01 PM
Monster Hunter Wilds players are encountering frustrating crashes due to Fatal D3D or RE Engine Aborted errors. This guide provides solutions to resolve these issues and get you back to hunting. Understanding the Problem Monster Hunter Wilds uses Cap
 R.E.P.O. Crashing & Freezing on PC? Result-Driven FixesMar 07, 2025 pm 08:02 PM
Troubleshooting R.E.P.O. Game Crashes: A Comprehensive Guide Experiencing frustrating game crashes, especially in a team-based game like R.E.P.O., can be incredibly disruptive. This guide offers several solutions to resolve R.E.P.O. crashes, freezes
 Monster Hunter Wilds Audio Not Working Fix Guide, Essential TipsMar 04, 2025 pm 08:17 PM
Troubleshooting Monster Hunter World's Audio Issues on PC Experiencing audio problems in Monster Hunter World (MHW) on your PC can significantly impact gameplay. This guide provides several solutions to fix MHW audio issues, ranging from simple adjus


Hot AI Tools

Undresser.AI Undress
AI-powered app for creating realistic nude photos

AI Clothes Remover
Online AI tool for removing clothes from photos.

Undress AI Tool
Undress images for free

Clothoff.io
AI clothes remover

AI Hentai Generator
Generate AI Hentai for free.

Hot Article
Hot Tools

SublimeText3 Mac version
God-level code editing software (SublimeText3)

SAP NetWeaver Server Adapter for Eclipse
Integrate Eclipse with SAP NetWeaver application server.

Atom editor mac version download
The most popular open source editor

mPDF
mPDF is a PHP library that can generate PDF files from UTF-8 encoded HTML. The original author, Ian Back, wrote mPDF to output PDF files "on the fly" from his website and handle different languages. It is slower than original scripts like HTML2FPDF and produces larger files when using Unicode fonts, but supports CSS styles etc. and has a lot of enhancements. Supports almost all languages, including RTL (Arabic and Hebrew) and CJK (Chinese, Japanese and Korean). Supports nested block-level elements (such as P, DIV),

SecLists
SecLists is the ultimate security tester's companion. It is a collection of various types of lists that are frequently used during security assessments, all in one place. SecLists helps make security testing more efficient and productive by conveniently providing all the lists a security tester might need. List types include usernames, passwords, URLs, fuzzing payloads, sensitive data patterns, web shells, and more. The tester can simply pull this repository onto a new test machine and he will have access to every type of list he needs.

