


How to set virtual memory in Win11 system? Virtual memory is an important part of a computer system. It can provide additional memory space for the system to improve system operating efficiency. In the Win11 system, the virtual memory settings can be adjusted according to actual needs to ensure the stability and smooth operation of the system. In this article, PHP editor Xiaoxin will introduce in detail the methods and steps on how to set up virtual memory in the Win11 system to help users obtain better performance and experience when using the Win11 system.
Virtual memory is a technology in computer systems that can use hard disk space as an extension of memory to provide more available memory space. In Win11 system, setting virtual memory can help improve system performance and stability. This article will introduce how to set up virtual memory in Win11 system.
Step 1: Open system properties
First, right-click the “This PC” icon and select “Properties”. In the pop-up window, click "Advanced system settings" on the left.
Step 2: Open virtual memory settings
In the pop-up "System Properties" window, click the "Settings" button in the "Performance" area under the "Advanced" tab. Next, in the pop-up "Performance Options" window, click the "Change" button in the "Virtual Memory" area under the "Advanced" tab.
Step 3: Set up virtual memory
In the pop-up "Virtual Memory" window, first uncheck "Automatically manage paging file size for all drives". Then, select the drive where you want to set up virtual memory, usually the C drive where the system is located. Next, click on the “Custom size” option.
Step 4: Set the initial size and maximum size
In the "Custom size" option, you can set the initial size and maximum size of the virtual memory. Initial size is the starting size of virtual memory, and maximum size is the maximum capacity of virtual memory. According to your actual needs, you can set the appropriate value according to the system recommendations or yourself. Normally, the initial size and maximum size should be set to the same value.
Step 5: Apply Settings
After setting the initial size and maximum size, click the "Set" button, and then click the "OK" button. Next, you will be prompted to restart your computer to apply the new virtual memory settings. Click the "OK" button and then restart your computer.
Through the above steps, you can set virtual memory in Win11 system. Setting up virtual memory can improve your system's performance and stability, especially when running large programs or multitasking. Depending on your actual needs, you can set the appropriate initial size and maximum size according to system recommendations or by yourself. Remember to restart your computer after setting up virtual memory to apply the new settings.
The above is the detailed content of Virtual memory setting steps for Win11 system. For more information, please follow other related articles on the PHP Chinese website!

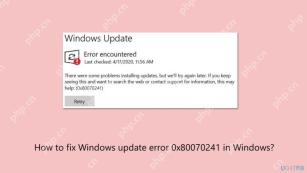 How to fix Windows update error 0x80070241 in Windows?Apr 16, 2025 am 12:00 AM
Windows Update failures do occur and can be due to a variety of reasons at the update or upgrade stage. Such failures can be annoying if they result in system u
 How to fix KB5055612 fails to install in Windows 10?Apr 15, 2025 pm 10:00 PM
Windows updates are a critical part of keeping the operating system stable, secure, and compatible with new software or hardware. They are issued on a regular b
 Game_Ship.exe Error in COD Warzone & Black Ops 6, Proven TipsApr 15, 2025 pm 08:06 PM
The Call of Duty series (including Black Ops 6, Warzone and Modern Warfare 3) may crash with game_ship.exe errors during the game. This article will guide you step by step how to resolve this crash problem with some methods. Black Ops 6, Warzone and Modern Warfare 3 continue to crash: game_ship.exe error It is reported that when playing these games, you often encounter game_ship.exe errors. You can find many complaints about this crash problem on Steam or Reddit. On your computer screen, the errors displayed may vary from game to game, for example: DirectX Error: DirectX
 How to Save Pictures on Google Drive? Follw the Guide Below!Apr 15, 2025 pm 08:04 PM
Google Drive: Your Cloud Photo Storage Solution Google Drive offers secure and reliable cloud storage for your valuable files, including photos, videos, and documents. This guide details several ways to upload your photos to Google Drive, covering bo
 Expert Guide to Finding Blue Prince Save File Location EasilyApr 15, 2025 pm 08:01 PM
Protecting Your Blue Prince Progress: Finding and Backing Up Save Files Knowing the location of your Blue Prince save files is crucial for protecting your game progress. This guide explains how to locate these files and create backups to prevent dat
 How to fix RESULT_CODE_MISSING_DATA error in Chrome and Edge?Apr 15, 2025 pm 08:00 PM
Google Chrome and Microsoft Edge, both founded on the Chromium engine, are leading browsers in Windows 11 because of their performance and integration of online
 Wanderstop Stuck on Loading Screen/Not Loading: Try 6 SolutionsApr 15, 2025 pm 06:02 PM
Troubleshooting Wanderstop Loading Issues: Effective Solutions Wanderstop, like many games, can experience issues such as freezing on the loading screen, crashing, or low FPS. This guide provides several solutions to resolve the loading screen proble
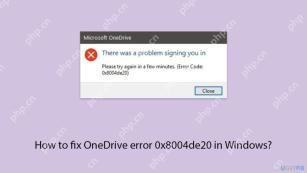 How to fix OneDrive error 0x8004de20 in Windows?Apr 15, 2025 am 12:00 AM
Microsoft OneDrive is the default cloud storage for Windows users, depending on it for file syncing between devices and keeping important documents saved in the


Hot AI Tools

Undresser.AI Undress
AI-powered app for creating realistic nude photos

AI Clothes Remover
Online AI tool for removing clothes from photos.

Undress AI Tool
Undress images for free

Clothoff.io
AI clothes remover

AI Hentai Generator
Generate AI Hentai for free.

Hot Article
Hot Tools

SAP NetWeaver Server Adapter for Eclipse
Integrate Eclipse with SAP NetWeaver application server.

Dreamweaver CS6
Visual web development tools

Zend Studio 13.0.1
Powerful PHP integrated development environment

EditPlus Chinese cracked version
Small size, syntax highlighting, does not support code prompt function

MinGW - Minimalist GNU for Windows
This project is in the process of being migrated to osdn.net/projects/mingw, you can continue to follow us there. MinGW: A native Windows port of the GNU Compiler Collection (GCC), freely distributable import libraries and header files for building native Windows applications; includes extensions to the MSVC runtime to support C99 functionality. All MinGW software can run on 64-bit Windows platforms.

