


php editor Xiaoxin will introduce to you how to solve the problem of the WiFi icon disappearing and being unable to connect to the network in Win11 system. After upgrading the Win11 system, some users may encounter the problem of the WiFi icon disappearing, resulting in the inability to connect to the network normally. In response to this problem, we have compiled some solutions, hoping to help users who encounter similar problems. Next, we will introduce these solutions one by one to restore normal WiFi connection to your Win11 system.
Three solutions to the problem of win11wifi icon disappearing and unable to connect to the Internet
Method 1:
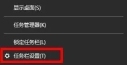
1. First, we right-click the taskbar below and select Taskbar Settings .
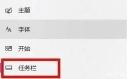
#2. Then click the taskbar on the left.
#3. Then select those icons to display on the taskbar.

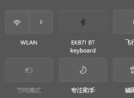
4. Finally, we just open the network.

Method 2:
1. Click the Start menu and search for services.
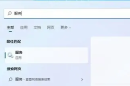
2. Then find WLAN AutoConfig and start it.

#3. Finally, you can see the wifi icon.
The above is the detailed content of Win11 cannot connect to WiFi, how to solve it?. For more information, please follow other related articles on the PHP Chinese website!

![[Fixed] You Need to Authenticate Microsoft Services in Minecraft? - MiniTool](https://img.php.cn/upload/article/001/242/473/174568627523426.png?x-oss-process=image/resize,p_40) [Fixed] You Need to Authenticate Microsoft Services in Minecraft? - MiniToolApr 27, 2025 am 12:51 AM
[Fixed] You Need to Authenticate Microsoft Services in Minecraft? - MiniToolApr 27, 2025 am 12:51 AMIn this post, php.cn provides several effective solutions to the “you need to authenticate to Microsoft services” issue in Minecraft on the PC. If you get stuck in this issue, you should pay attention to this post.
 Top 4 Fixes for High Power Usage in Task ManagerApr 27, 2025 am 12:49 AM
In Task Manager, you can view how much power the processes on your computer use. What if you receive high power usage in Task Manager constantly? In this post from php.cn Website, we will explore how to address this issue easily and effectively.
 2 Windows Folders in C Drive: How to Deal with Them?Apr 27, 2025 am 12:48 AM
The Windows folder contains the Windows operating system and is a crucial folder in Windows computers. Sometimes, you may see 2 Windows folders in the C drive. How to delete one of them? This post from php.cn tells you how to do that.
 Top 4 Halo Infinite Trackers to Track KD, Stats, Ranks, and More! - MiniToolApr 27, 2025 am 12:47 AM
Many people are looking for a feasible Halo Infinite tracker. In this post, php.cn introduces several available Halo Infinite trackers to help you track the Halo Infinite KD, ranks, stats, etc. Now, keep on your reading.
 10 Best Google Sheets Add-ons You Must Have - MiniToolApr 27, 2025 am 12:46 AM
Have you ever heard of Google Sheets add-ons? Do you have any idea how to install them in your Google Sheets? Do you want to get the best and the free Google Sheets add-ons? This article on php.cn focuses on these questions and provides you with seve
 Enable/Disable Ctrl Alt Delete Secure Sign-In on Windows 11 - MiniToolApr 27, 2025 am 12:45 AM
Secure Sign-In is a handy way to keep your PC safe, but if you don't want it around, here's how to disable it for Windows 11. This post from php.cn provides 3 ways for you to enable or disable Ctrl Alt Delete secure sign-in on Windows 11.
 How to Fix Word Dictation Not Working Issue in Windows 10 - MiniToolApr 27, 2025 am 12:44 AM
Have you ever heard of Microsoft Word dictation? What if Word dictation not working? This post from php.cn shows you the basic information about Word dictation and some feasible ways to fix the “Word dictation not working” issue.
 What Is Atlas VPN? How to Free Download Atlas VPN for Use? - MiniToolApr 27, 2025 am 12:43 AM
What is Atlas VPN used for? Is Atlas VPN safe? Can you use Atlas VPN for free? How to download Atlas VPN & install it on your device for use? Refer to this post from php.cn and you can find details about this VPN service and Atlas VPN download fo


Hot AI Tools

Undresser.AI Undress
AI-powered app for creating realistic nude photos

AI Clothes Remover
Online AI tool for removing clothes from photos.

Undress AI Tool
Undress images for free

Clothoff.io
AI clothes remover

Video Face Swap
Swap faces in any video effortlessly with our completely free AI face swap tool!

Hot Article
Hot Tools

PhpStorm Mac version
The latest (2018.2.1) professional PHP integrated development tool

mPDF
mPDF is a PHP library that can generate PDF files from UTF-8 encoded HTML. The original author, Ian Back, wrote mPDF to output PDF files "on the fly" from his website and handle different languages. It is slower than original scripts like HTML2FPDF and produces larger files when using Unicode fonts, but supports CSS styles etc. and has a lot of enhancements. Supports almost all languages, including RTL (Arabic and Hebrew) and CJK (Chinese, Japanese and Korean). Supports nested block-level elements (such as P, DIV),

MinGW - Minimalist GNU for Windows
This project is in the process of being migrated to osdn.net/projects/mingw, you can continue to follow us there. MinGW: A native Windows port of the GNU Compiler Collection (GCC), freely distributable import libraries and header files for building native Windows applications; includes extensions to the MSVC runtime to support C99 functionality. All MinGW software can run on 64-bit Windows platforms.

MantisBT
Mantis is an easy-to-deploy web-based defect tracking tool designed to aid in product defect tracking. It requires PHP, MySQL and a web server. Check out our demo and hosting services.

EditPlus Chinese cracked version
Small size, syntax highlighting, does not support code prompt function

