
Home >Web Front-end >H5 Tutorial >Introduction to the HTML5 Canvas pixel processing interface_html5 tutorial skills
Introduction to the HTML5 Canvas pixel processing interface_html5 tutorial skills

- WBOYWBOYWBOYWBOYWBOYWBOYWBOYWBOYWBOYWBOYWBOYWBOYWBOriginal
- 2016-05-16 15:50:591396browse
Summary of content: This article shows the common interfaces of canvas in image pixel data operations through simple code examples and a slightly wretched picture demo. As for how to use these interfaces to achieve more complex effects, we will continue to describe them in subsequent chapters.
1. Canvas image filling; 2. Set/get canvas image data; 3. Create canvas image data; 4. A few additions about imageData.data; 5. Write at the back
1. Canvas image Fill in
/**
* @description
* @param {Number} x The distance between the starting drawing point of the image and the far left of the canvas
* @param {Number} y The distance between the starting drawing point of the image and the top of the canvas
* @param {Number} width The width of the final image drawn on the canvas
* @param {Number} height The height of the final image drawn on the canvas
*/
context.drawImage(image, x, y, width, height)
demo_01 is as follows:
function $(id) { return document.getElementById(id); }
function getImage(url, callback){
var img = document.createElement('img');
img.onload = function( ){
callback && callback(this);
};
img.src = url;
document.body.appendChild(img);
}
function drawImage(){
var url = 'xiangjishi.png';
var canvas = $('draw_image_canvas');
var context = canvas.getContext('2d');
getImage(url, function(img ){
canvas.width = img.width;
canvas.height = img.height;
var offsetX = 20;
var offsetY = 20;
var drawWidth = img.width/ 4;
var drawHeight = img.height/4;
context.drawImage(img, offsetX, offsetY, drawWidth, drawHeight);
});
}
drawImage();
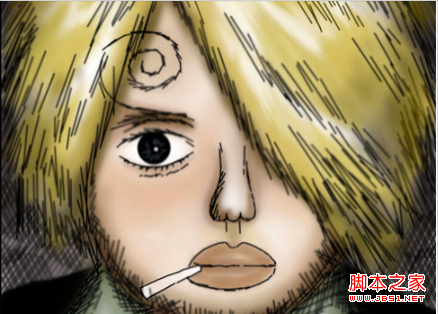
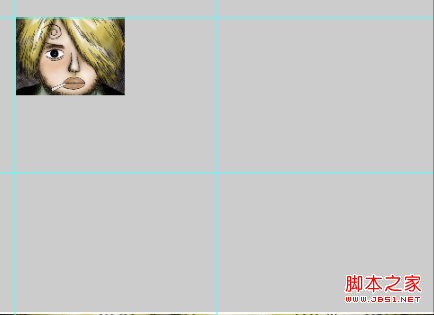
Demo instructions: Load xiangjishi.png. After the loading is completed, start from the coordinate (0, 0) relative to the upper left corner of the canvas, and draw xiangjishi.png on the canvas. The effect is as follows:
Seeing this, you may not have a clear understanding of the meaning of the four parameters in context.drawImage(image, x, y, width, height). You can simply modify a few parameters to see the effect:
var offsetX = 20;
var offsetY = 20;
var drawWidth = img.width/2;
var drawHeight = img.height/2;
context.drawImage(img, offsetX, offsetY, drawWidth, drawHeight);
The modified demo effect is as follows. Combined with the above API description, it should not be difficult to understand the meaning of the four parameters
context.drawImage(image, x, y, width, height)
2. Get/set canvas image data
/**
* @description Get the pixel information of a specific area of the canvas
* @param {Number} x The distance between the starting point of getting the information and the far left side of the canvas
* @param {Number} y The starting point of getting the information The starting distance from the top of the canvas
* @param {Number} width The obtained width
* @param {Number} height The final height
*/
context.getImageData(x, y, width, height)
This method returns an ImageData object, which mainly has three attributes:
imageData.width: how many elements are in each row
imageData.height: how many elements are in each column
imageData.data: a one-dimensional array that stores the RGBA value of each pixel obtained from the canvas . This array holds four values for each pixel - red, green, blue and alpha. Each value is between 0 and 255. Therefore, each pixel on the canvas becomes four integer values in this array. Arrays are filled from left to right and top to bottom.
/**
* @description Use specific imageData to set the pixel information of a specific area of the canvas
* @param {Number} x Set from the x point of the canvas
* @param {Number} y From the y point of the canvas Start setting at
* @param {Number} width Get width
* @param {Number} height Final height
*/
context.putImageData(imageData, x, y)
The following uses demo_2 to explain the usage of getImageData() and the parameters of each The corresponding meaning
DEMO_02 source code is as follows, slightly modified based on demo_01:
function getAndSetImageData(){
var url = 'xiangjishi.png';
getImage(url, function(img){
$('draw_image_canvas').width = img.width;
$('draw_image_canvas').height = img.height;
var context = $('draw_image_canvas').getContext('2d');
context.drawImage(img, 0 , 0, img.width, img.height);
//Get pixel information
var offsetX = img.width/2;
var offsetY = img.height/2;
var getImgWidth = img.width/2;
var getImgHeight = img.height/2;
var imgageData = context.getImageData(offsetX, offsetY, getImgWidth, getImgHeight);
//Set pixel information, ignore it here For the specific code, you know that you can put the pixel information obtained above intact into another canvas
var startX = 0;
var startY = 0;
var ct = $('get_image_canvas') .getContext('2d');
$('get_image_canvas').width = img.width;
$('get_image_canvas').height = img.height;
ct.putImageData(imgageData, startX , startY);
});
}
demo_2 The display effect is as follows :
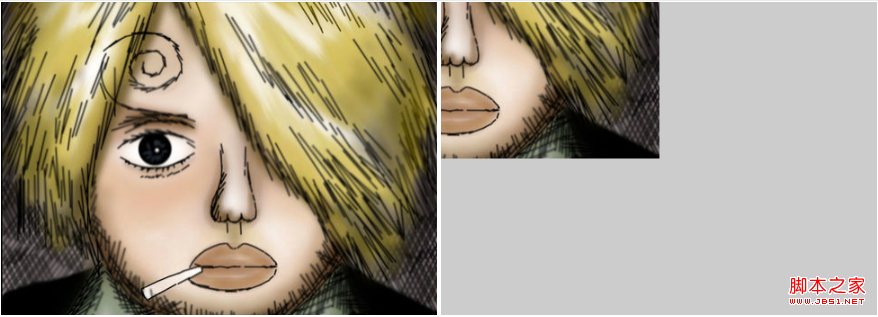
At this point, you can basically clear the meaning of the four parameters of the getImageData method. It is not difficult to understand the putImageData parameters. You can see the effect after slightly modifying the code of demo_2
function getAndSetImageData(){
var url = 'xiangjishi.png';
getImage(url, function(img){
$('draw_image_canvas') .width = img.width;
$('draw_image_canvas').height = img.height;
var context = $('draw_image_canvas').getContext('2d');
context.drawImage( img, 0, 0, img.width, img.height);
//Get pixel information
var offsetX = img.width/2;
var offsetY = img.height/2;
var getImgWidth = img.width/2;
var getImgHeight = img.height/2;
var imgageData = context.getImageData(offsetX, offsetY, getImgWidth, getImgHeight);
//Set pixel information
var startX = img.width/2; //This was originally 0
var startY = img.width/2; //This was originally 0
var ct = $('get_image_canvas').getContext(' 2d');
$('get_image_canvas').width = img.width;
$('get_image_canvas').height = img.height;
ct.putImageData(imgageData, startX, startY);
});
}
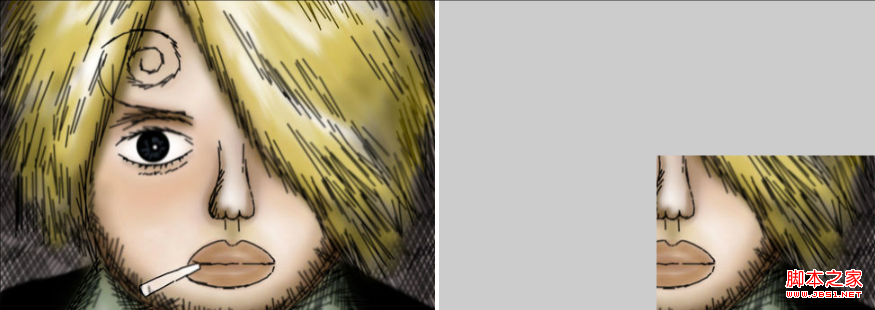
The demo_3 display effect is as follows, but try changing a few parameters yourself and you may have a better understanding:
3. Create canvas image data
/**
* @description Create a set of image data in advance and bind it to the canvas object
* @param {Number} width The created width
* @param {Number} height The created height
*/
context.createImageData(width, height)
The interface is relatively simple, and the created data can be created like The data obtained by getImageData is processed in the same way. The only thing to note here is that this set of image data does not necessarily reflect the current state of the canvas.
4. A few additional points about imageData
In "HTML5 Advanced Programming" and many articles, imageData.data is treated as an array, but in fact:
imageData.data returns not a real array, but an array-like object. The type of imageData.data can be printed out.
console.log(Object.prototype .toString.call(imgageData.data)); //Output: [object Uint8ClampedArray]
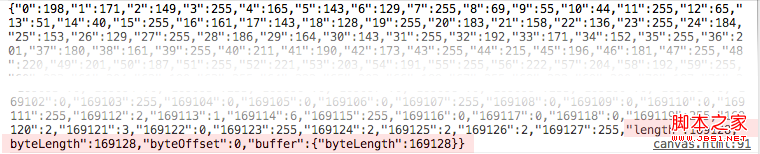
Then print out the specific content of imageData.data. The content is long and only the front and last are intercepted. From the above section, we can see:
imageData.data is actually an object, and its index starts from 0 and goes to width*height*4-1.
Why not store it directly in an array? Because the length of the array has an upper limit, assuming it is limitLength, elements exceeding limitLength are stored in the form of key values, such as data[limitLength 100] is actually data['limitLength 100 ''] (I can't remember the specific value of limitLength, there is Interested children can check it out)
As for the byteLength, byteOffset, and buffer attributes at the end, they have not been studied in detail and will not be expanded here to prevent misleading readers.
5. Write it at the back
The level is limited. If there are any errors, please point them out
Related articles
See more- AlloyTouch full-screen scrolling plug-in creates a smooth H5 page in 30 seconds
- HTML5 actual combat and analysis of touch events (touchstart, touchmove and touchend)
- Detailed explanation of image drawing examples in HTML5 canvas 9
- Regular expressions and new HTML5 elements
- How to combine NodeJS and HTML5 to drag and drop multiple files to upload to the server