Home >Computer Tutorials >Troubleshooting >Steps to cancel Win7 shared folder
Steps to cancel Win7 shared folder
- WBOYWBOYWBOYWBOYWBOYWBOYWBOYWBOYWBOYWBOYWBOYWBOYWBforward
- 2024-01-16 15:24:121498browse
Some friends have set up some shared folders while using Win7, and then want to cancel the sharing but don’t know how to cancel the shared folders in Win7. The editor below will give you a detailed introduction to how to cancel the shared folders in Win7. If you are interested, you can come and take a look.
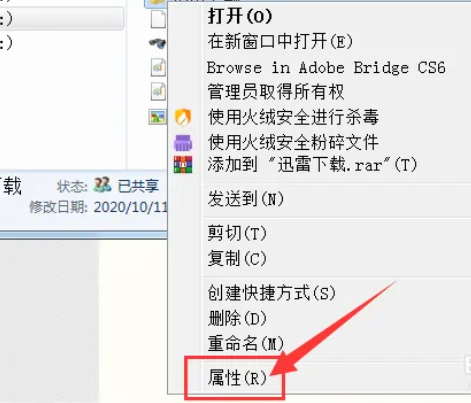
1. Select the file that needs to be unshared, right-click and select "Properties" in the menu option to open it.

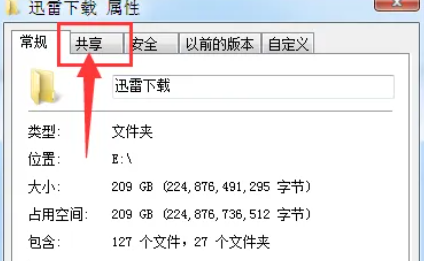
2. In the open window, switch to the "Sharing" tab above.

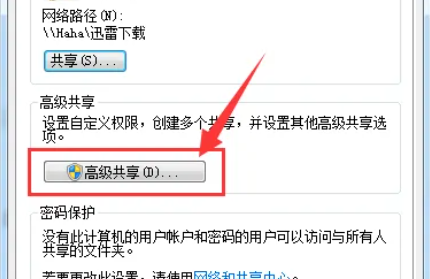
3. Then click the "Advanced Sharing" button.

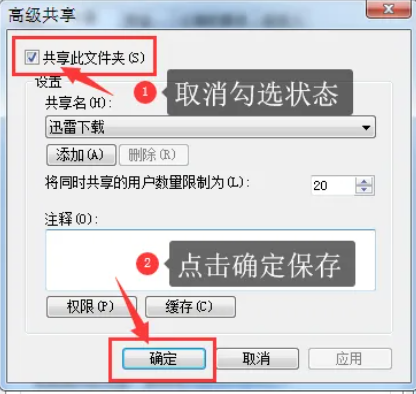
4. Finally, uncheck "Share this folder" and click OK to save.

The above is the detailed content of Steps to cancel Win7 shared folder. For more information, please follow other related articles on the PHP Chinese website!

