
Home >System Tutorial >Windows Series >A guide to learning how to create time frames using God Edit
A guide to learning how to create time frames using God Edit

- WBOYWBOYWBOYWBOYWBOYWBOYWBOYWBOYWBOYWBOYWBOYWBOYWBforward
- 2024-01-14 12:00:231381browse
How to use Shenjian to create time freeze? Shenjia is a video editing software that users can use to edit and optimize the captured videos. If you want to use God's Edit to create a time frame, how should you do it? The following is a tutorial on using God's Editor to create a time frame. Friends in need can refer to it.
1. First, shoot a complete video, a video of a character walking from one side to the other. During the shooting, the camera position needs to be fixed and the camera position cannot be moved. When the characters do some changing movements in the video, it is best to have more classic and good-looking movements, so that the freeze-frame picture will look better.
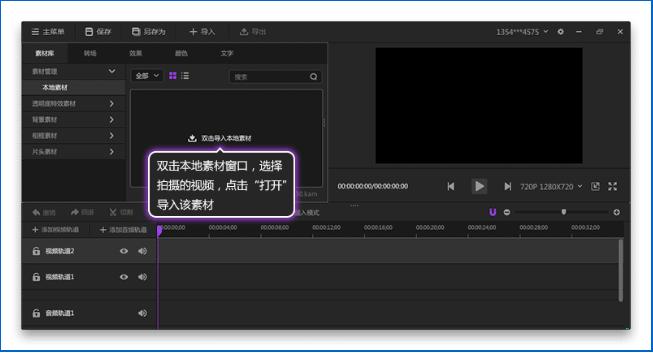
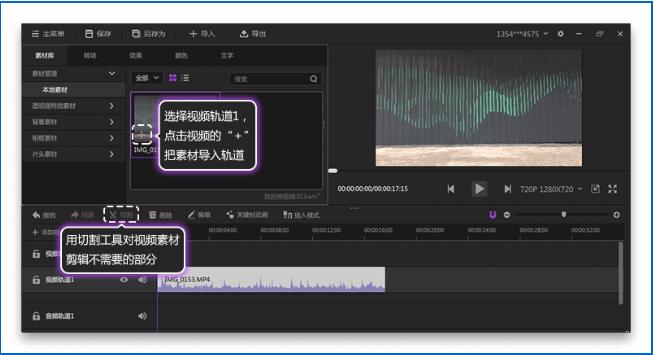
2. Open the editing software, create a new project, and import the captured video into the local material window of the software, as shown in Figure 1. The subsequent material importing software operations are also the same. Then select video track 1, click the " " of the material, and add the video to video track 1, as shown in Figure 2. The subsequent operations of importing materials into the track are the same.
Use the cutting tool to cut the unnecessary parts of the track video, drag the purple cursor to the position that needs to be cut, select the material that needs to be cut, and click Cut to cut the material. The same operation is done for the audio track material. .
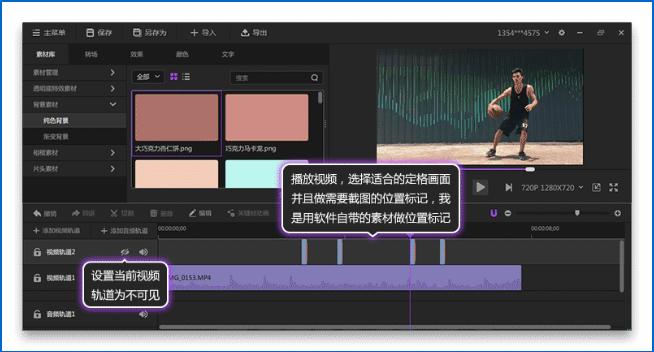
3. Play the video, view and select the pictures suitable for freeze-frame, and mark the location where the freeze-frame is required. I placed the material in Video track 2 is used to mark the screenshot location, so video track 2 needs to be set to invisible, as shown in Figure 3.
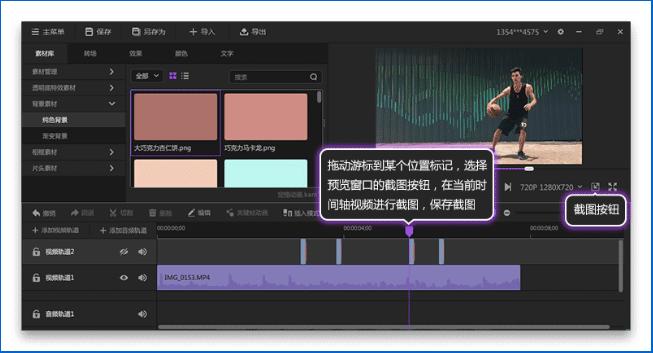
#4. Next, take a screenshot of the frozen position, as shown in Figure 4, drag the cursor to the material at the marked position, and click the screenshot button in the preview window. Select the storage path, click Export and the screenshot will be successful. I marked four places in this video, which means I need to take screenshots four times.
5. Next, you need to use the image cutout software-Photoshop. Use this software to cut out the characters in the screenshot. I used PS mask to cut out the image. , so there is room for change.
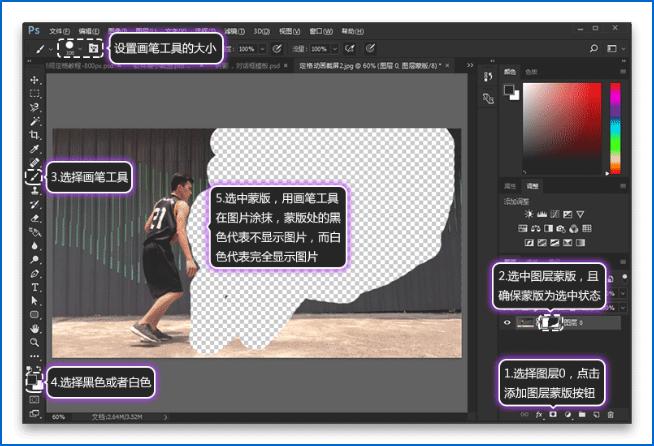
The cutout operation steps are shown in Figure 5. Open the ps software, "File-Open", select the screenshot file just now, and open the screenshot in ps. The first step is to select the picture layer and click the Add Layer Mask button. The second step is to select the layer mask and ensure that the mask is selected. The third step is to select the brush tool and set the appropriate size. The fourth step is to set Set the foreground color to white or black. The fifth step is to use the brush tool to smear the image. The black color at the mask means that the image is not displayed, and the white color means that the image is fully displayed.
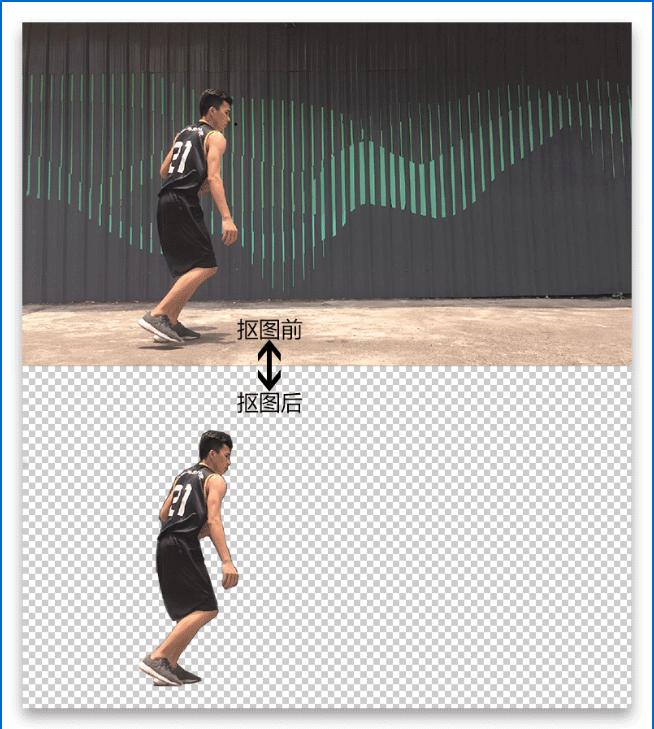
The before and after cutout is shown in Figure 6. After the cutout is completed, the current image is stored as a png image with a transparent background. The same is true for other screenshots.
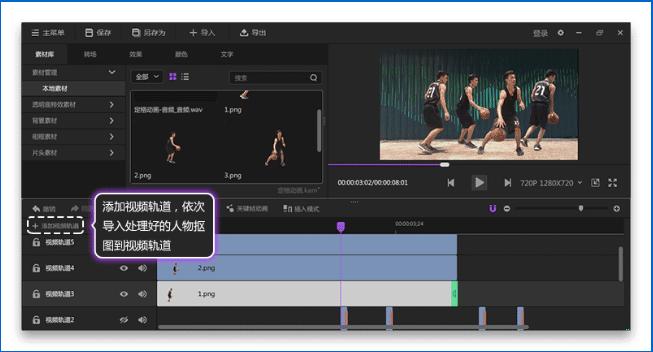
6. Import the cutout background transparent image into the project, add a video track, and import the processed screenshot into the video Orbit, as shown in Figure 7.
The before and after cutout is shown in Figure 6. After the cutout is completed, the current image is stored as a png image with a transparent background. The same is true for other screenshots.
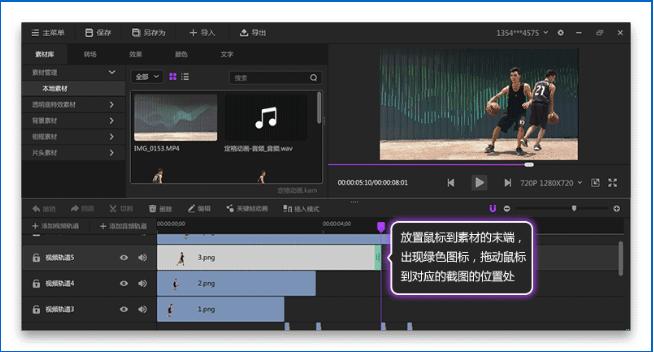
#7. Change the duration of character cutout pictures. As shown in Figure 8, place the mouse to the end of the material and a green icon will appear. Drag the mouse to the position of the corresponding screenshot. In fact, the duration of the picture is the position of the corresponding screenshot.
If the screenshot location is not marked at the beginning, you can also find the screenshot location corresponding to the cutout by playing the video.
Вырез до и после показан на рисунке 6. После завершения вырезания текущее изображение сохраняется в формате png, а фон представляет собой прозрачное изображение.Другие скриншоты обрабатываются аналогичным образом.
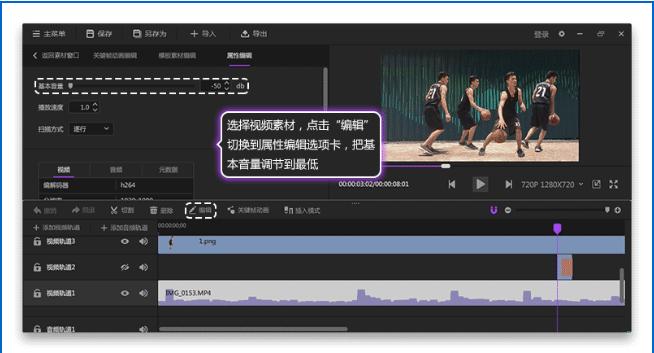
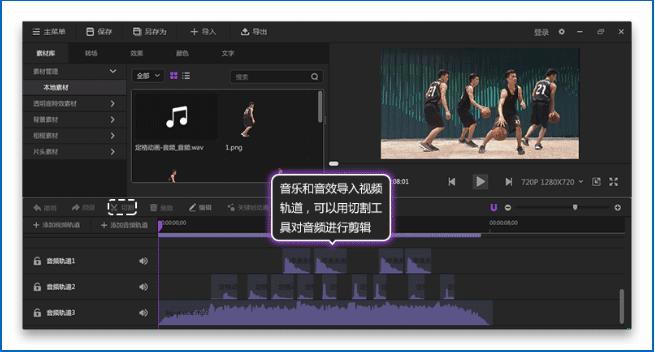
8. Следующий шаг касается звуковых эффектов и музыки в видео. Как показано на рисунке 9, выберите видео видеодорожки, нажмите «Редактировать», переключитесь на вкладку свойств и установите минимальное базовое значение громкости видео. Как показано на рисунке 10, просто импортируйте подходящую фоновую музыку и звуковые эффекты в окно локального материала, а затем импортируйте звук на звуковую дорожку. Для редактирования звука можно использовать инструмент резки.
Выше приведено руководство по использованию Божьего редактирования для создания временных рамок. Вы изучили его? Другие соответствующие руководства.
The above is the detailed content of A guide to learning how to create time frames using God Edit. For more information, please follow other related articles on the PHP Chinese website!
Related articles
See more- How to solve the problem of Windows 7 desktop rotating 90 degrees
- How to forcefully terminate a running process in Win7
- Win11 Build 25336.1010 preview version released today: mainly used for testing operation and maintenance pipelines
- Win11 Beta preview Build 22621.1610/22624.1610 released today (including KB5025299 update)
- Fingerprint recognition cannot be used on ASUS computers. How to add fingerprints? Tips for adding fingerprints to ASUS computers