
Home >Computer Tutorials >Troubleshooting >How to remove disk protection in Win11
How to remove disk protection in Win11

- 王林forward
- 2024-01-11 22:06:501569browse
The computer disk is equipped with a write-protected function. Once the disk is write-protected, no data can be written to the disk, and data cannot be deleted. So how to remove the disk protection in Win11? The editor below will give you a detailed introduction to the method of removing disk protection in Win11. Friends in need can take a look.
#1. "win R" shortcut key to open run, enter "regedit" and press Enter to open.

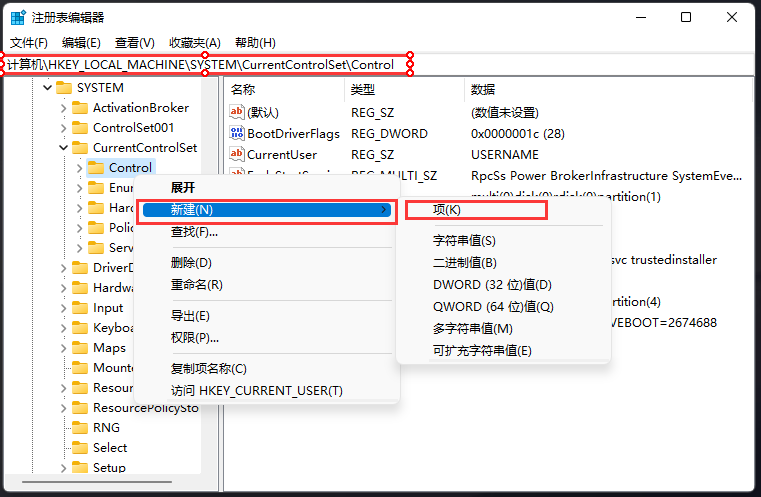
2. After entering the registry editor, copy and paste "HKEY_LOCAL_MACHINESYSTEMCurrentContrcSet" into the address bar above, and press Enter to locate this. Select "Control", right-click, select "New" an "item" and name it "StorageDevicePolicies".
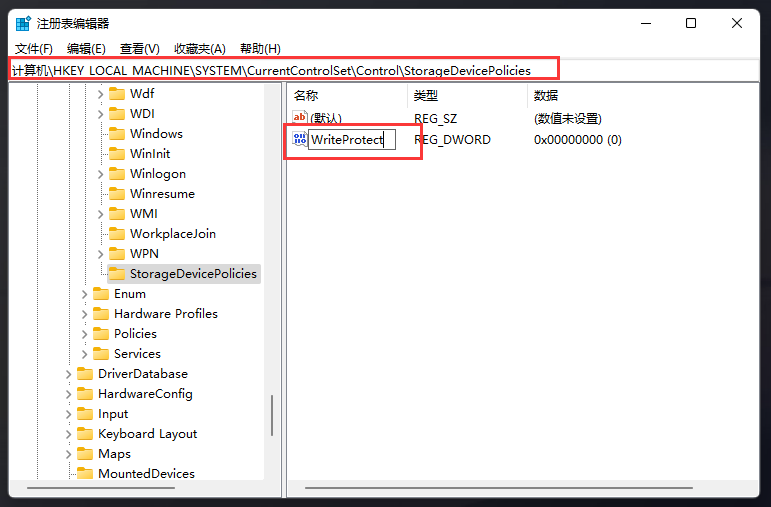
3. Click the "StorageDevicePolicies" item, right-click the blank space on the right, and select "New" a "DWORD (32-bit)" value" and name it "WriteProtect".
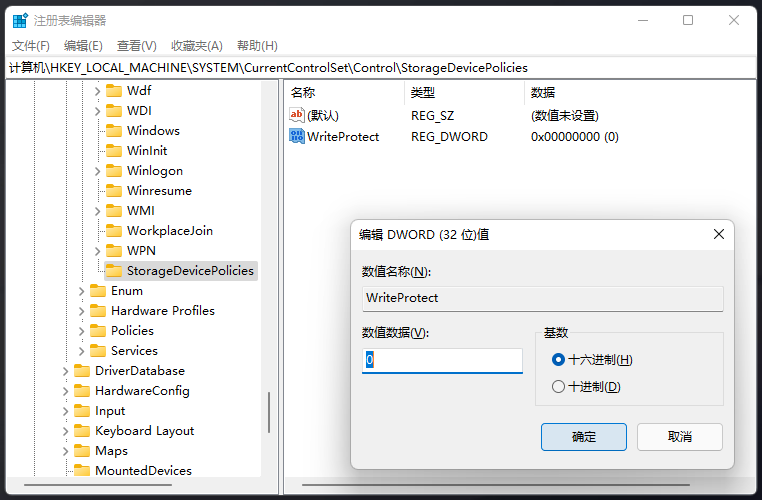
4. Double-click to open the "WriteProtect" value. In the window that opens, change the "Value Data" to "0". Then click OK to save.
Finally, restart the computer to remove it.
The above is the detailed content of How to remove disk protection in Win11. For more information, please follow other related articles on the PHP Chinese website!