Home >Computer Tutorials >Troubleshooting >How to add exclusions for Defender in Windows 10
How to add exclusions for Defender in Windows 10
- 王林forward
- 2024-01-10 13:22:211233browse
The Windows Defender that comes with the Win10 system can effectively protect computer security, but sometimes some files and processes will be accidentally killed. At this time, just add the programs and files to the anti-virus exclusions, then Win10 How to add exclusions to Defender? For this reason, the editor will give you a detailed introduction to how to add exclusions to Defender in Win10. Friends who are in need, come and take a look.
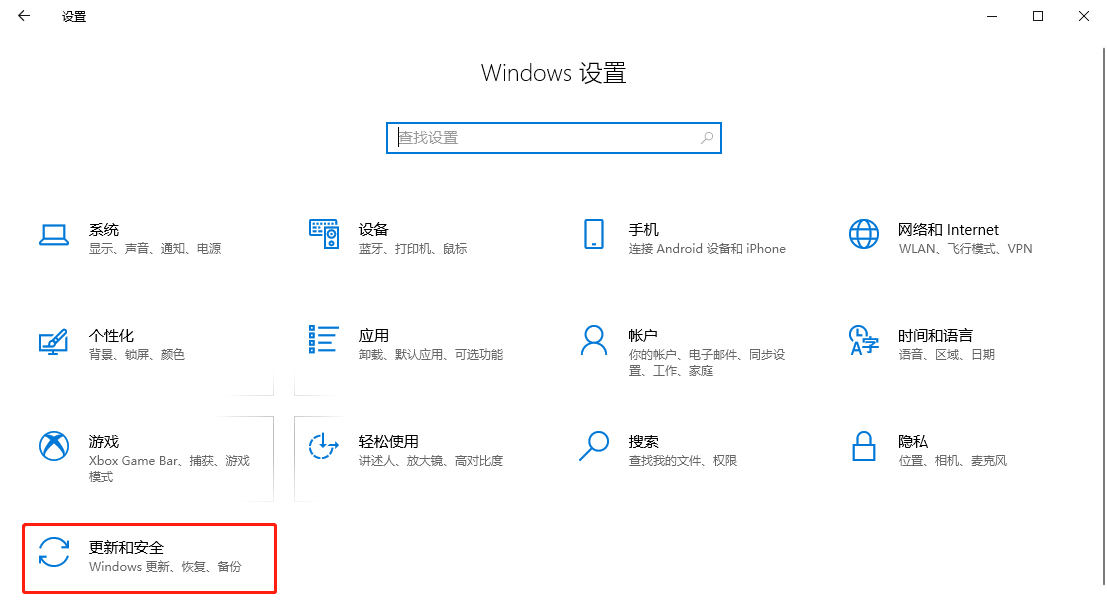
1. Shortcut key "win i" to open the "Settings" page and click the "Update and Security" option.
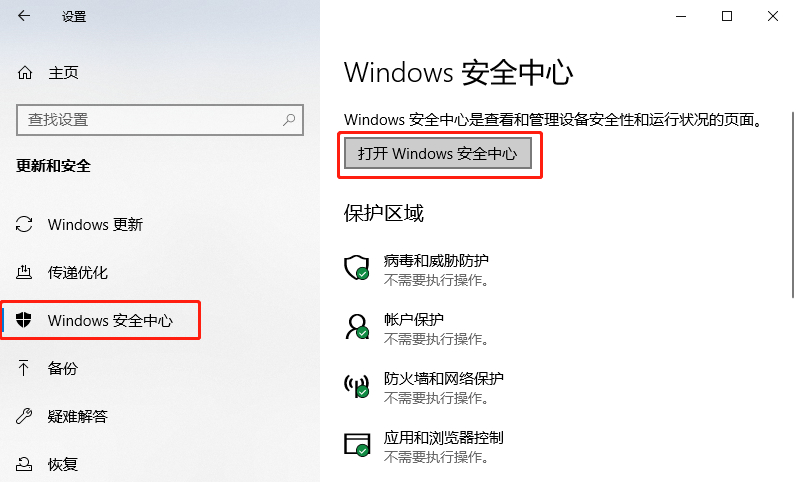
2. Then click "Windows Security Center" in the new interface. Select the "Open Windows Security Center" button on the right.
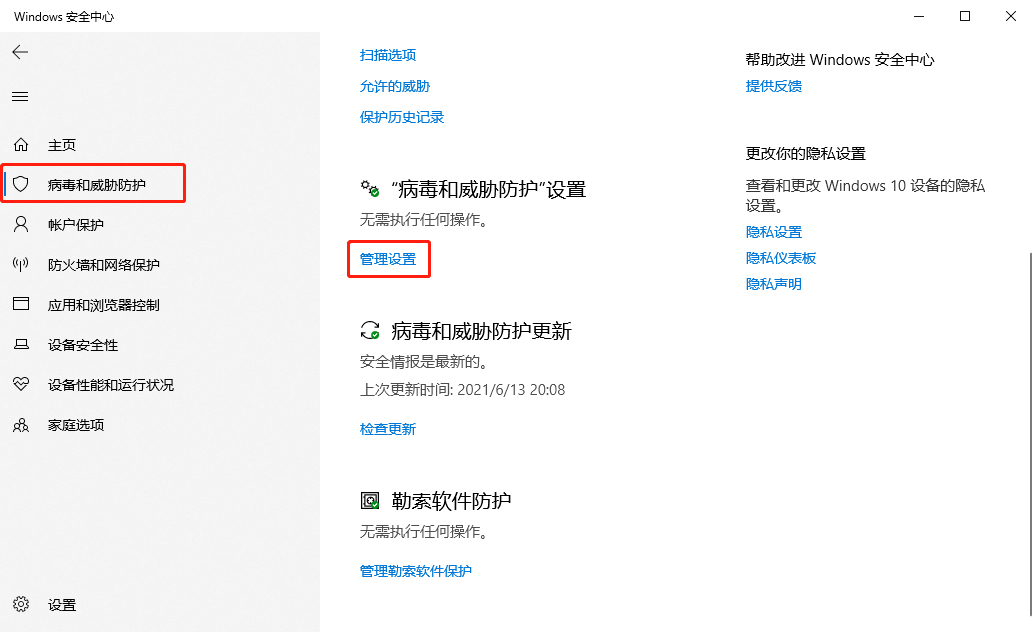
3. Then click "Virus and Threat Protection" and select the "Manage Settings" option under "Virus and Threat Protection".
4. Then click on "Exclusions".
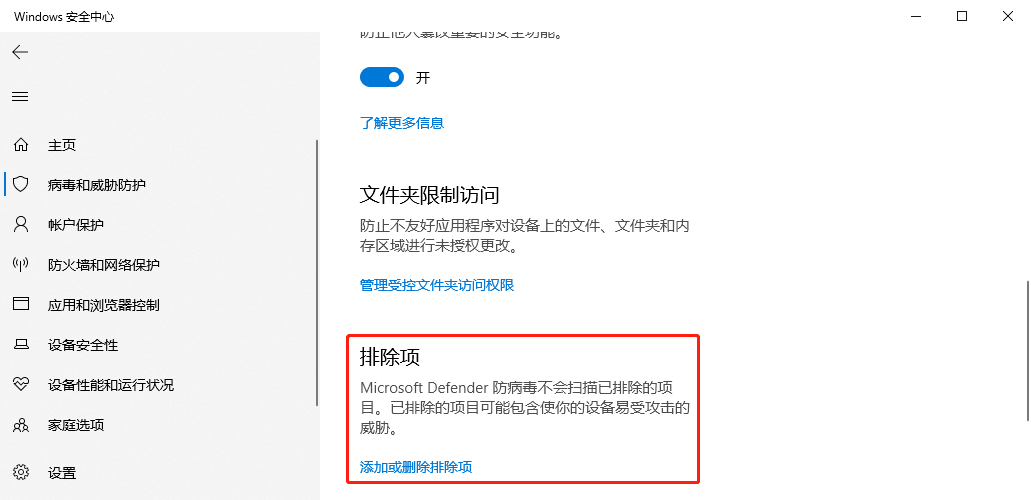
5. Find the "Add Exclusions" button and select the type of exclusions according to your needs.
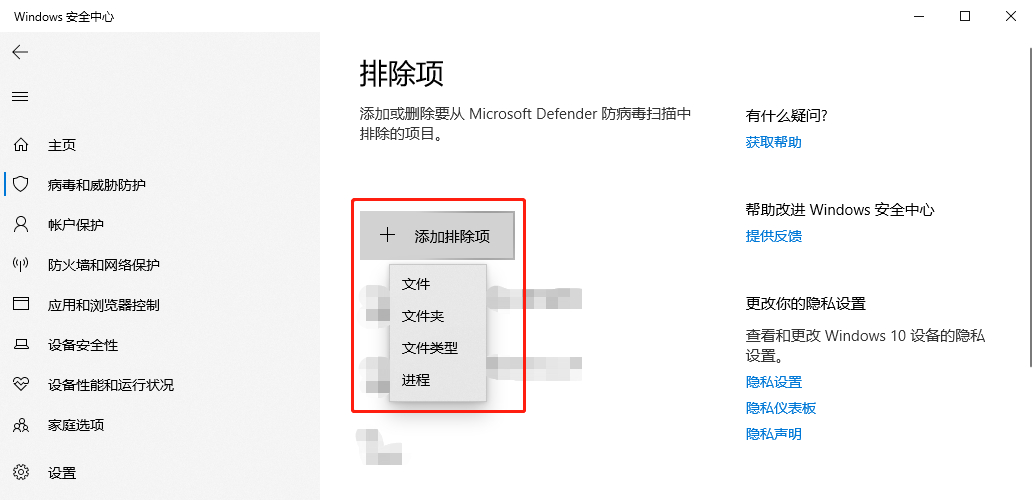
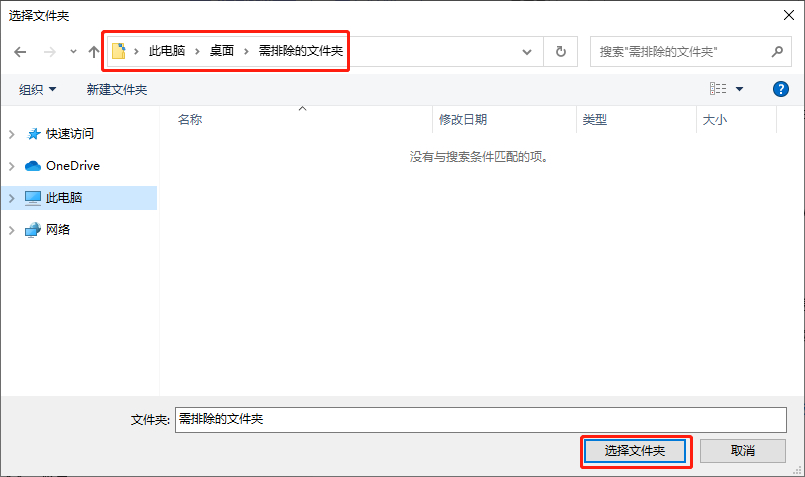
6. Finally, find the location of the exclusion item and click the "Select Folder" button (here, take the exclusion item type as a folder as an example).
The above is the detailed content of How to add exclusions for Defender in Windows 10. For more information, please follow other related articles on the PHP Chinese website!

