
Home >System Tutorial >Windows Series >Win7 shared folder setting tutorial
Win7 shared folder setting tutorial

- PHPzforward
- 2024-01-10 09:01:041675browse
Although the win7 system is relatively old, there are still a lot of folders that can be shared. There may still be users who don’t know how to operate them, so here is a tutorial on how to set up win7 shared folders. Come and take a look. Take a look.
win7 shared folder settings:
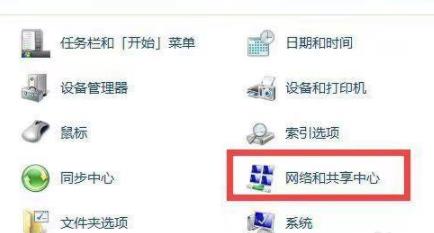
1. First click on the lower left corner to start, then enter the control panel and click "Network and Sharing Center".
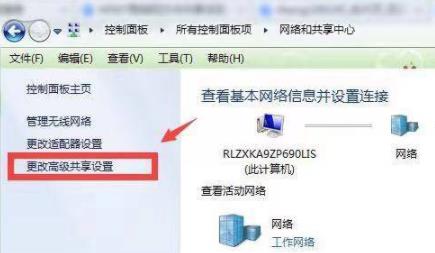
2. Then click "Change advanced sharing settings" on the left.
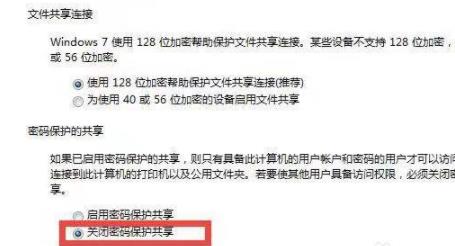
3. Check "Enable network discovery" and "Enable file and printer sharing".

4. Then select "Turn off password protected sharing" below.
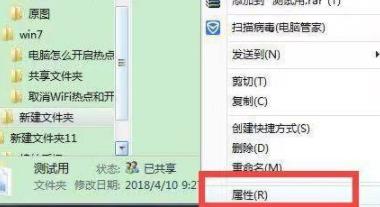
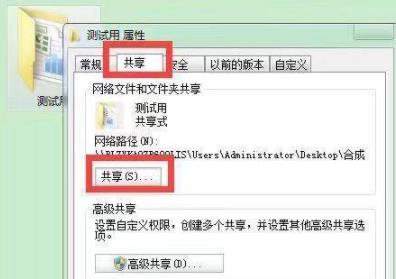
5. Then enter the shared folder, right-click and select "Properties".
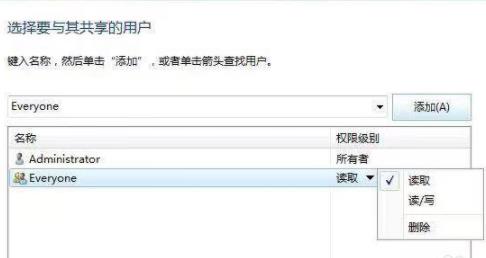
6. Then click the Sharing tab and click "Share" below.
7. Finally, the folder can be successfully created.
The above is the detailed content of Win7 shared folder setting tutorial. For more information, please follow other related articles on the PHP Chinese website!