Home >System Tutorial >Windows Series >Win11 shared homegroup setup tutorial
Win11 shared homegroup setup tutorial
- WBOYWBOYWBOYWBOYWBOYWBOYWBOYWBOYWBOYWBOYWBOYWBOYWBforward
- 2024-01-08 19:02:142081browse
Only after the computer has created a home group can you add other computers for sharing, so that it can be used more easily. After the latest win11 system update, I believe many users still don’t know how to operate it. Here’s what I’ll bring Here is a tutorial on how to create a shared homegroup in win11, come and try it out.
How to create a shared home group win11
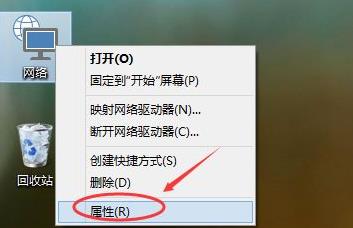
1. First, right-click the network on the Win11 system desktop, and then click Properties in the menu.

2. Then click the Home Group in the lower left corner of the Network and Sharing Center window.

3. Open the homegroup window and click Create Homegroup.

4. Enter the Create Homegroup Wizard and click Next to create it.

5. Select the permissions you want to share with other family group members and click Next.

6. After clicking, the system will start to create a home group.
7. Just choose to exit after the final creation is completed.

The above is the detailed content of Win11 shared homegroup setup tutorial. For more information, please follow other related articles on the PHP Chinese website!

