Home >System Tutorial >Windows Series >How to take screen capture in win7
How to take screen capture in win7
- 王林forward
- 2024-01-05 18:58:001507browse
Screening is one of the most commonly used functions when using computers. Generally, we will use tools such as QQ or WeChat to take screenshots. However, the system itself actually has its own screenshot function, which is more convenient. Let us take a look below. The specific method.
win7 screenshot key
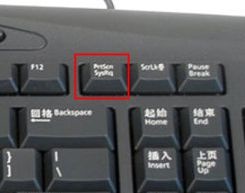
Method 1: Use the "print screen" key in the upper right corner of the keyboard to take a screenshot, and then "ctrl v" to paste it.

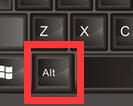
Method 2: Press "alt print screen" at the same time. At this time, the screenshot is not the entire screen, but the current program interface.

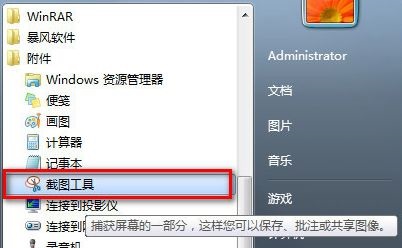
Method 3: Select "Start" - "All Programs" - "Accessories" and "Snipping Tool" in order, and you can use the system's own snipping tool to take screenshots.

In addition, some win7 systems may have been simplified and do not have the screenshot tool function. If this is the case, you can use the system recommended below.
This official win7 flagship version has all the functions of the win7 system, and also integrates a large number of commonly used hardware drivers today, which can meet almost all users' needs.
This system is a very conscientious and easy-to-use system. It has been optimized on the basis of the original system, allowing all users to experience comfortable interactive services.

On the basis of retaining all the functions of the original flagship version, this system adds many practical system components to provide users with the best interactive experience.
At the same time, the system also optimizes the installation process and improves the installation speed. After the installation is completed, users can directly use the administrator account to operate the system.

The above is the detailed content of How to take screen capture in win7. For more information, please follow other related articles on the PHP Chinese website!
Related articles
See more- How to solve the problem of Windows 7 desktop rotating 90 degrees
- How to forcefully terminate a running process in Win7
- Win11 Build 25336.1010 preview version released today: mainly used for testing operation and maintenance pipelines
- Win11 Beta preview Build 22621.1610/22624.1610 released today (including KB5025299 update)
- Fingerprint recognition cannot be used on ASUS computers. How to add fingerprints? Tips for adding fingerprints to ASUS computers

