Home >Mobile Tutorial >iPhone >Fix the problem that iPhone cannot connect to Wi-Fi
Fix the problem that iPhone cannot connect to Wi-Fi
- PHPzforward
- 2024-01-04 16:22:311535browse
If you frequently use WiFi services on your iPhone, you may have encountered iPhone not accepting WiFi password at least once in your lifetime. This happens when you try to connect your iPhone to a WiFi network, but your iPhone just refuses to connect successfully and lets you enjoy network access on your device.
Fortunately, there are some fixes that can help you resolve the iPhone not accepting password for the WiFi network on your device issue. These fixes change the configuration on your iPhone and ensure it is compatible so that you can connect to WiFi networks from your iPhone.
Let’s see how to get rid of this problem and get your iPhone connected to your WiFi network:
- Part 1. Why doesn't iPhone accept WiFi password?
- part 2. Eight Ways to Fix iPhone Not Accepting WiFi Password
Part 1. Why doesn't iPhone accept WiFi password?
We believe you want to understand the cause of the problem first. Well, there are multiple reasons why your iPhone won't accept WiFi password. Below are two of the most common reasons listed so you can understand what is causing problems with your device.
Cause 1. Wrong WiFi Password
Well, whenever you receive something, like a text message from someone on your iPhone, your iPhone will try to figure out who sent the message people. Your iPhone will tell you the next time you get a call or message from them, maybe it's someone they've emailed you before.
If you find this feature a little weird and no longer want it on your device, here's how to get rid of it.
Cause 2. Bug in the software
If you are sure you entered the correct WiFi password on your iPhone, but your iPhone still doesn’t accept the WiFi password, there may be a bug in your device’s software . This error may prevent you from connecting to wireless networks.
part 2. Top 8 Ways to Fix iPhone Not Accepting WiFi Password
Now that you know what is causing the problem, let’s check out the ways to fix it and be able to successfully connect your iPhone to a WiFi network. You can easily apply many of the solutions found below using the built-in options on your device without having to download or install anything on your device.
Fix 1. Turn off/on WiFi
This is the most basic yet effective method for this problem. Sometimes switching WiFi options on your iPhone and router can solve problems like not being able to connect to a WiFi network, here's how you can do it.
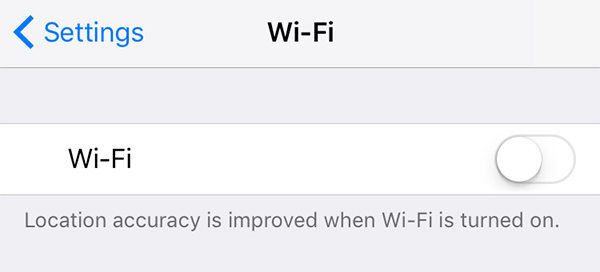
To toggle WiFi options on your iPhone, launch the Settings app and tap Wi-Fi to open the Wi-Fi settings menu. Then, move Wi-Fi’s toggle switch to the OFF position to disable it on your device. Wait approximately one minute and then return the toggle switch to the ON position.
See if you are now able to connect to your WiFi network.
Fix 2. Restart iPhone
If it is a minor software glitch causing the iPhone problem, you can try restarting the iPhone to see if it helps solve the problem. In many cases, restarting the device usually solves the problem, and it should work for you too.
To restart your iPhone, press and hold the power button for a few seconds. Drag the slider and the iPhone will turn off. Hold down the power button for a few seconds and your iPhone will power up.
Fix 3. Turn off WiFi Assist
To help you enjoy uninterrupted Internet service on your iPhone, Apple has added a feature called Wi-Fi Assist to your iPhone, which can be used on iPhone Automatically switches to cellular data when your WiFi signal is detected to be weak. It may be interfering with your current situation and may be the cause of the problem. Therefore, it is recommended that you turn it off for a while and see if it solves the problem for you. Here's how to do it.
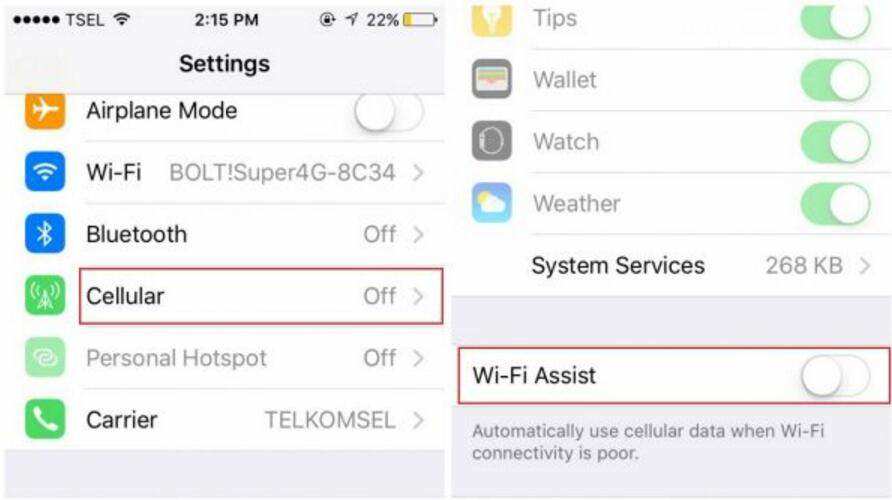
Launch the Settings app on your iPhone and tap on the cell. Then, turn the Wi-Fi Assist switch to the OFF position. you did it.
Fix 4. Forget WiFi network and rejoin it
It is also recommended that you forget the network and then rejoin it to freshen everything up. Here's how to do it on your iPhone.
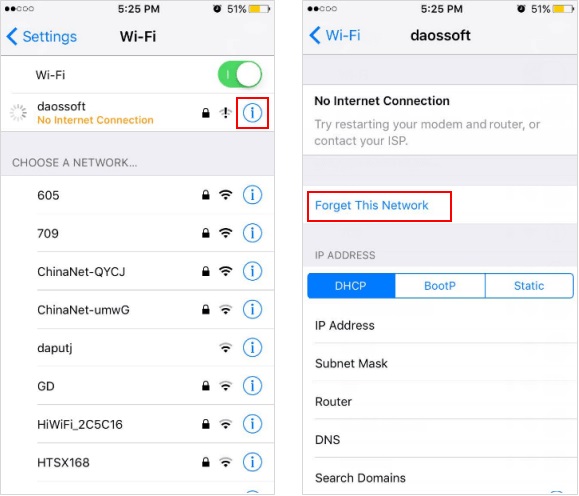
Launch the Settings app and tap Wi-Fi . Select your WiFi network and click the i logo next to it. Tap Forget this network and you can rejoin the network.
Fix 5. Disable location services for WiFi networks
You can try to disable location services for WiFi networks on your iPhone. This can help you get rid of the problems your iPhone is currently facing.
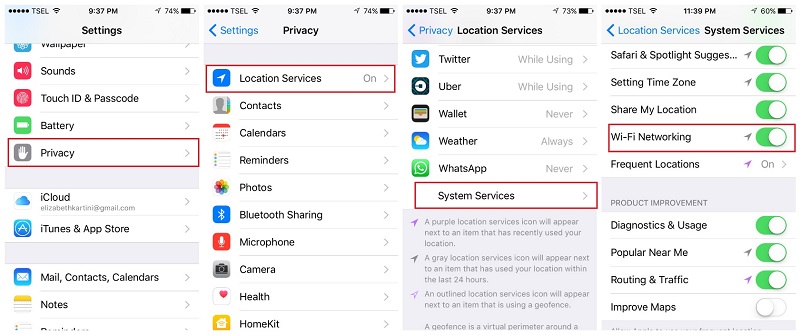
Open the Settings app on your iPhone and tap Privacy followed by Location Services . Click on "System Services" and disable the option that appears Wi-Fi Network .
Fix 6. Reset Network Settings
Network settings define how to connect to various networks on your iPhone, if there are misconfigurations in these settings you may experience network problems on your iPhone question. You can reset these settings to factory defaults as shown below. It should help you resolve issues on your device.
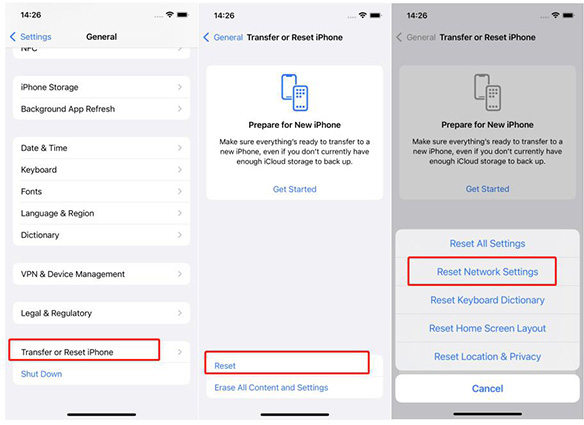
Open the Settings app and tap General followed by Restart . Tap Reset Network Settings and it will do the work for you.
Fix 7. Switch to Google DNS
If you are using a not-so-good DNS provider on your iPhone, it may cause your iPhone to not accept your WiFi password. Here's how to change these DNS servers to more reliable Google DNS servers.
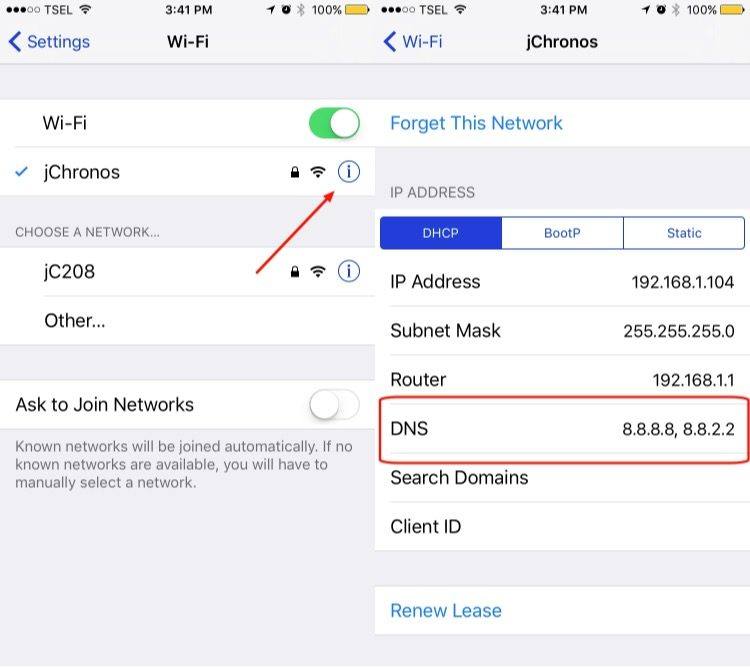
Open Settings and tap Wi-Fi . Click on your WiFi network and then click on the number that appears next to DNS . Change those to 8.8.8.8 and 8.8.4.4 and you're good to go.
Fix 8. Fix your iOS to fix iPhone won’t connect to WiFi
If your iPhone won’t accept WiFi passwords even after applying the above fixes, you may need to use a third party Software to solve problems on iPhone. Sometimes the built-in fixes don't work and you need to use specially developed software to handle problems like yours.
Enter Tenorshare ReiBoot, a software that helps iOS users fix various issues on their devices. It focuses on helping users fix almost all types of iOS problems on iPhone and iPad, and here's how to use it to fix your WiFi problems:
Step 1: Download and run the software on your computer. Connect your iPhone to the computer and click "Repair Operating System" in the software.
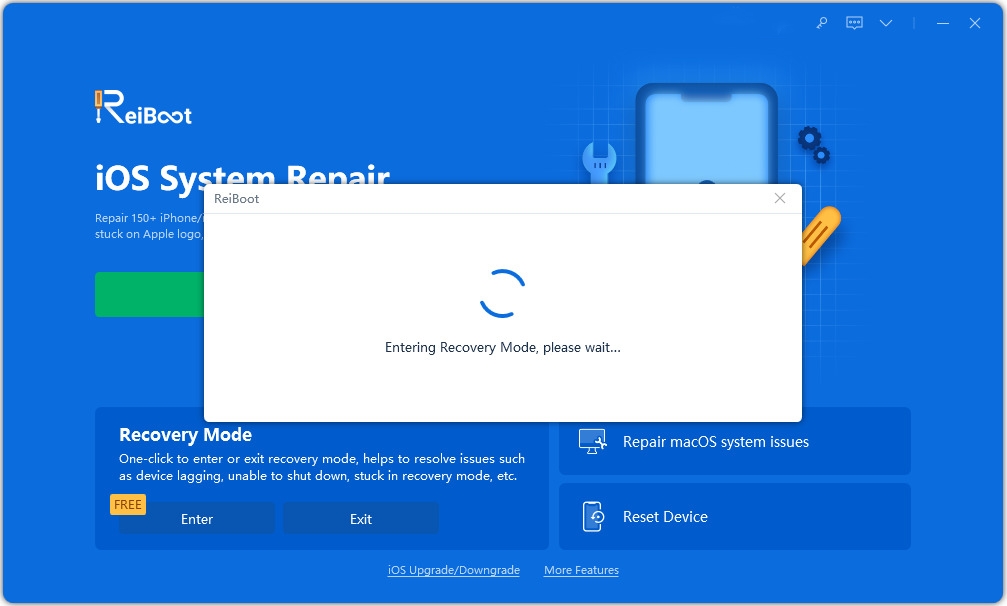
Step 2: Click "Start Repair" on the following screen and then click "Download" to download the firmware package for your device.
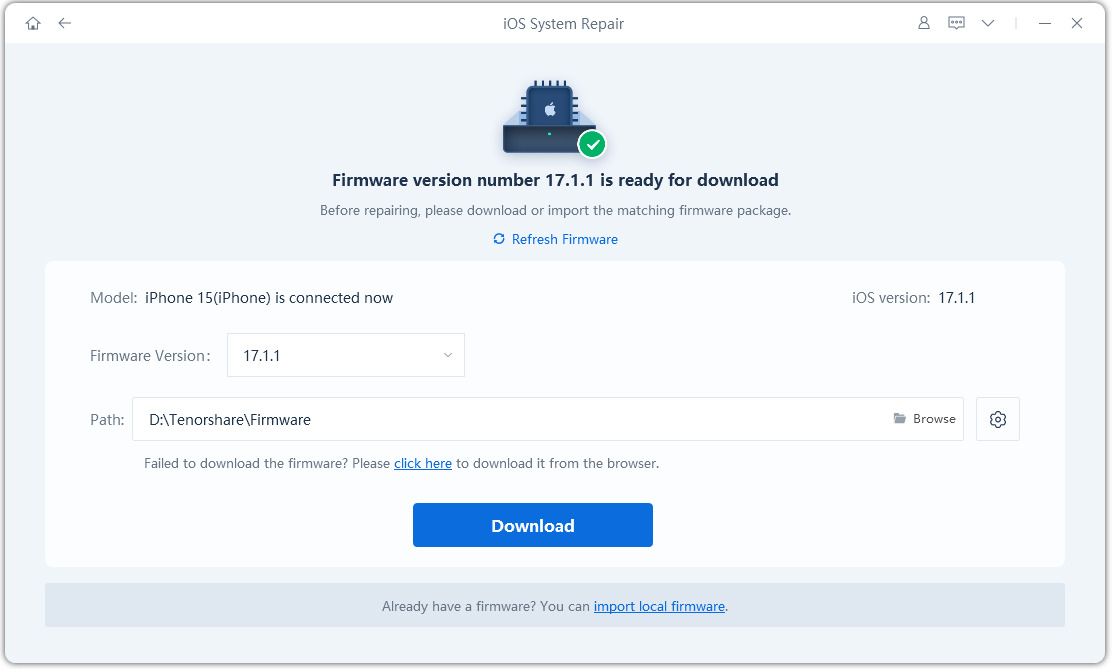
Step 3: Click Start Repair when downloading the firmware to start repairing your iPhone. When repairing your iPhone, you will see the following.
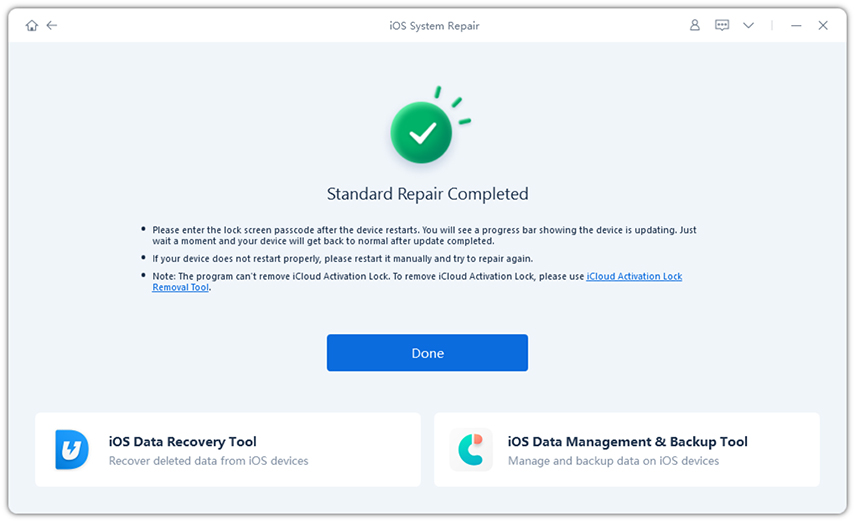
Now that you have gotten rid of the WiFi issues on your iPhone, you should be able to connect it to the WiFi network of your choice without any issues from now on.
Conclusion
If your iPhone XS/XS Max/XR/X/8/7/6s/6 is not accepting WiFi password, you can get plenty of fixes as shown above to solve it Problems on your device. If nothing works, ReiBoot is the way to go.
The above is the detailed content of Fix the problem that iPhone cannot connect to Wi-Fi. For more information, please follow other related articles on the PHP Chinese website!
Related articles
See more- How to remove the red dot prompt, that is, the unread message mark, in the Messages app in iOS 16?
- A non-destructive way to quickly import iPhone photos to your computer!
- How to self-check whether there are problems with the new iPhone 13/14 and how to avoid buying refurbished devices.
- Weiyun mac version download and function introduction
- How to solve the problem that Safari cannot be found in private browsing mode and cannot clear history in iOS 16?

