
Home >Software Tutorial >Computer Software >How to measure and display area using autocad?
How to measure and display area using autocad?

- 王林forward
- 2024-01-03 14:17:381827browse
Recently, the editor has received a lot of private messages in the background. Many friends have come to this site to ask the editor how to measure the area in autocad. In order to help everyone, the editor has collected relevant information online and finally found how to quickly calculate the area in cad. The details of the displayed methods are in the article below. If you need it, please come to this site for reference.

How to measure area in autocad?
The specific steps are as follows:
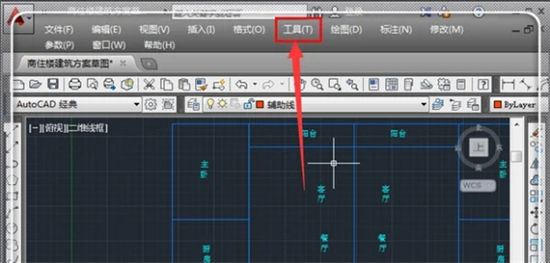
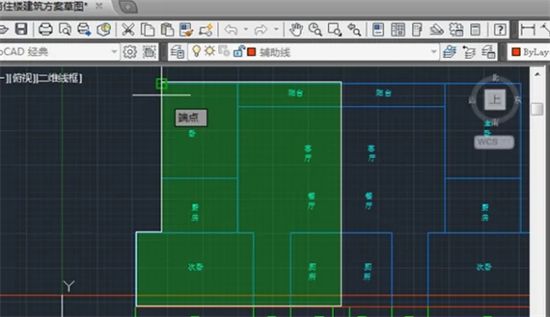
1. Open the CAD graphics, click "Tools" in the menu bar ;
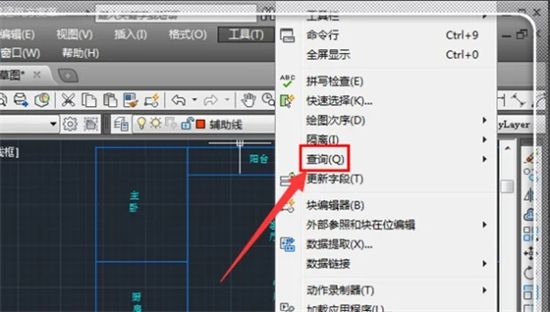
2. Call up the tool options, point the mouse at "Query Q" to activate the query command;
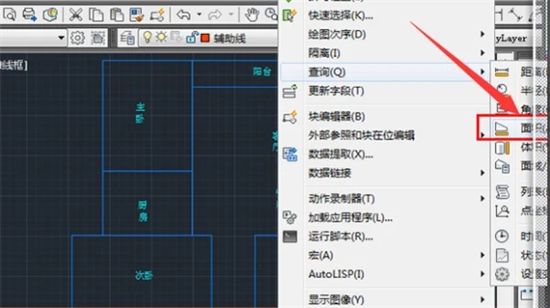
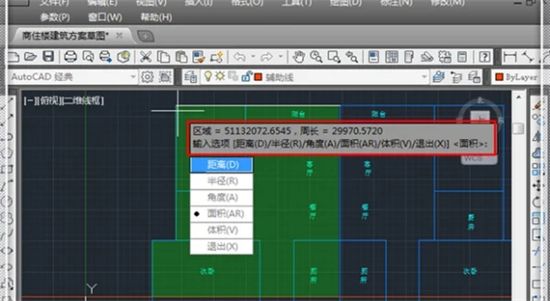
3. More function options of the query will pop up, click "Area";
4. At this time, use the mouse to pick up the key points surrounding the area that need to be queried;
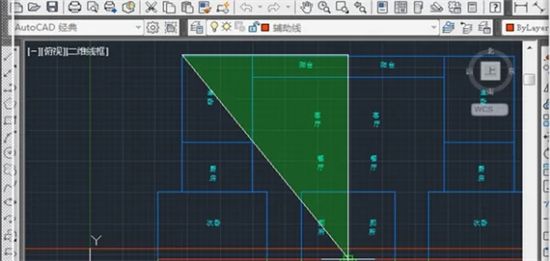
5. Pick each point and form a closed figure;
6. Press the Enter key. At this time The area information will pop up directly. The area here is generally in millimeters (mm). If the decimal point is moved 6 places to the left, it is square meters.
The above is the detailed content of How to measure and display area using autocad?. For more information, please follow other related articles on the PHP Chinese website!