
Home >System Tutorial >Windows Series >Learn how to enable secure boot in win11
Learn how to enable secure boot in win11

- WBOYWBOYWBOYWBOYWBOYWBOYWBOYWBOYWBOYWBOYWBOYWBOYWBforward
- 2024-01-03 13:58:211020browse
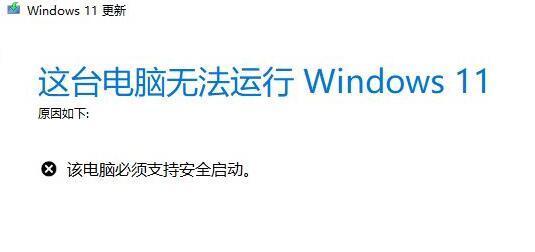
When some users install win11, they are prompted that win11 must support secure boot. Generally speaking, computers can support secure boot. When encountering this prompt, you only need to turn it on in the motherboard settings. Different motherboards have different opening methods. You can choose the following opening method according to your motherboard model.
How to turn on the secure boot of win11:
1. ASUS motherboard
1. Use the hotkey to enter the bios settings and click on the upper left corner Change language to Chinese.
2. Then press "F7" on the keyboard to enter the advanced settings.

3. Then find "Secure Boot Menu" under the "Startup Settings" option
4. Select " Key Management" and press Enter to enter.

5. Press Enter to confirm "Install the default secure boot key". After the installation is complete, exit the bios settings to turn on secure boot.

2. Lenovo computers
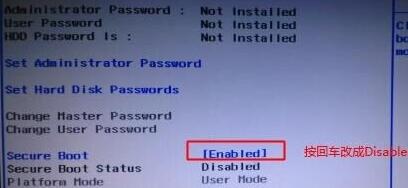
1. Lenovo computers before 2020 need to use "F2" to enter the bios settings, and use the arrow keys to select the "security" option .
2. Then change "secure boot" to "Enabled" below.
3. Finally, press "F10" on the keyboard to save the settings and turn on secure boot.
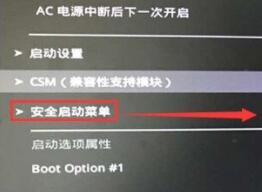
4. The bios setting interface of Lenovo computers after 2020 is different. You need to open the "Security Menu" in the left column.
5. Then follow the illustrated method Just do it and save.

3. HP computers
1. HP computers need to press "Esc" when booting to enter the startup selection interface, and press "F10" according to the prompts Enter bios.

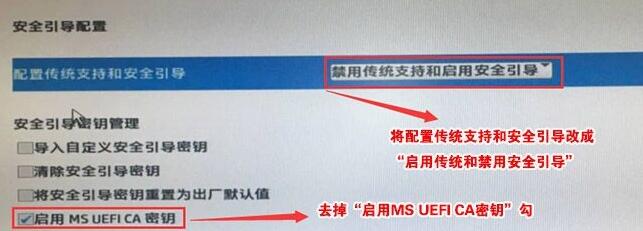
2. Click the "Advanced" tab above and open "Secure Boot Configuration"

3 , change the configuration support and secure boot according to the icon, and then uncheck "Enable MS UEFI CA key"
4. Finally, use "F10" to save the settings, and you can install win11.
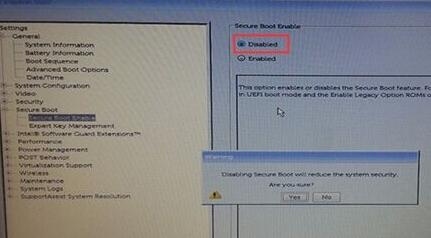
4. Dell Computer
1. Dell computer needs to continuously press "F2" on the keyboard to enter the BIOS settings when booting.
2. Click on the "BOOT" option in the left column, find the secure Boot below and press Enter to change it to "enabled".
3. After the settings are completed, press "F10" to save, and select "Yes" in the pop-up window.
4. Finally, restart the computer, and you can install the win11 system normally.
The above is the detailed content of Learn how to enable secure boot in win11. For more information, please follow other related articles on the PHP Chinese website!
Related articles
See more- The latest five Laravel video tutorial recommendations in 2023
- What should I do if Win10 cannot connect to the Internet normally?
- Win10 computer keeps spinning when booting
- Getting Started Tutorial on Using a Digital Multimeter
- What should I do if the prompt that my windows license is about to expire keeps popping up?