
 System TutorialLINUXUbuntu 20.04 desktop version graphic tutorial: ultra-detailed installation steps
Ubuntu 20.04 desktop version graphic tutorial: ultra-detailed installation steps

1. Preparation tools
- VMWare Workstation15 Pro;
- ubuntu-20.04-desktop-amd64.iso;
2. Initial configuration of virtual machine
1) Select File → New Virtual Machine in VMWare Workstation to create a new virtual machine;

2) Select the "Custom (Advanced)" option in the "New Virtual Machine Wizard" that opens, and click Next;

3) Use the default configuration in "Select Virtual Machine Hardware Compatibility" and click Next;

4) In the "Install guest operating system" option, select "Install the operating system later" and click Next;

5) In the "Select Guest Operating System" option, select "Linux" as the guest operating system, and select Ubuntu 64-bit version (because the Ubuntu20.04 system is a Linux system, 64-bit);

6) On the "Name Virtual Machine" page, name the virtual machine to be created, specify the location where the virtual machine is stored, and click Next;

7) In the "Processor Configuration" interface, specify the number of processors of the virtual machine and the number of cores of each processor;

8) In the "Memory of this virtual machine" configuration interface, specify the amount of available memory for the virtual machine. This amount of memory is shared with the memory owned by the host (original operating system). It can be based on the memory owned by the machine. Select and configure the actual physical memory amount;

9) In the "Network Type" configuration interface, you can select the network type owned by the virtual machine network card, including bridge network, NAT network, Host Only network and no network. The meaning and difference of each network will be later Will explain, here you can select the default "Use Network Address Translation (NAT)" item;

10) In the "Select I/O Controller Type" option, you can specify the I/O controller type used by the virtual machine. This option will affect the IO performance of the disk. You can choose LSI Logic and LSI Logic SAS. There are two options. The specific meanings and differences of each item will be explained later. Here you can choose the default "LSI Logic" option;

11) In the "Select Disk Type" option, you can specify the interface type of the hard disk owned by the virtual machine. Generally, the recommended SCSI is used by default;

12) In the "Select Disk" option, you can specify the type of hard disk used by the virtual machine. If it is a newly created virtual machine, you need to select "Create a new virtual disk", which means the hard disk used by the virtual machine. It is newly created and does not use disks previously created for other virtual machines;

13) In the "Specify disk capacity" option, you can specify the size of the hard disk space owned by the virtual machine. Since the hard disk space occupied by the virtual machine comes entirely from the hard disk space of the physical machine where it is located, therefore, The value entered in "Maximum disk size" is the maximum space value of the hard disk owned by the virtual machine. When the first item "Allocate all disk space immediately" is not checked, the size of the disk space occupied by the virtual machine increases with the current value. The actual usage of the virtual machine's hard disk depends on it, and the maximum value should not exceed the "Maximum disk size" value allocated to the virtual machine. In addition, it is recommended to select "Save the virtual disk as a single file", which also makes it easier to store the virtual machine's hard disk in different locations. Move between locations;

14) In the "Specify Disk File" option, specify the location where the virtual machine's hard disk file is stored;

15) In the "Ready to Create Virtual Machine" option, all the previous configurations made for the virtual machine will be given for checking the previous configuration. If errors are found in the previous configuration, you can click "Auto "Define Hardware" to change the previous configuration. In addition, you can click "Customize Hardware" here, and in the pop-up option box, specify the ISO image file required for installing the system for the virtual machine (in the "Preparation" chapter The mentioned Ubuntu20.04 system ISO image);

16) After clicking the "Customize Hardware" option in step (15), in the pop-up "Hardware" configuration box, by clicking the "New CD/DVD (SATA)" option, you can click the "New CD/DVD (SATA)" option in the context on the right Specify the Ubuntu20.04 ISO image file required in the menu;


17) After selecting the ISO image required for system installation, return to step (15). After clicking Finish, the virtual machine configuration completion interface will appear. If you need to modify the configuration again, you can click "Edit Virtual Machine Settings" " to make modifications. If no modification is required, you can click "Open this virtual machine" to install the virtual machine.
3. Ubuntu20.0.4 system installation
1) After finishing

2) After clicking "Turn on this virtual machine", the system will first perform a self-check of installing the image, and you need to wait quietly here;

3) In the pop-up "Welcome" interface, you need to select the system language to be installed and the trial system (Try Ubuntu) or the installation system (Install Ubuntu). Install Ubuntu should be selected here. In addition, it is strongly recommended that the language Select English instead of Chinese to avoid Chinese characters appearing in the folder name after installation and making it inconvenient to enter commands during use;

4) In the "keyboard layout" option interface, you need to specify the keyboard layout format. You can use the default here. It is strongly recommended not to select other configurations, otherwise the key values of the keyboard after installation will match the key sequence of the keyboard you are using. Not on;

5) In the "Update and other software" option, it is recommended to uncheck "Download updates while installing Ubuntu". In this way, only the native system will be installed during the installation process, and system updates will not be performed online, which will greatly save the installation system. time; in addition, it is recommended to select the "Normal installation" option, which will configure a graphical interface for the system. If "Mininal installation" is selected, it will be a minimal system installation without a graphical interface, which is inconvenient for desktop systems;

6) In the "Installation type" option, you need to specify the operation of the hard disk. If it is the first installation, just select the first item "Erase disk and install Ubuntu", which means erasing the contents of the hard disk and installing the Ubuntu system;

7) In the pop-up "Write the changes to disks" option, you will be prompted for the default partitioning method used by the system. The default is used here and click Continue;

8) During the installation process, you will be prompted to select the time zone where the system is located, so that the system can perform time synchronization operations. In China, you can directly select "Shanghai". Here you need to click the mouse on the corresponding location to select, and then click Continue to the next step;

9) In the "Who are you" configuration interface. It mainly allows users to specify the user name, machine name and password of the virtual machine system. You can enter it according to your preference;

10) At this point, you have officially entered the system installation process. The following screen will appear, indicating that the system installation process is in progress and files are being copied;

11) After the system is installed, the "Installation Complete" dialog box will pop up, prompting that the system has been installed. At this time, click "Restart Now" to restart the system to enter the installed Ubuntu20.04 virtual machine system;


12) The following interface appears, indicating that the system starts normally. At this time, click on the user name, enter the corresponding password to enter the system, and you can start enjoying the Ubuntu20.04 system!

Set ip (NAT8), if you don’t know how to set ip for NAT8, you can check it
Logic diagram of three network modes of VMware virtual machine (super detailed)


The above is the detailed content of Ubuntu 20.04 desktop version graphic tutorial: ultra-detailed installation steps. For more information, please follow other related articles on the PHP Chinese website!

 How to Automatically Restart a Failed Service in LinuxApr 28, 2025 am 09:39 AM
This guide details how to configure automatic service restarts in Linux using systemd, enhancing system reliability and minimizing downtime. System administrators often rely on this functionality to ensure critical services, such as web servers (Apa
 10 Hidden Linux Commands Every Sysadmin Should KnowApr 28, 2025 am 09:35 AM
As Linux users, we often rely on commonly used commands ls, grep, awk, sed and find to complete the work. But Linux has a large number of lesser-known commands that can save time, automate tasks and simplify workflows. This article will explore some underrated but powerful Linux commands that deserve more attention. rename – efficient batch rename files The rename command is the savior when you need to rename multiple files at once. Without using loops containing mv, rename allows you to easily apply complex renaming patterns. Change all .txt files to .log. rename 's/\.txt$/\.log/' *
 How to List All Running Services Under Systemd in LinuxApr 28, 2025 am 09:29 AM
Linux systems provide various system services (such as process management, login, syslog, cron, etc.) and network services (such as remote login, email, printer, web hosting, data storage, file transfer, domain name resolution (using DNS), dynamic IP address allocation (using DHCP), and so on). Technically, a service is a process or group of process (usually known as a daemon) that runs continuously in the background, waiting for incoming requests (especially from the client). Linux supports different ways to manage services (start, stop, restart, enable automatic startup at system startup, etc.), usually through a process or service manager. Almost all modern Linux distributions now use the same
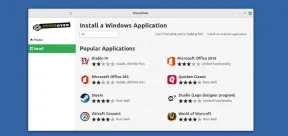 CrossOver 25: Run Windows Software and Games on LinuxApr 28, 2025 am 09:27 AM
Run Windows Software and Games on Linux with CrossOver 25 Running Windows applications and games on Linux is now easier than ever, thanks to CrossOver 25 from CodeWeavers. This commercial software solution lets Linux users run a wide variety of Wind
![pCloud - The Most Secure Cloud Storage [50% Off Offer]](https://img.php.cn/upload/article/001/242/473/174580357418126.jpg?x-oss-process=image/resize,p_40) pCloud - The Most Secure Cloud Storage [50% Off Offer]Apr 28, 2025 am 09:26 AM
pCloud - The Most Secure Cloud Storage [50% Off Offer]Apr 28, 2025 am 09:26 AMSecure Your Data with pCloud: A Comprehensive Guide to Linux Installation pCloud, a leading secure cloud storage service, provides a robust platform for managing your files and data. This guide details the installation process on Linux systems. About
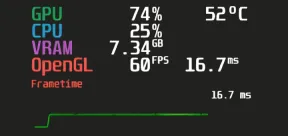 MangoHud - Monitor FPS, CPU & GPU Usage in Linux GamesApr 28, 2025 am 09:25 AM
MangoHud: A powerful tool for real-time monitoring of Linux gaming performance MangoHud is a powerful and lightweight tool designed for gamers, developers, and anyone who wants to monitor system performance in real time. It acts as an overlay for Vulkan and OpenGL applications, displaying important information such as FPS, CPU and GPU usage, temperature, etc. This article will explore the functions, working principles and usage of MangoHud, and provide step-by-step instructions for installing and configuring MangoHud on Linux systems. What is MangoHud? MangoHud is an open source project available on GitHub and aims to provide a simple and customizable way to monitor
 5 Must-Know Linux Command Line Archive Tools – Part 1Apr 28, 2025 am 09:23 AM
Managing archived files is a common task in Linux. This article, the first of a two-part series, explores five powerful command-line archive tools, detailing their features and usage with examples. 1. The tar Command: A Versatile Archiving Utility t
 Top 7 Tools to Compare Files in Linux (with Examples)Apr 28, 2025 am 09:21 AM
This guide explores various methods for comparing text files in Linux, a crucial task for system administrators and developers. We'll cover command-line tools and visual diff tools, highlighting their strengths and appropriate use cases. Let's assum


Hot AI Tools

Undresser.AI Undress
AI-powered app for creating realistic nude photos

AI Clothes Remover
Online AI tool for removing clothes from photos.

Undress AI Tool
Undress images for free

Clothoff.io
AI clothes remover

Video Face Swap
Swap faces in any video effortlessly with our completely free AI face swap tool!

Hot Article
Hot Tools

Notepad++7.3.1
Easy-to-use and free code editor

ZendStudio 13.5.1 Mac
Powerful PHP integrated development environment

SublimeText3 Chinese version
Chinese version, very easy to use

SublimeText3 Mac version
God-level code editing software (SublimeText3)

SublimeText3 Linux new version
SublimeText3 Linux latest version

