
Home >System Tutorial >Windows Series >Win11 Wireless Network Connection Guide
Win11 Wireless Network Connection Guide

- WBOYWBOYWBOYWBOYWBOYWBOYWBOYWBOYWBOYWBOYWBOYWBOYWBforward
- 2023-12-30 19:01:552612browse
Wifi is a network connection that many users now use. It allows us to connect to the Internet without a network cable. However, some friends don’t know how to connect to wifi after updating win11. In fact, just click on the network connection in the lower right corner. The icon is enough, let’s take a look at it below.
How to connect to wifi in win11
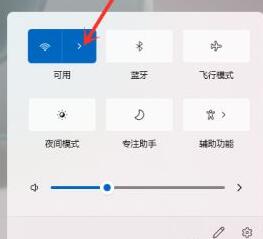
1. First, click the network button in the lower right corner of the interface to open the network connection list.

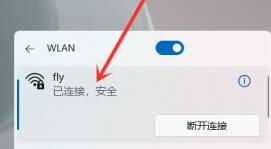
2. Find the wifi icon and click to turn it on, as shown in the picture.
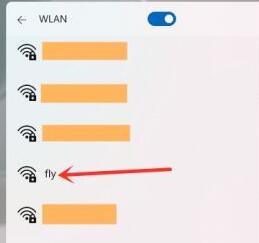
3. Then find the wifi we want to connect to and click on it.
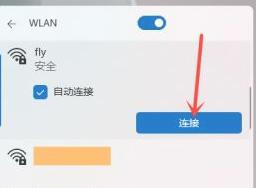
4. Check Automatically connect, and then click the "Connect" button on the lower right.
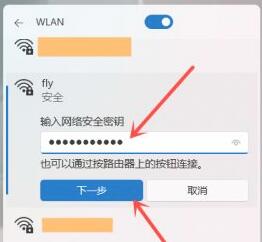
5. Then the password input interface will pop up, enter the password in the location shown, and finally click "Next"
6. We can see that the wifi has been connected successfully.
The above is the detailed content of Win11 Wireless Network Connection Guide. For more information, please follow other related articles on the PHP Chinese website!