Home >Web Front-end >JS Tutorial >How to create a time picker in ReactJS?
How to create a time picker in ReactJS?
- WBOYWBOYWBOYWBOYWBOYWBOYWBOYWBOYWBOYWBOYWBOYWBOYWBforward
- 2023-09-11 11:09:071856browse
ReactJS is a popular JavaScript library for building user interfaces. It provides developers with a flexible and efficient way to create interactive web applications. Time pickers are typically used in applications where users need to select a specific time period to make an appointment, schedule an event, or reserve resources. The time picker allows users to easily select the required time and ensures accurate time allocation. In this article, we will create a time picker step by step using reactjs.
Setting up a React application
First, let’s set up a new React application using Create React App. Open a terminal and run the following command:
Example
The code below will create a new folder called "time−picker" containing all required files and dependencies.
npx create-react-app time-picker
Method 1: Using react-time-picker library
react-time-picker library provides a simple and customizable time picker component. It provides various configuration options to adjust the appearance and behavior of the time picker.
Example
First, let us use npm to install the react-time-picker library:
npm install react-time-picker
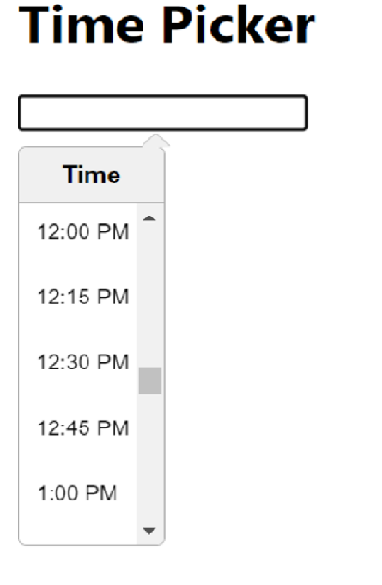
In the example below, we import the necessary dependencies, including the React and TimePicker components from the React-time-picker library. Inside the TimePickerComponent function component, we use the useState hook to define a state variable time and initialize it with the current date and time. We define a handleTimeChange function that updates the time state whenever the selected time changes. In the JSX code, we render the TimePicker component, passing the handleTimeChange function as the onChange property and the time state as the value property.
import React, { useState } from 'react';
import TimePicker from 'react-time-picker';

function TimePickerComponent() {
  const [time, setTime] = useState(new Date());

  const handleTimeChange = (newTime) => {
    setTime(newTime);
  };

  return (
    <div>
      <h1>React Time Picker Example</h1>
      <TimePicker
        onChange={handleTimeChange}
        value={time}
      />
    </div>
  );
}

export default TimePickerComponent;
Output

Method 2: Use react-datetime library
react-datetime library provides a highly customizable date and time picker component. It provides various formats and configuration options to meet the specific needs of the time picker.
Example
To use the react-datetime library, we need to install it using npm:
npm install react-datetime
In the code below, after installing the react-datetime library, we import the required dependencies, including React, the Datetime component, and the corresponding CSS files.
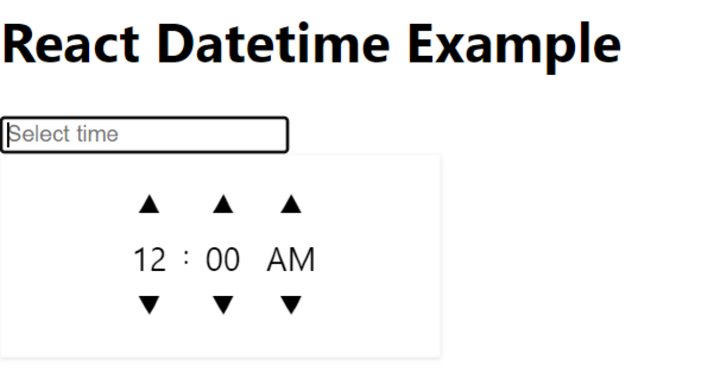
In the TimePickerComponent function component, we use the useState hook to define a state variable time, which is initialized to an empty string. We define a handleTimeChange function that receives a moment object and updates the time state by formatting the moment object into the required time format. In the JSX code, we render the Datetime component, passing the handleTimeChange function as the onChange property, the time state as the value property, and additional configuration for customization (such as dateFormat and inputProps).
import React, { useState } from 'react';
import Datetime from 'react-datetime';
import 'react-datetime/css/react-datetime.css';

function TimePickerComponent() {
  const [time, setTime] = useState('');

  const handleTimeChange = (momentObj) => {
    setTime(momentObj.format('HH:mm'));
  };

  return (
    <div>
      <h1>React Datetime Example</h1>
      <Datetime
        onChange={handleTimeChange}
        value={time}
        dateFormat={false}
        inputProps={{ placeholder: 'Select time' }}
      />
    </div>
  );
}

export default TimePickerComponent;
Output

Method 3: Using react-time-range-picker library
react-time-range-picker library provides a comprehensive solution for selecting time ranges. It allows users to select start and end times and provides visual feedback for the selected range.
Example
To use the react-time-range-picker library, we need to install it using npm:
npm install react-time-range-picker
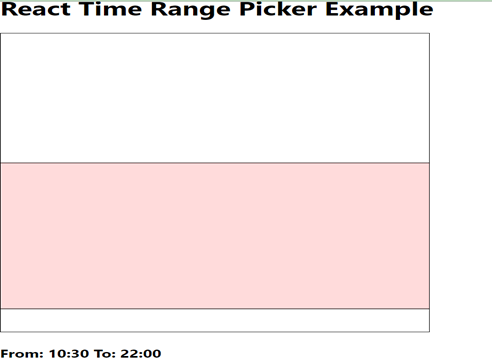
In the example below, after installing the react-time-range-picker library, we import the necessary dependencies, including React, the TimeRangePicker component, and the corresponding CSS files. Inside the TimePickerComponent function component, we define a state variable timeRange using the useState hook and initialize it with the default start and end time.
We define a handleTimeChange function that updates the timeRange state whenever the selected time range changes. In the JSX code, we render the TimeRangePicker component, passing the handleTimeChange function as the onChange property and the timeRange state as the value property.
import React, { useState } from 'react';
import TimeRangePicker from 'react-time-range-picker';
import 'react-time-range-picker/dist/styles.css';

function TimePickerComponent() {
  const [timeRange, setTimeRange] = useState({
    start: '09:00',
    end: '17:00',
  });

  const handleTimeChange = (time) => {
    setTimeRange(time);
  };

  return (
    <div>
      <h1>React Time Range Picker Example</h1>
      <TimeRangePicker
        onChange={handleTimeChange}
        value={timeRange}
      />
    </div>
  );
}

export default TimePickerComponent;
Output

in conclusion
In this article, we discussed how to create a time picker in Reactjs. We leveraged the react-time-picker, react-datetime and react-time-range-picker libraries, each providing unique features and benefits. By following the provided code examples, you can create highly customizable time pickers to suit a variety of use cases. Additionally, we discussed how to enhance the user experience by adding CSS styles to time picker components to make them more visually appealing and user-friendly.
The above is the detailed content of How to create a time picker in ReactJS?. For more information, please follow other related articles on the PHP Chinese website!
Related articles
See more- An in-depth analysis of the Bootstrap list group component
- Detailed explanation of JavaScript function currying
- Complete example of JS password generation and strength detection (with demo source code download)
- Angularjs integrates WeChat UI (weui)
- How to quickly switch between Traditional Chinese and Simplified Chinese with JavaScript and the trick for websites to support switching between Simplified and Traditional Chinese_javascript skills

