


Views are a key component in any MVC application, and the CodeIgniter application is no exception. Today we'll learn what views are and how to use them to create template solutions for your CodeIgniter projects.
The first part of this tutorial will introduce CodeIgniter beginners to what views are and how to use them in a typical application. The second half discusses the motivations for finding a template solution and guides the reader through the necessary steps to create a simple yet effective template library.
If you want to do more with CodeIgniter, check out the range of CodeIgniter plugins and code scripts on Envato Market.

What is a view?
Views are special files in CodeIgniter used to store markup for application output, usually consisting of HTML and simple PHP markup.
"A view is just a web page, or a page fragment, like header, footer, sidebar, etc. In fact, views have the flexibility to be embedded into other views (within other views, etc.) if you need it hierarchically Types of institutions.”
Views are loaded from within controller methods, and the content within the view is then displayed in the browser.
How to load the view
To load (and display) views in CodeIgniter, we use the built-in Loader library.
$this->load->view('hello_world', $data, true/false);
This line of code will tell CodeIgniter to look for hello_world.php in the application/views folder and display the contents of that file in the browser.
Please note that CodeIgniter allows you to exclude the .php suffix, thereby saving some keystrokes when typing the name of the view file to load.
The second parameter $data is optional and takes an associative array or object. This array/object is used to pass data to the view file so it can be used or referenced in the view.
The last optional parameter determines whether the content of the view is displayed in the browser window or returned as a string. This parameter defaults to false, which displays the content in the browser. We will see later in this tutorial how to use this parameter when creating template solutions.
Create and display views
To set up our first view, create a new file called hello_world.php in application/views and write the following simple HTML in it:
<!DOCTYPE html>
<html>
	<head>
		<title>Hello World!</title>
	</head>
	<body>
		<p>
			Hello world!
		</p>
	</body>
</html>
Now to display this view in the browser it has to be loaded into the controller method using the above method.
So, let’s create a new controller file called hello_world.php in application/controllers and place the following code in it. From this controller we will load the newly created view.
<?php if ( ! defined('BASEPATH')) exit('No direct script access allowed');

class Hello_world extends CI_Controller {

	public function index()
	{
		$this->load->view('hello_world');
	}
}
Pointing your browser to http://your-ci-install.com/index.php/ will now cause the HTML in application/views/hello_world.php to be output in the browser . You have successfully loaded the view!
Load multiple views
Splitting your views into multiple files can make your site easier to maintain and reduce the possibility of duplicating code.
Displaying a single view is fine, but you may want to split the output into multiple different files, such as Header, Content, and Footer views.
Simply call the $this->load->view() method multiple times to load multiple views. CodeIgniter then joins the view's contents together before displaying them in the browser.
Create a new file called header.php in application/views and cut and paste the first few lines from the original hello_world.php file.
<!DOCTYPE html>
<html>
	<head>
		<title>Hello World!</title>
	</head>
	<body>
Likewise, create another file called footer.php in application/views and move the last two lines of hello_world.php into it.
</body>
</html>
This leaves the hello_world.php view file containing only our page content.
<p>
	Hello world!
</p>
Now to show the page again, we have to load all three views (header.php, hello_world.php, footer.php) sequentially in the controller.
Reopen application/controllers/hello_world.php and add new $this->load->view() calls above and below the existing calls.
<?php if ( ! defined('BASEPATH')) exit('No direct script access allowed');

class Hello_world extends CI_Controller {

	public function index()
	{
		$this->load->view('header');
		$this->load->view('hello_world');
		$this->load->view('footer');
	}
}
Since the header and footer views are now separate from the hello_world view, this means they can be used in conjunction with any other view in the site. This means that the code in the header and footer files does not need to be copied to any other views in the project that require this code.
Obviously, this is a huge benefit, since any changes to the HTML or content in the view (for example, adding a new stylesheet to the header) can only be done to one file, not to every file!
在视图中使用来自控制器的数据
现在,我们将研究从控制器传递数据,以便可以在视图内使用或输出它们。
为此,我们将传递一个关联数组 $data 作为 $this->load->view() 调用中的第二个参数。
该数组的值将在加载的视图中作为变量进行访问,由各自的键命名。
$data = array(

	'title'		=>	'Hello World!',
	'content'	=>	'This is the content',
	'posts'		=>	array('Post 1', 'Post 2', 'Post 3')

);

$this->load->view('hello_world', $data);
上面的代码将为变量 $title 赋予值“Hello World!”在 hello_world 视图内。
如何在视图中使用变量
一旦我们将数据传递到视图文件,就可以按照通常的方式使用变量。
通常,视图文件将使用传递的数据来:
- 显示变量的值
- 循环数组或对象属性
- 使用条件语句显示或隐藏标记
我将通过快速示例来说明如何执行每个操作。
要显示变量的内容,请使用简单且熟悉的 echo 语句:
<h1><?php echo $title; ?></h1>
循环遍历数组或对象是视图文件中的常见任务,可以使用 foreach 循环来实现:
<ul>
<?php foreach($posts as $post) { ?>

	<li><?php echo $post; ?></li>

<?php } ?>
</ul>
可以在视图文件中使用简单的条件语句来稍微改变输出,具体取决于传递的数据。
一般来说,您希望尽量减少视图中条件语句的使用,因为过度使用可能会导致包含“业务逻辑”的复杂视图文件。将视图拆分为不同的文件,并决定在控制器中显示哪个文件是更可取的。
<?php if ( $logged_in ) { ?>

	<p><?php echo 'Welcome '.$user_name; ?></p>

<?php } else { ?>

	<p>Please login</p>

<?php } ?>
上面的示例将显示“欢迎”消息,或要求用户登录的请求,具体取决于 $logged_in 的值(true/false)。
CodeIgniter 中的模板
我们已经了解了如何将视图拆分为单独的较小文件可以帮助组织和减少 CodeIgniter 项目中的文件数量,但现在每个显示页面的实例都需要进行多个加载视图调用。
假设您有单独的页眉和页脚视图,它们用于形成模板。项目中您希望使用此模板加载和显示页面的每个实例,都必须调用三个视图加载。这不仅会使您的控制器变得混乱,还会导致大量重复代码 - 这正是我们希望通过拆分文件来摆脱的事情。
如果您现在想向此模板添加额外的标记,例如侧边栏菜单。它可以放在标题视图中,但更适合放在自己的单独视图中。将这个新视图添加到现有模板意味着要遍历视图加载的每个实例,然后添加另一个实例。这可能会很快变得混乱。
我们需要一种方法,能够将显示单个页面内容的视图文件嵌入模板内,而无需重复代码,并且允许轻松高效地对模板进行修改。
以下步骤将指导您创建一个简单的 CodeIgniter 库来满足这些需求,以及:
- 为您的视图实施可预测且可维护的目录结构
- 允许使用多个不同的模板
- 将页面视图的加载减少为一行代码
一旦库被编写并放入我们的 CodeIgniter 工具带中,我们将能够显示一个模板化页面,如下所示:
$this->template->load('template_name', 'body_view');
好多了!
我们的模板解决方案将使用包含模板完整标记的视图文件,以及要嵌入其中的另一个视图文件(包含页面内容)的占位符。
占位符实际上只是一个名为 $body 的变量。当使用我们的库加载模板化视图时,相应的正文视图文件的内容将被分配给此 $body,将视图嵌入到模板中。
第 1 步:设置目录
我们希望为要存放的视图文件强制执行一个合理且可预测的目录系统,以便我们的视图:
- 易于定位
- 轻松确定它们属于应用程序的哪个区域
- 易于维护
我们的目录系统还允许库巧妙地确定在哪里查找视图文件,从而减少加载模板化视图所需的代码量。
在 application/views 目录中创建一个新文件夹,并将其命名为 templates。该文件夹将保存不同的模板视图。
第 2 步:创建库
CodeIgniter 中的库只是 PHP 类,并且像视图一样加载到控制器中。
$this->load->library('class_name');
您在 CodeIgniter 项目中使用的自定义库存储在 application/libraries 文件夹中。要开始编写我们的模板库,请在此文件夹中创建一个名为 Template.php 的新文件,并将以下代码放入:
<?php  if ( ! defined('BASEPATH')) exit('No direct script access allowed');

	class Template
	{
		var $ci;

		function __construct()
		{
			$this->ci =& get_instance();
		}
	}
上面的代码定义了一个名为 Template 的新类或库,以及其中的 __construct() 方法。
此方法将 CodeIgniter 超级对象分配给 $ci 类变量,从而通过在通常的方法调用中将 $this 替换为 $this->ci 来允许使用 CodeIgniter 的所有资源。
当CodeIgniter框架加载该库时,会自动调用__construct()方法。
编写加载方法
现在我们将编写实际加载模板视图的方法。我们希望向此函数传递最多三个参数:
- 模板名称
- 主体视图名称(可选)
- 要传递给视图的数据(可选)
调用此方法的结果将是在浏览器中显示模板视图,并嵌入其中的正文视图(如果提供了)。
在 __construct() 方法下面,放置以下代码:
function load($tpl_view, $body_view = null, $data = null)
{
	if ( ! is_null( $body_view ) )
	{
		if ( file_exists( APPPATH.'views/'.$tpl_view.'/'.$body_view ) )
		{
			$body_view_path = $tpl_view.'/'.$body_view;
		}
		else if ( file_exists( APPPATH.'views/'.$tpl_view.'/'.$body_view.'.php' ) )
		{
			$body_view_path = $tpl_view.'/'.$body_view.'.php';
		}
		else if ( file_exists( APPPATH.'views/'.$body_view ) )
		{
			$body_view_path = $body_view;
		}
		else if ( file_exists( APPPATH.'views/'.$body_view.'.php' ) )
		{
			$body_view_path = $body_view.'.php';
		}
		else
		{
			show_error('Unable to load the requested file: ' . $tpl_name.'/'.$view_name.'.php');
		}

		$body = $this->ci->load->view($body_view_path, $data, TRUE);

		if ( is_null($data) )
		{
			$data = array('body' => $body);
		}
		else if ( is_array($data) )
		{
			$data['body'] = $body;
		}
		else if ( is_object($data) )
		{
			$data->body = $body;
		}
	}

	$this->ci->load->view('templates/'.$tpl_view, $data);
}
上面的代码首先检查 $body_view 参数是否已提供给该方法。该变量将保存要用作模板视图中的正文的视图的名称。
if ( ! is_null( $body_view ) )
如果提供了该参数,则会进行一系列 file_exists 检查,以尝试在目录系统中找到视图文件。
if ( file_exists( APPPATH.'views/'.$tpl_view.'/'.$body_view ) )
{
	$body_view_path = $tpl_view.'/'.$body_view;
}
else if ( file_exists( APPPATH.'views/'.$tpl_view.'/'.$body_view.'.php' ) )
{
	$body_view_path = $tpl_view.'/'.$body_view.'.php';
}
该代码首先尝试在 application/views 文件夹中与模板同名的文件夹内找到视图文件。
如果项目的各个部分与其他部分截然不同并且使用不同的模板,这非常有用。在这些情况下,将这些视图文件分组在一起是有意义的。
例如,许多网站为不同的部分(例如博客)显示不同的模板。在我们的系统中,博客视图文件可以放置在 application/views/blog 文件夹中,将它们与主站点视图分开。
如果无法在此文件夹中找到视图文件,则将 .php 附加到文件名末尾,并再次进行检查。这只是为了像本地 $this->load->view() 调用一样排除 .php 。
如果仍然找不到该文件,则会进一步检查其位置。
else if ( file_exists( APPPATH.'views/'.$body_view ) )
{
	$body_view_path = $body_view;
}
else if ( file_exists( APPPATH.'views/'.$body_view.'.php' ) )
{
	$body_view_path = $body_view.'.php';
}
else
{
	show_error('Unable to load the requested file: ' . $tpl_name.'/'.$view_name.'.php');
}
这次,代码检查视图文件是否位于 application/views 文件夹内,如果找不到,则追加 .php 并再次检查。
如果文件位于这些位置之一,则将路径分配给 $body_view_path,否则使用 CodeIgniter 内置的 show_error() 函数会抛出错误消息,并终止脚本。
如果成功找到正文视图文件,则内容将分配给 $body 变量。
$body = $this->ci->load->view($body_view_path, $data, TRUE);
我们将 $data 参数(如果未提供则为 null)传递给视图加载调用,并将第三个参数设置为 true 以将视图的输出作为字符串返回。
我们现在将这个 $body 变量添加到 $data 中的数据列表中,以便在加载时可以将其嵌入到模板视图中。
if ( is_null($data) )
{
	$data = array('body' => $body);
}
else if ( is_array($data) )
{
	$data['body'] = $body;
}
else if ( is_object($data) )
{
	$data->body = $body;
}
如果 $data 未提供给 load() 调用,则 $data 会被分配到键 body 下包含 $body 的数组。如果提供了参数,则将 $body 添加到列表中,方法是将其分配给数组键或对象属性,两者也都命名为 body。
$body 变量现在可以在模板视图文件中用作嵌入视图的占位符。
我们方法的最后一行从 application/views/templates 文件夹加载模板视图文件,并在第二个参数中传递 $data 变量。
$this->ci->load->view('templates/'.$tpl_name, $data);
就是这样!该库现在可以投入使用了。
使用库
要开始使用我们的库,让我们在 application/views/templates 中创建一个名为 default.php 的模板视图,并将以下 HTML/PHP 放入其中:
<!DOCTYPE html>
<html>

	<head>
		<title><?php echo $title; ?></title>
	</head>

	<body>

		<h1 id="Default-template">Default template</h1>

		<div class="wrapper">

			<?php echo $body; ?>

		</div>

	</body>

</html>
在此模板中,我们引用两个变量,$title 和 $body。
回想一下,在我们的模板文件中,$body 用作嵌入视图的占位符。
我们现在将制作另一个视图嵌入到该模板中。在 application/views/ 中创建一个名为 content.php 的新文件,并将以下简单的 HTML 放入其中:
<p>
	Hello world!
</p>
我们现在准备从控制器内加载模板化页面视图。
在任何控制器方法内,放置以下代码以在 default 模板内显示 content 视图。
$data = array(

	'title' => 'Title goes here',

);

$this->load->library('template');
$this->template->load('default', 'content', $data);
注意:必须先加载该库,然后才能调用 load 方法。为了避免每次需要显示模板视图时加载库,
通过将类添加到 application/config/autoload.php 中的库数组来自动加载该类。
如果您希望在模板中嵌入字符串而不是视图文件,只需使用键 body 将字符串分配给 $data 数组,并传递 null 作为加载调用中的第二个参数。
$data = array(

	'title' => 'Title goes here',
	'body'	=> 'The string to be embedded here!'

);

$this->template->load('default', null, $data);
快速提示
我发现按控制器甚至它们所属的方法将视图文件分组到文件夹中确实有助于使我的视图井然有序且易于查找。
以这种方式组织视图会导致目录结构紧密遵循 controller/method 的 URL 架构。
例如,假设您的项目有一个名为 Members 的控制器,包含方法 list。
list 视图文件的适当位置应位于 application/views/members 或 application/views/members/list(如果此方法加载多个视图)。
然后可以使用我们的库通过以下代码将该视图嵌入到模板中:
$this->template->load('template_name', 'members/list');
结论
本教程中讨论的模板解决方案只是在 CodeIgniter 中实现模板的众多不同方法之一。
希望您现在应该知道什么是视图,以及如何在您的 CodeIgniter 项目中有效且高效地使用它们。
本教程中讨论的模板解决方案只是在 CodeIgniter 中实现模板的众多不同方法之一。有多种不同的方法,我鼓励读者研究其他方法并确定哪种方法最适合您的项目。
如果您对本教程有任何意见或疑问,或者对不同模板解决方案有任何见解,请在下面发表评论!感谢您的阅读。
The above is the detailed content of CodeIgniter: Explore views and templates. For more information, please follow other related articles on the PHP Chinese website!

 11 Best PHP URL Shortener Scripts (Free and Premium)Mar 03, 2025 am 10:49 AM
Long URLs, often cluttered with keywords and tracking parameters, can deter visitors. A URL shortening script offers a solution, creating concise links ideal for social media and other platforms. These scripts are valuable for individual websites a
 Introduction to the Instagram APIMar 02, 2025 am 09:32 AM
Following its high-profile acquisition by Facebook in 2012, Instagram adopted two sets of APIs for third-party use. These are the Instagram Graph API and the Instagram Basic Display API.As a developer building an app that requires information from a
 Working with Flash Session Data in LaravelMar 12, 2025 pm 05:08 PM
Laravel simplifies handling temporary session data using its intuitive flash methods. This is perfect for displaying brief messages, alerts, or notifications within your application. Data persists only for the subsequent request by default: $request-
 Build a React App With a Laravel Back End: Part 2, ReactMar 04, 2025 am 09:33 AM
This is the second and final part of the series on building a React application with a Laravel back-end. In the first part of the series, we created a RESTful API using Laravel for a basic product-listing application. In this tutorial, we will be dev
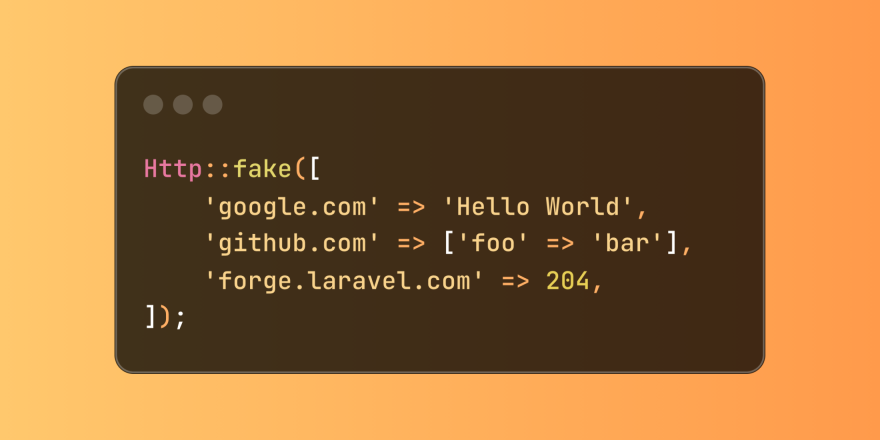 Simplified HTTP Response Mocking in Laravel TestsMar 12, 2025 pm 05:09 PM
Laravel provides concise HTTP response simulation syntax, simplifying HTTP interaction testing. This approach significantly reduces code redundancy while making your test simulation more intuitive. The basic implementation provides a variety of response type shortcuts: use Illuminate\Support\Facades\Http; Http::fake([ 'google.com' => 'Hello World', 'github.com' => ['foo' => 'bar'], 'forge.laravel.com' =>
 cURL in PHP: How to Use the PHP cURL Extension in REST APIsMar 14, 2025 am 11:42 AM
The PHP Client URL (cURL) extension is a powerful tool for developers, enabling seamless interaction with remote servers and REST APIs. By leveraging libcurl, a well-respected multi-protocol file transfer library, PHP cURL facilitates efficient execution of various network protocols, including HTTP, HTTPS, and FTP. This extension offers granular control over HTTP requests, supports multiple concurrent operations, and provides built-in security features.
 12 Best PHP Chat Scripts on CodeCanyonMar 13, 2025 pm 12:08 PM
Do you want to provide real-time, instant solutions to your customers' most pressing problems? Live chat lets you have real-time conversations with customers and resolve their problems instantly. It allows you to provide faster service to your custom
 Announcement of 2025 PHP Situation SurveyMar 03, 2025 pm 04:20 PM
The 2025 PHP Landscape Survey investigates current PHP development trends. It explores framework usage, deployment methods, and challenges, aiming to provide insights for developers and businesses. The survey anticipates growth in modern PHP versio


Hot AI Tools

Undresser.AI Undress
AI-powered app for creating realistic nude photos

AI Clothes Remover
Online AI tool for removing clothes from photos.

Undress AI Tool
Undress images for free

Clothoff.io
AI clothes remover

AI Hentai Generator
Generate AI Hentai for free.

Hot Article
Hot Tools

SublimeText3 Chinese version
Chinese version, very easy to use

SublimeText3 Mac version
God-level code editing software (SublimeText3)

MantisBT
Mantis is an easy-to-deploy web-based defect tracking tool designed to aid in product defect tracking. It requires PHP, MySQL and a web server. Check out our demo and hosting services.

Dreamweaver CS6
Visual web development tools

DVWA
Damn Vulnerable Web App (DVWA) is a PHP/MySQL web application that is very vulnerable. Its main goals are to be an aid for security professionals to test their skills and tools in a legal environment, to help web developers better understand the process of securing web applications, and to help teachers/students teach/learn in a classroom environment Web application security. The goal of DVWA is to practice some of the most common web vulnerabilities through a simple and straightforward interface, with varying degrees of difficulty. Please note that this software

