Home >Common Problem >A practical guide to screen recording on Windows 11 for free
A practical guide to screen recording on Windows 11 for free
- WBOYWBOYWBOYWBOYWBOYWBOYWBOYWBOYWBOYWBOYWBOYWBOYWBforward
- 2023-08-13 18:17:221621browse
How to Screen Record on Windows 11
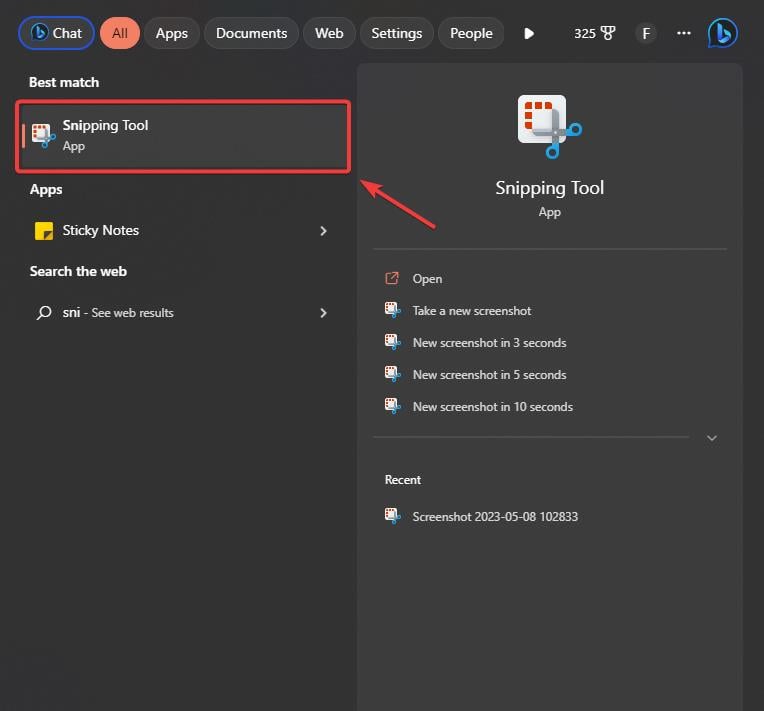
- Go to the Settings bar of Windows 11 and enter Snipping Tool.
- Open the screenshot tool.

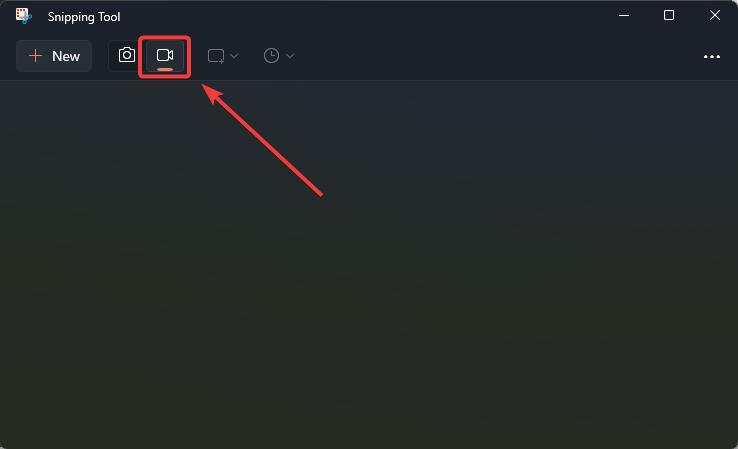
- After opening the snipping tool, go to the top bar and click on the camera icon to select the screen recording feature.

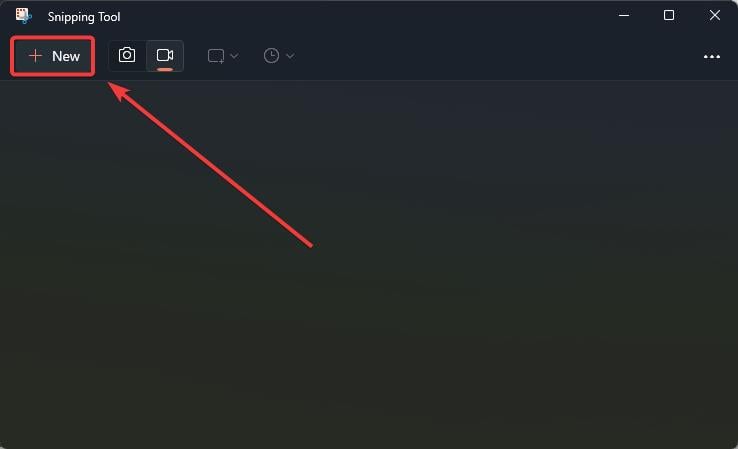
- Next, click the "New" button and select the area you want to record.

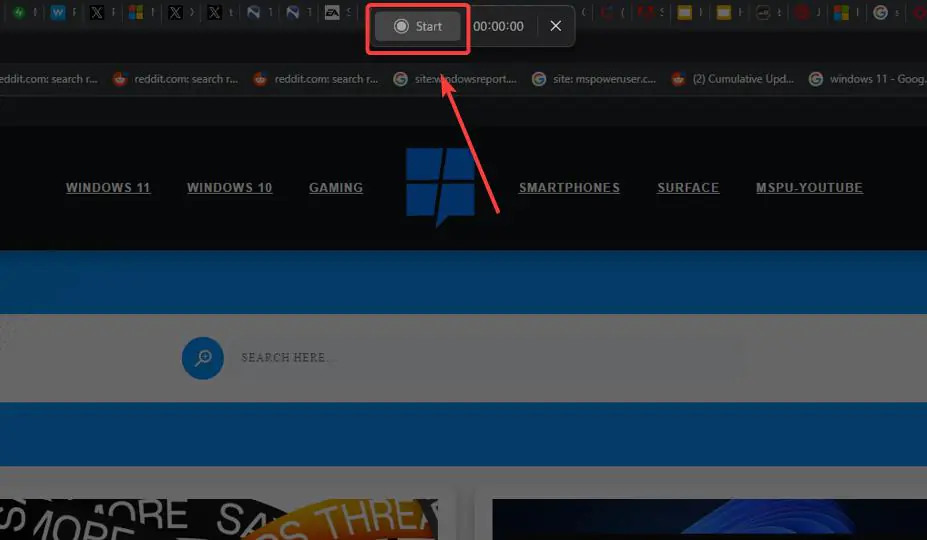
- After selection, click the "Start" button to start recording.

- To stop recording, click the red button.
That's it. You just recorded your screen on Windows 11 for free.
To save the video, you just click Ctrl S and the Save window will open. You will be able to save the screen recording in your preferred folder.
However, you should know that Snipping Tool only saves files in MP4 format and does not have any other format available.
The above is the detailed content of A practical guide to screen recording on Windows 11 for free. For more information, please follow other related articles on the PHP Chinese website!
Statement:
This article is reproduced at:yundongfang.com. If there is any infringement, please contact admin@php.cn delete
Previous article:Availability of Azure OpenAI service will be expanded as Microsoft announced yesterdayNext article:Availability of Azure OpenAI service will be expanded as Microsoft announced yesterday


