Home >Common Problem >How to Screen Record Using Snipping Tool on Windows 11
How to Screen Record Using Snipping Tool on Windows 11
- WBOYWBOYWBOYWBOYWBOYWBOYWBOYWBOYWBOYWBOYWBOYWBOYWBforward
- 2023-04-28 11:13:063277browse
How to use Snipping Tool for screen recording on Windows 11
If you want, you can use Snipping Tool to record a selected application or part of the screen or the entire desktop. Once the recording is complete, you can preview, save, or share it with others. It's also worth noting that the recording feature doesn't support audio.
Use the Snipping Tool for screen recording on Windows 11:
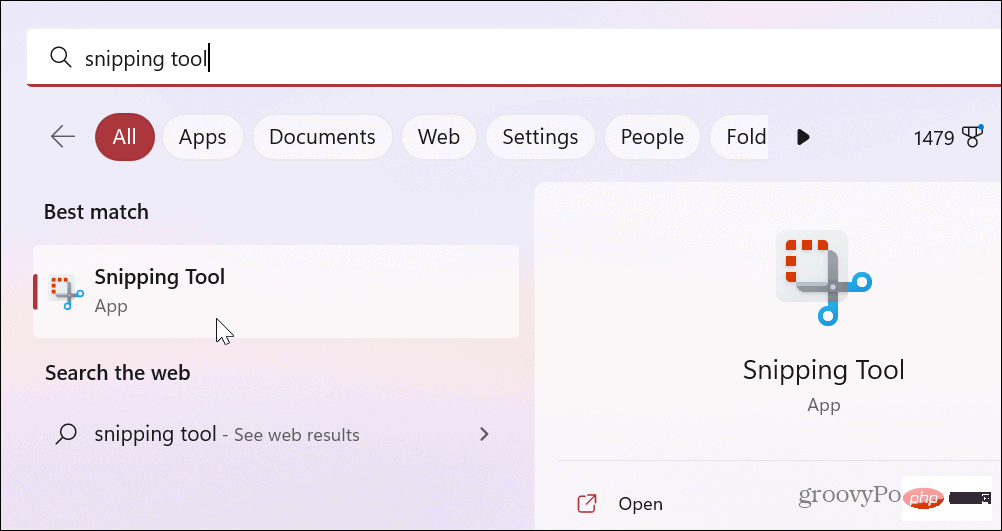
- Open the Start menu.
- Type Snipping Tool and click on the Snipping Tool app under the Best match section.

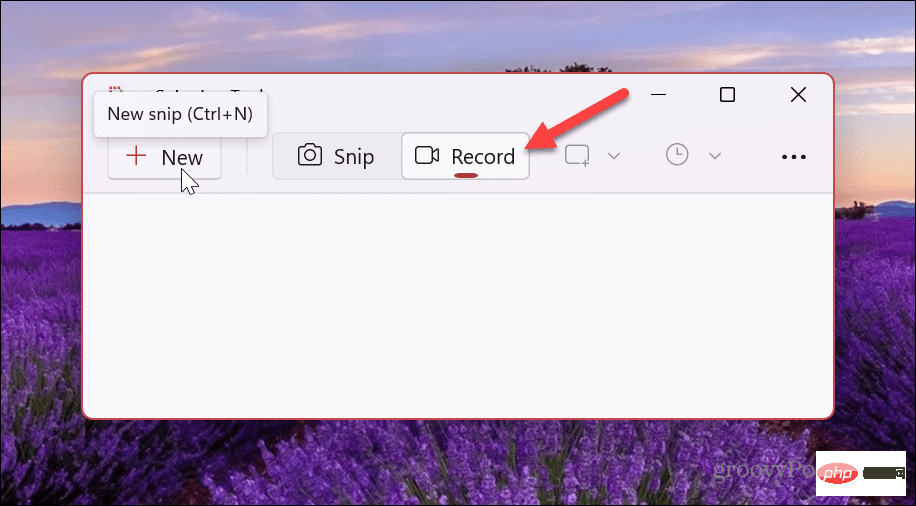
- When the Snipping Tool starts, select the Record button and click the New button.

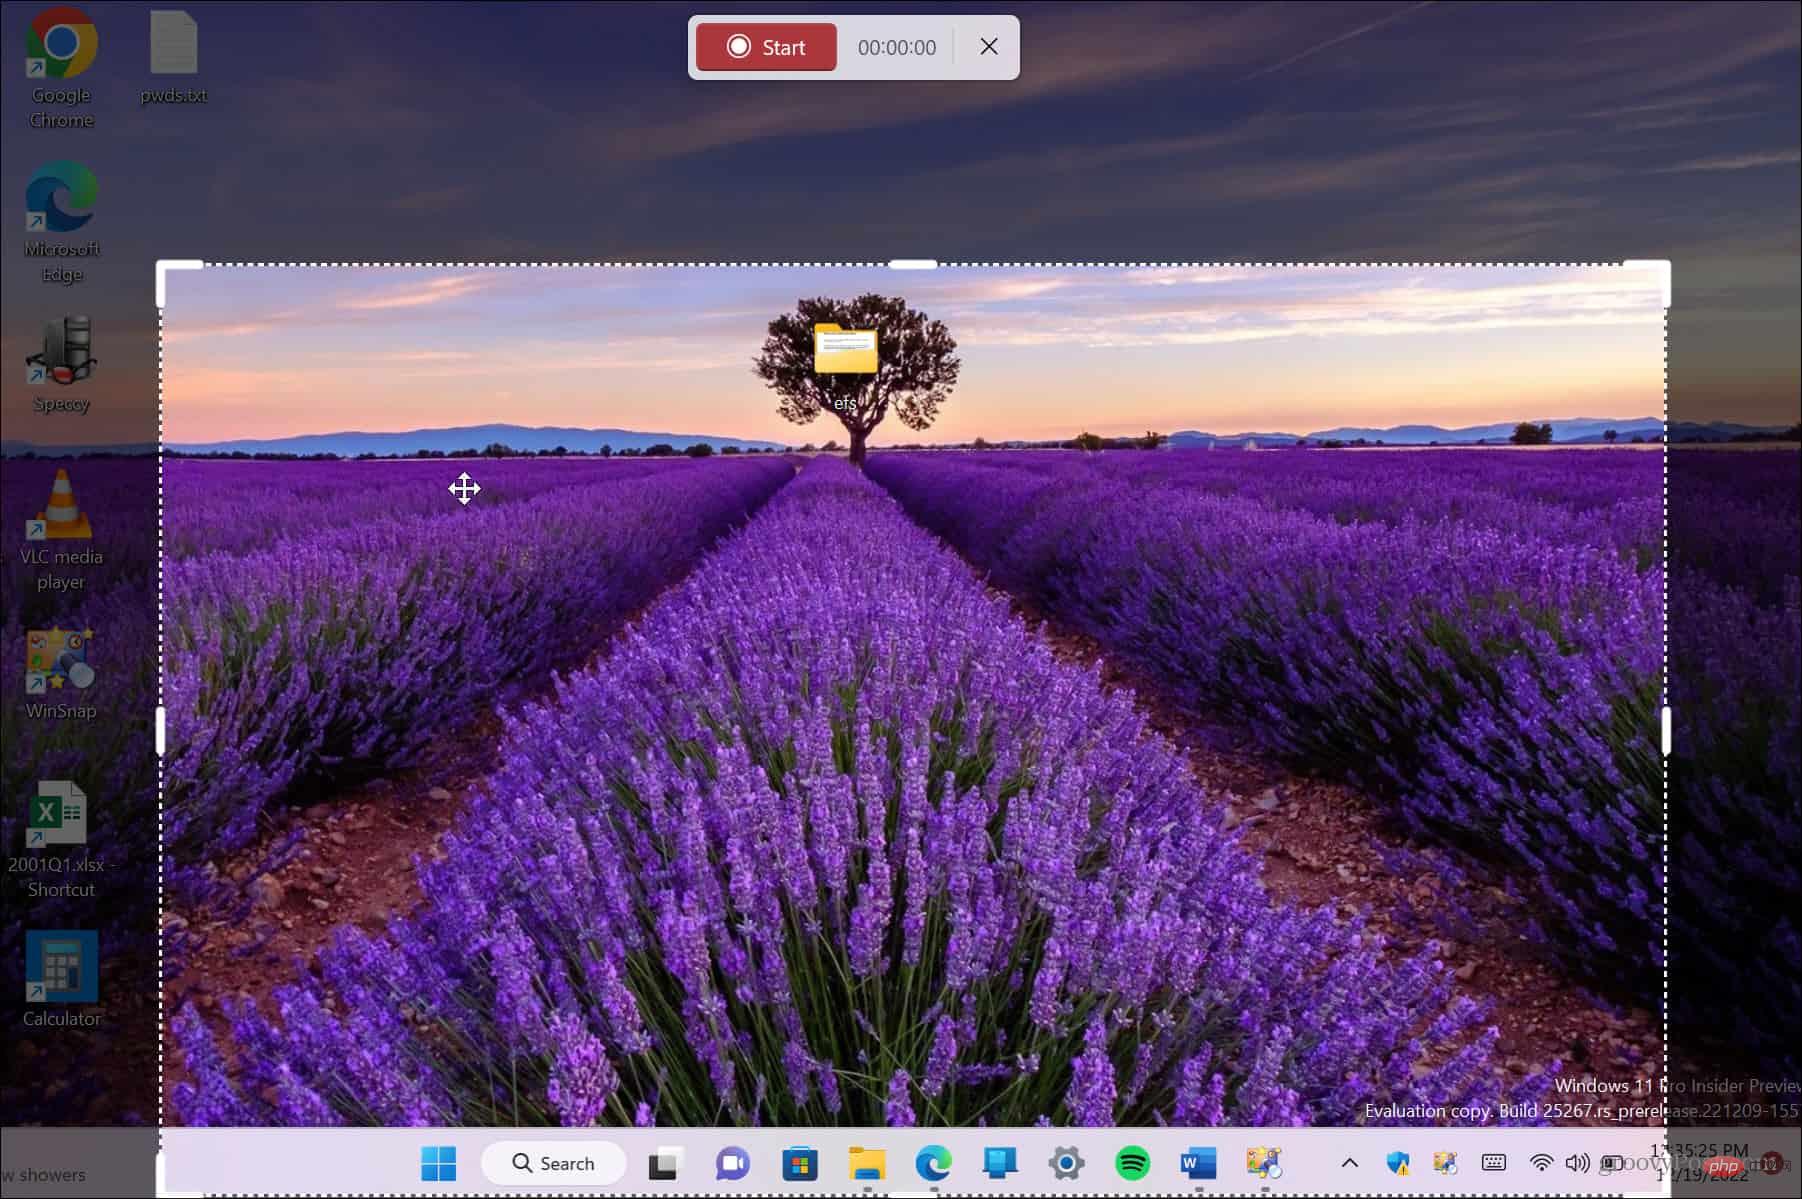
- Drag the outline to select the area to record.

- After selecting the part you want to record, click the "Start " button.
- The Snipping Tool will count down from three and you can click on the item of the step you want to record. You can see the recording time at the top.

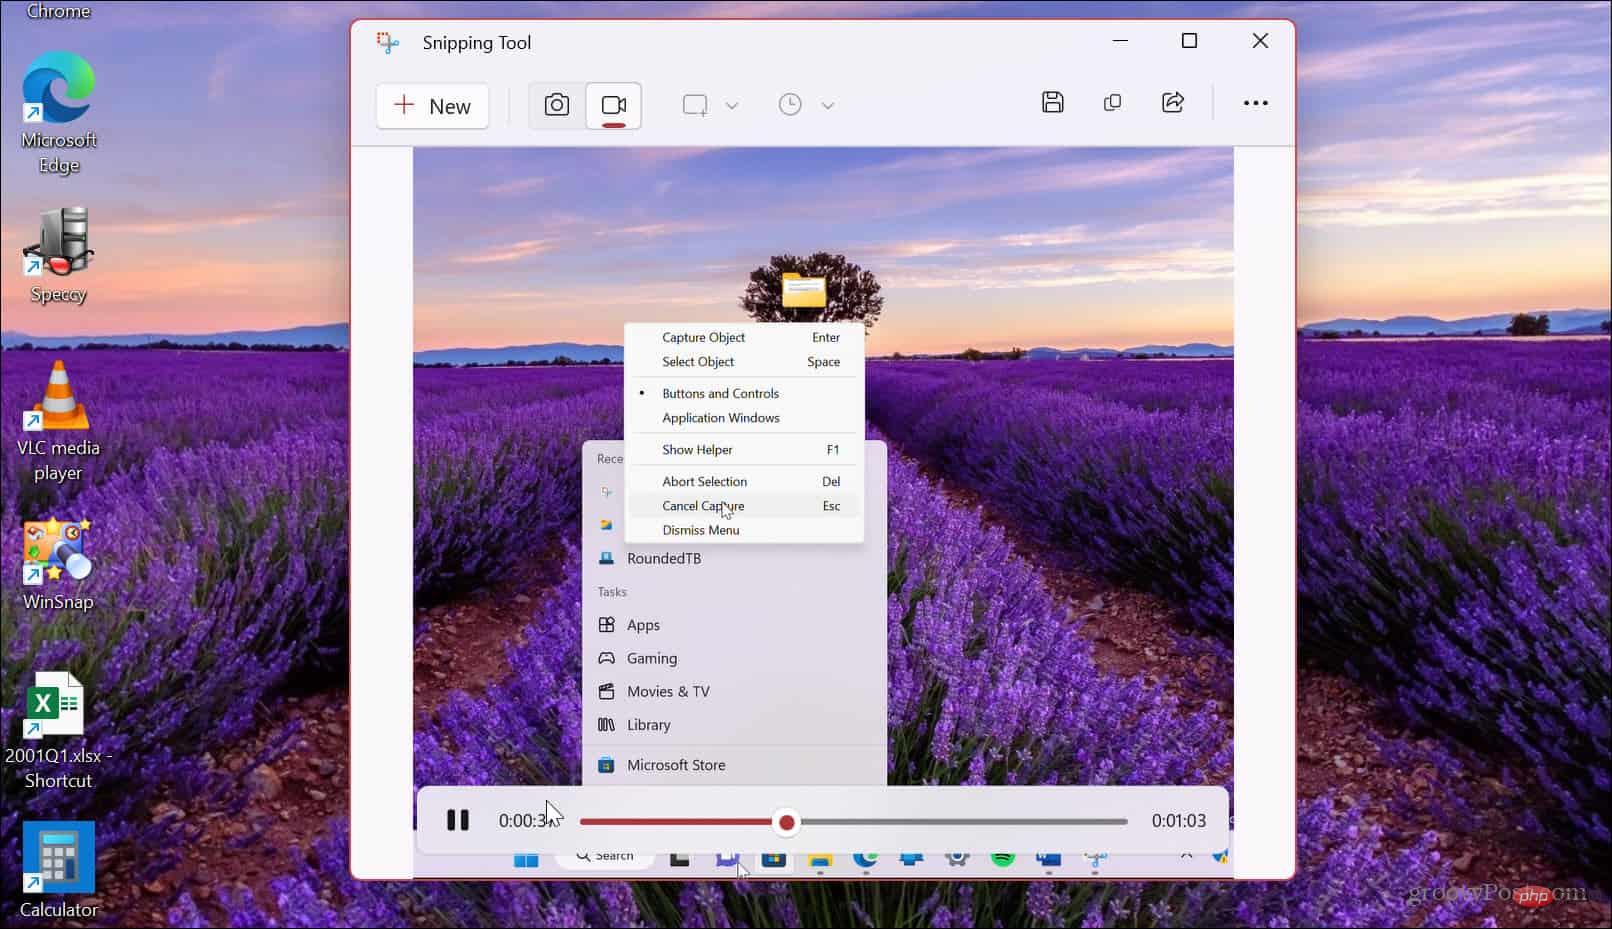
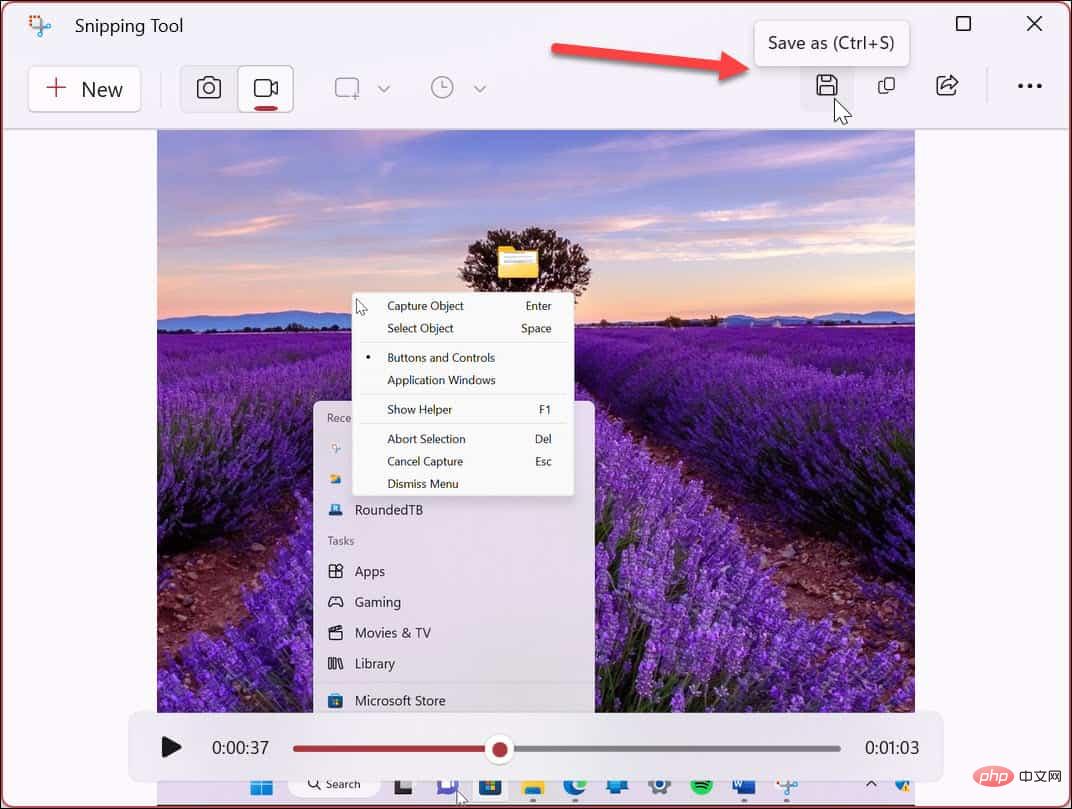
- A preview of your recording will be available in the Snipping Tool. You can use the basic playback controls at the bottom to see what you have.

- If you are satisfied with your screen recording, click the Save button in the upper right corner.

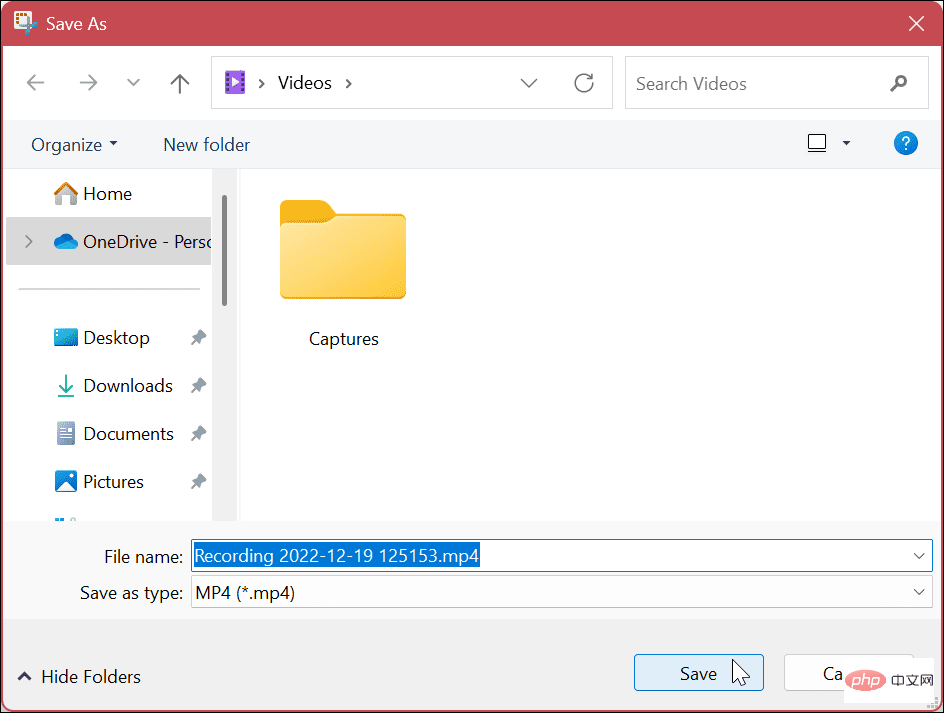
- Navigate to the location where you want to save the screen recording and click Save.

- The video will be saved in MP4 format and you can watch it with any compatible video player. Saving it in a standard format allows you to share it with people who don't have a snipping tool installed. You can also send it to Mac users.

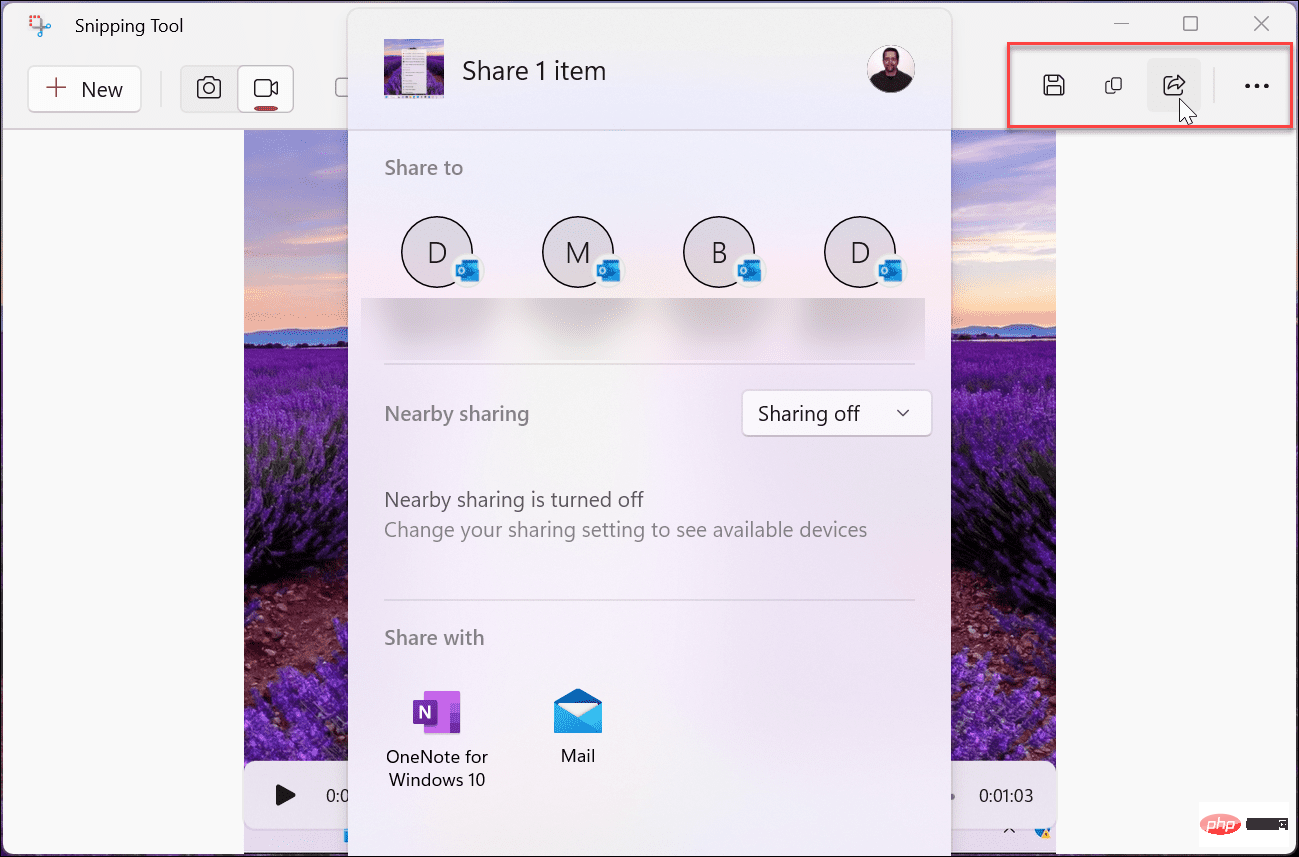
If you don't want to save the recording, you can copy and paste it into a different application (such as Paint). You can also share it directly from the app by clicking the "Share" button next to the "Save" button in the upper right corner.
Record your PC on Windows 11
The ability to record your screen on Windows 11 can be useful in many situations. Maybe you need to share a video that contains the steps a user needs to complete a task, or maybe you need to share it with your IT department. Whatever the reason, the snipping tool on Windows 11 is built-in, and best of all, it’s free.
It doesn't have the flashy features you get from SnagIt or the professional screen recorder Camtasia, but it's a straightforward way to explain the steps to a friend or colleague.
Snipping Tool is a "simple" screen capture solution. However, it doesn't always work as expected. If you're having trouble, learn how to fix Snipping Tool not working. Additionally, you may also be interested in fixing the keyboard shortcut Windows Shift S not working.
Your PC isn't the only thing you can record to. For example, check out Screen Recording on Android or How to Screen Record on a Chromebook. We'd be remiss if we didn't mention Apple, too. Learn how to take a screenshot on your Mac or learn how to take a screenshot on your iPhone or iPad.
The above is the detailed content of How to Screen Record Using Snipping Tool on Windows 11. For more information, please follow other related articles on the PHP Chinese website!
Related articles
See more- What will happen if the IP addresses of the two hosts are ANDed with their subnet masks?
- Apple's 'Business Essentials' service expanded to all small businesses
- How to turn on Win7 slider hardware acceleration?
- Reasons and solutions for the blue screen without text when booting from the U disk in Win10 system
- How to hide the recycle bin icon in Win7 system


