Home >Common Problem >Windows 7 system restore step tutorial
Windows 7 system restore step tutorial
- WBOYWBOYWBOYWBOYWBOYWBOYWBOYWBOYWBOYWBOYWBOYWBOYWBforward
- 2023-07-11 21:57:086173browse
We can repair fault problems through the system restore function that comes with win7. However, by default, the system restore function is turned off and needs to be turned on manually by the user. Today I will talk about the step-by-step tutorial of Windows 7 system restore. Let's take a look.
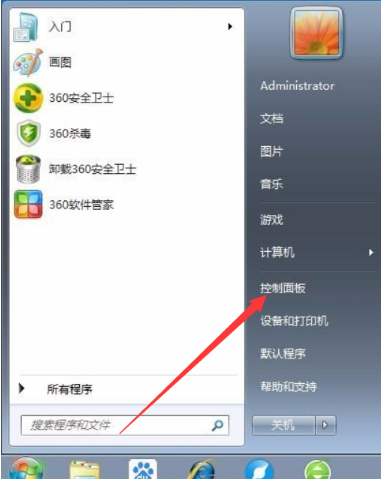
1. Open the Start menu and click Control Panel.

#2. After opening, select System and Security.

3. Find Backup and Restore and click Restore files from backup below.

4. Click the Open System Restore button in the System Restore column.

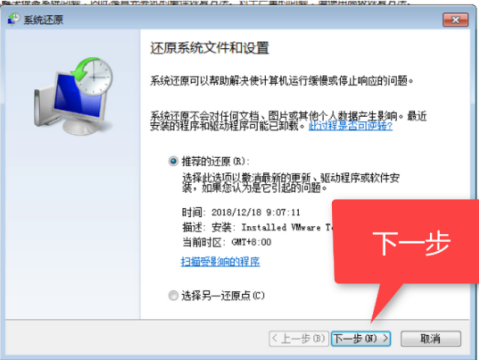
#5. The System Restore Wizard appears, click Next.

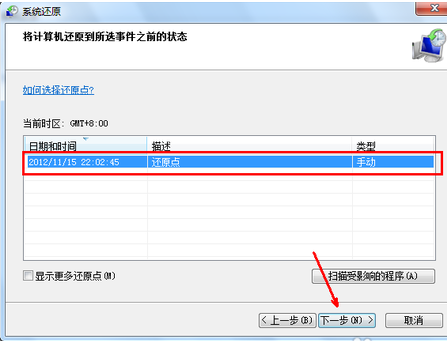
#6. Select a restore point and click next.

#7. Confirm the restore point and wait for the computer to automatically restore.

The above is the step-by-step tutorial on restoring the Windows 7 system. I hope it can help everyone.
The above is the detailed content of Windows 7 system restore step tutorial. For more information, please follow other related articles on the PHP Chinese website!

