Home >Common Problem >How to turn off the automatic upgrade function in win10
How to turn off the automatic upgrade function in win10
- WBOYWBOYWBOYWBOYWBOYWBOYWBOYWBOYWBOYWBOYWBOYWBOYWBforward
- 2023-07-10 12:25:291280browse
The default setting of the win10 system is to turn on the automatic upgrade function, which can help users upgrade to the new version on time. However, sometimes the win10 update process may directly affect our work, and sometimes the new version may cause computer problems. Blue screens and other situations occur, so many netizens want to turn off the win10 upgrade function. The following is the method I share with you on how to turn off the automatic upgrade function in win10.
How to turn off the automatic upgrade function in win10
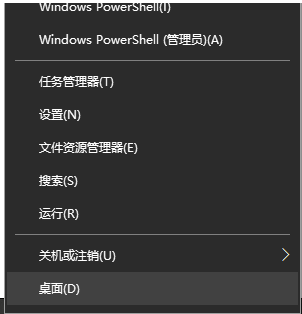
Click the Microsoft Start button above the computer, right-click on the pop-up page, and select "Run" to start the application. Or directly use the keyboard shortcut win r to open the run menu bar.

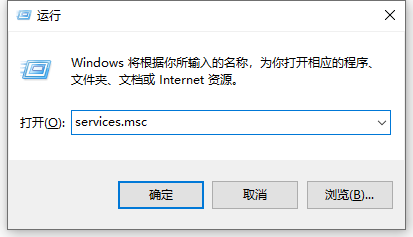
#2. Type services.msc to confirm and open the service window.

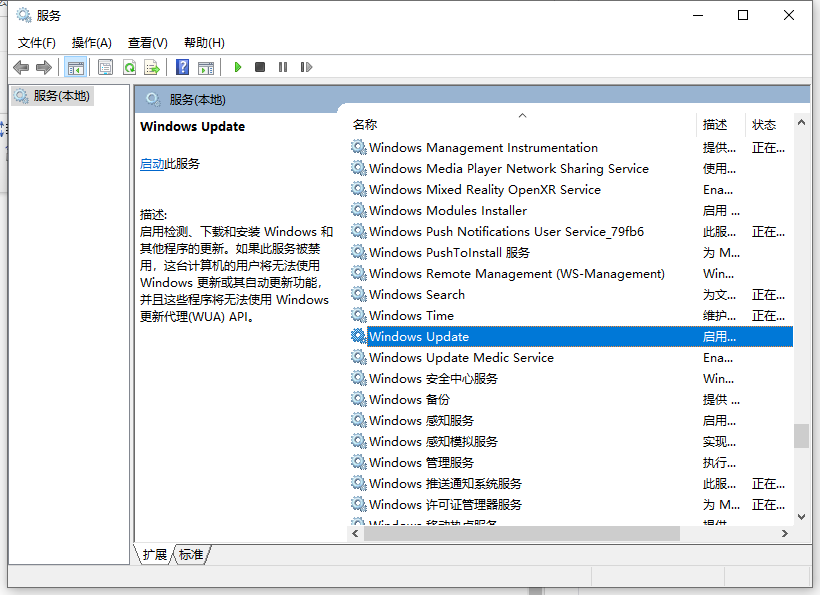
#3. In the pop-up page, find and double-click WindowsUpdate to open it.

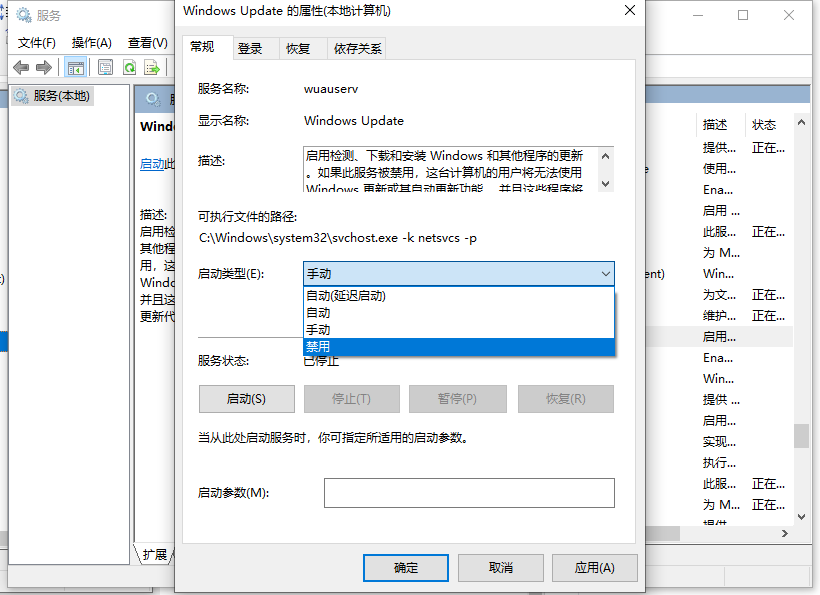
4. Then in the windows update feature, change the enabled status to disabled, and then click to confirm.

#5. From now on, the automatic upgrade function of the win10 system will be turned off. If you need to upgrade next time, follow the procedure to cancel the ban, and then go to the system to update.
The above is how to turn off the automatic upgrade of win10. The actual operation is relatively simple. Friends in need can refer to the example tutorial for actual operation.
The above is the detailed content of How to turn off the automatic upgrade function in win10. For more information, please follow other related articles on the PHP Chinese website!
Related articles
See more- What will happen if the IP addresses of the two hosts are ANDed with their subnet masks?
- Apple's 'Business Essentials' service expanded to all small businesses
- How to turn on Win7 slider hardware acceleration?
- Reasons and solutions for the blue screen without text when booting from the U disk in Win10 system
- How to hide the recycle bin icon in Win7 system

