Home >Common Problem >Win10 registry repair steps
Win10 registry repair steps
- PHPzforward
- 2023-06-30 23:01:434315browse
How to repair the registry in Win10 system? What is the method to repair the registry in Win10 system? The system registry is a very important part of the computer. No one can guarantee that they can remember all the registry entries. When the registry is modified or for other reasons When the registry fails, you can use cmd to repair the registry. So how to repair the registry in Win10? The following editor will bring you the steps to repair the registry in Win10 system, let’s take a look!

Win10 system registry repair steps
Use the Win S key combination to open the run window, enter the CMD command and open the command prompt with administrator rights. As shown in the picture:

2. Paste the following code into the command prompt, and press the Enter key after entering it.
01reg add "HKEY_LOCAL_MACHINESOFTWAREMicrosoftWindowsSelfHostApplicability" /v "BranchName" /d "fbl_release" /t REG_SZ /f
02reg add "HKEY_LOCAL_MACHINESOFTWAREMicrosoftWindowsSelfHostApplicability" /v "ThresholdRiskLevel" /d "low" /t REG_SZ / f
03reg delete "HKEY_LOCAL_MACHINESOFTWAREMicrosoftWindowsSelfHostApplicability" /v "ThresholdInternal" /f
04reg delete "HKEY_LOCAL_MACHINESOFTWAREMicrosoftWindowsSelfHostApplicability" /v "ThresholdOptedIn" /f;As shown in the figure:

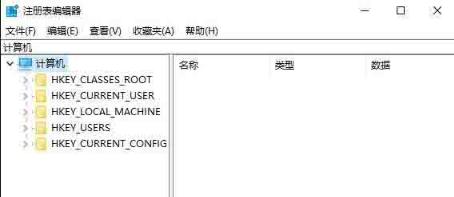
3. Press Win R and enter: regedit and press Enter to open the registry. In the end, your registry should look like this:

The above is [ How to Repair the Registry in Win10 System - Steps to Repair the Registry in Win10 System] All the content is here, more exciting tutorials are on this site!
The above is the detailed content of Win10 registry repair steps. For more information, please follow other related articles on the PHP Chinese website!

