Home >Common Problem >How to use Win11 cross-device sharing
How to use Win11 cross-device sharing
- WBOYWBOYWBOYWBOYWBOYWBOYWBOYWBOYWBOYWBOYWBOYWBOYWBforward
- 2023-06-29 15:24:102145browse
How to use Win11 cross-device sharing? With the launch of Win11 system, many users have downloaded and experienced it. However, during use, they will inevitably encounter situations where they are not clear about how to operate. Some users want to use the cross-device sharing function, so they should How to do it? The editor has compiled the Win11 cross-device sharing operation tutorial below. If you are interested, follow the editor and read on!

1. First, press the Windows logo key on the keyboard, or click the Start icon at the bottom of the taskbar.
2. In the open Start menu window, find and click Settings under Pinned Applications.
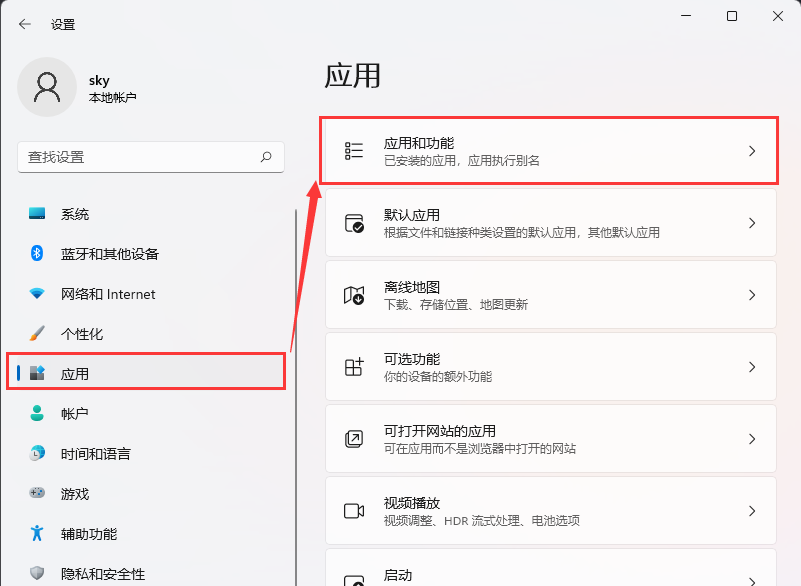
3. In the Windows Settings window, click Applications on the left and Applications and Features (installed applications, application execution aliases) on the right.

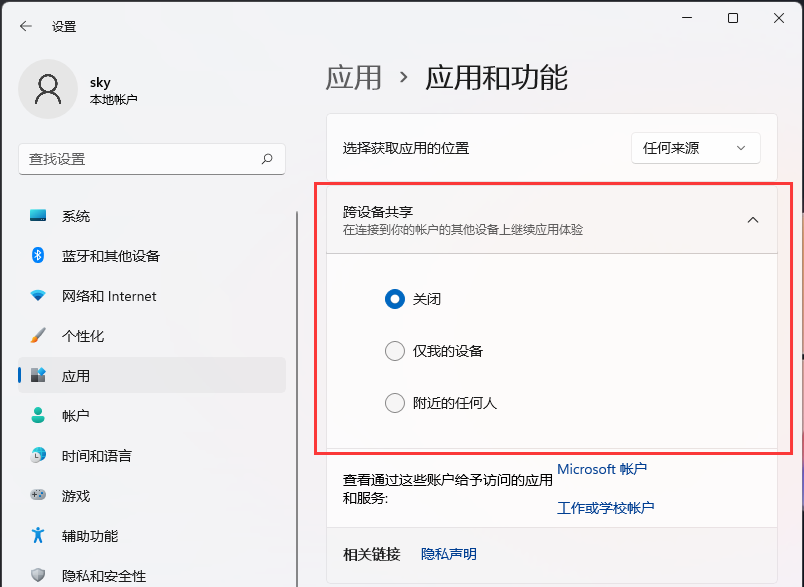
4. The current path is: Applications > Applications and Features, you can share across devices (continue the application experience on other devices connected to your account) Setup is done.
1) Off - Select this option to turn off cross-device sharing.
2) My devices only - Select this option to only allow sharing between your devices.
3) Anyone nearby - Select this option to allow sharing between all nearby devices.

The above is the detailed content of How to use Win11 cross-device sharing. For more information, please follow other related articles on the PHP Chinese website!
Related articles
See more- Obscura 3 camera app gets overhauled interface and new shooting modes
- Studio Buds, the 'best-selling” Beats product yet, now available in three new colors
- Microsoft apps on Windows 11 22H2 encounter issues after restoring the system
- How to rename and move files with spaces in their names from the command line
- How to disable search highlighting in Windows 11?

