WebSocket is a protocol for full-duplex communication over a single TCP connection that has been designated as a standard by the W3C. Using WebSocket makes data exchange between client and server much simpler. In the WebSocket protocol, the browser and the server only need to complete a handshake, and a persistent connection can be directly created between the two for bidirectional data transmission.

Features
When using WebSocket, you need to create a connection first, which makes Websocket a stateful protocol, part of the status information (such as identity authentication, etc.) can be omitted in the subsequent communication process.
WebSocket connections are created on port 80 (ws) or 443 (wss), the same port used by HTTP, so that basically all firewalls will not block WebSocket connections.
WebSocket uses the HTTP protocol for handshakes, so it can be naturally integrated into web browsers and HTTP servers at no additional cost.
Heartbeat messages (ping and pong) will be sent repeatedly to keep the WebSocket connection active.
Using this protocol, both the server and the client can know when a message starts or arrives.
WebSocket will send a special closing message when the connection is closed.
WebSocket supports cross-domain and can avoid Ajax limitations.
The HTTP specification requires browsers to limit the number of concurrent connections to two connections per host name, but when we use Websocket, this limit does not exist after the handshake is completed. , because the connection at this time is no longer an HTTP connection.
The WebSocket protocol supports extensions. Users can extend the protocol to implement some customized sub-protocols.
WebSocket has better binary support and better compression.
1. Add dependencies
<dependency>
    <groupid>org.springframework.boot</groupid>
    <artifactid>spring-boot-starter-websocket</artifactid>
</dependency>
2. Configure WebSocket
The Spring framework provides a WebSocket's STOMP support, STOMP is a simple interoperable protocol commonly used for asynchronous messaging between clients through an intermediary server.
@Configuration
@EnableWebSocketMessageBroker
public class WebSocketConfig implements WebSocketMessageBrokerConfigurer {

    @Override
    public void configureMessageBroker(MessageBrokerRegistry config) {
        // 设置消息代理的前缀,如果消息的前缀为"/topic",就会将消息转发给消息代理(broker)
        // 再由消息代理广播给当前连接的客户端
        config.enableSimpleBroker("/topic");
        // 下面方法可以配置一个或多个前缀,通过这些前缀过滤出需要被注解方法处理的消息。
        // 例如这里表示前缀为"/app"的destination可以通过@MessageMapping注解的方法处理
        // 而其他 destination(例如"/topic""/queue")将被直接交给 broker 处理
        config.setApplicationDestinationPrefixes("/app");
    }

    @Override
    public void registerStompEndpoints(StompEndpointRegistry registry) {
        // 定义一个前缀为"/chart"的endpoint,并开启 sockjs 支持。
        // sockjs 可以解决浏览器对WebSocket的兼容性问题,客户端将通过这里配置的URL建立WebSocket连接
        registry.addEndpoint("/chat").withSockJS();
    }
}
3. Server code
According to the configuration of WebSocketConfig above, the @MessageMapping("/hello") annotated method will be used to receive "/app/hello" ” path, after processing the message in the annotation method, the message is forwarded to the path defined by @SendTo. The @SendTo path is a path prefixed with "/topic", so the message is handed over to the message broker, and then broadcasted by the broker.
@Controller
public class DemoController {

    @MessageMapping("/hello")
    @SendTo("/topic/greetings")
    public Message greeting(Message message) throws Exception {
        return message;
    }

}
@Data
public class Message {

    private String name;

    private String content;

}
4. Front-end code
Create the chat.html page in the resources/static directory as the chat page.
nbsp;html>
<meta>
<title>群聊</title>
<script></script>
<script></script>
<script></script>
<script>
var stompClient = null;
// 根据是否已连接设置页面元素状态
function setConnected(connected) {
$("#connect").prop("disabled", connected);
$("#disconnect").prop("disabled", !connected);
if (connected) {
$("#conversation").show();
$("#chat").show();
}
else {
$("#conversation").hide();
$("#chat").hide();
}
$("#greetings").html("");
}
// 建立一个WebSocket连接
function connect() {
// 用户名不能为空
if (!$("#name").val()) {
return;
}
// 首先使用 SockJS 建立连接
var socket = new SockJS('/chat');
// 然后创建一个STOMP实例发起连接请求
stompClient = Stomp.over(socket);
// 连接成功回调
stompClient.connect({}, function (frame) {
// 进行页面设置
setConnected(true);
// 订阅服务端发送回来的消息
stompClient.subscribe('/topic/greetings', function (greeting) {
// 将服务端发送回来的消息展示出来
showGreeting(JSON.parse(greeting.body));
});
});
}
// 断开WebSocket连接
function disconnect() {
if (stompClient !== null) {
stompClient.disconnect();
}
setConnected(false);
}
// 发送消息
function sendName() {
stompClient.send("/app/hello",
{},
JSON.stringify({'name': $("#name").val(),'content':$("#content").val()}));
}
// 将服务端发送回来的消息展示出来
function showGreeting(message) {
$("#greetings")
.append("<div>" + message.name+":"+message.content + "");
}
// 页面加载后进行初始化动作
$(function () {
$( "#connect" ).click(function() { connect(); });
$( "#disconnect" ).click(function() { disconnect(); });
$( "#send" ).click(function() { sendName(); });
});
</script>
<div>
<label>请输入用户名:</label>
<input>
</div>
<div>
<button>连接</button>
<button>断开连接</button>
</div>
<div>
<div>
<label>请输入聊天内容:</label>
<input>
</div>
<button>发送</button>
<div>
<div>群聊进行中...</div>
</div>
</div>
SockJS is a browser JavaScript library that provides objects similar to WebSocket. SockJS provides you with a consistent, cross-browser Javascript API that creates a low-latency, full-duplex, cross-domain communication channel between the browser and the web server.
STOMP is Simple (or Streaming) Text Orientated Messaging Protocol. It provides an interoperable connection format that allows STOMP clients to communicate with any STOMP message broker (Broker) interacts.
@SendTo annotation, which forwards the message processed by the method to the broker, and then the broker broadcasts the message.
5. Verification results
Our request address: http://127.0.0.1:8086/chat.html
Login user: piao

Login user: admin

The above is the detailed content of How SpringBoot uses WebSocket to send group messages. For more information, please follow other related articles on the PHP Chinese website!
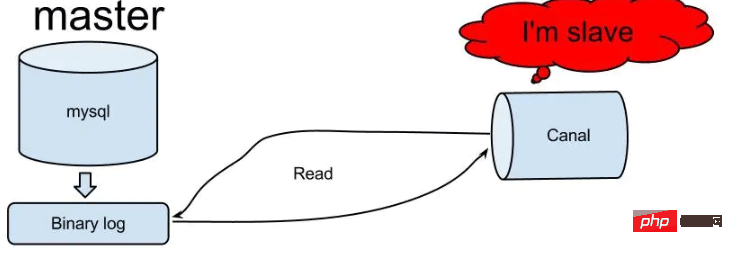 怎么使用SpringBoot+Canal实现数据库实时监控May 10, 2023 pm 06:25 PM
Canal工作原理Canal模拟MySQLslave的交互协议,伪装自己为MySQLslave,向MySQLmaster发送dump协议MySQLmaster收到dump请求,开始推送binarylog给slave(也就是Canal)Canal解析binarylog对象(原始为byte流)MySQL打开binlog模式在MySQL配置文件my.cnf设置如下信息:[mysqld]#打开binloglog-bin=mysql-bin#选择ROW(行)模式binlog-format=ROW#配置My
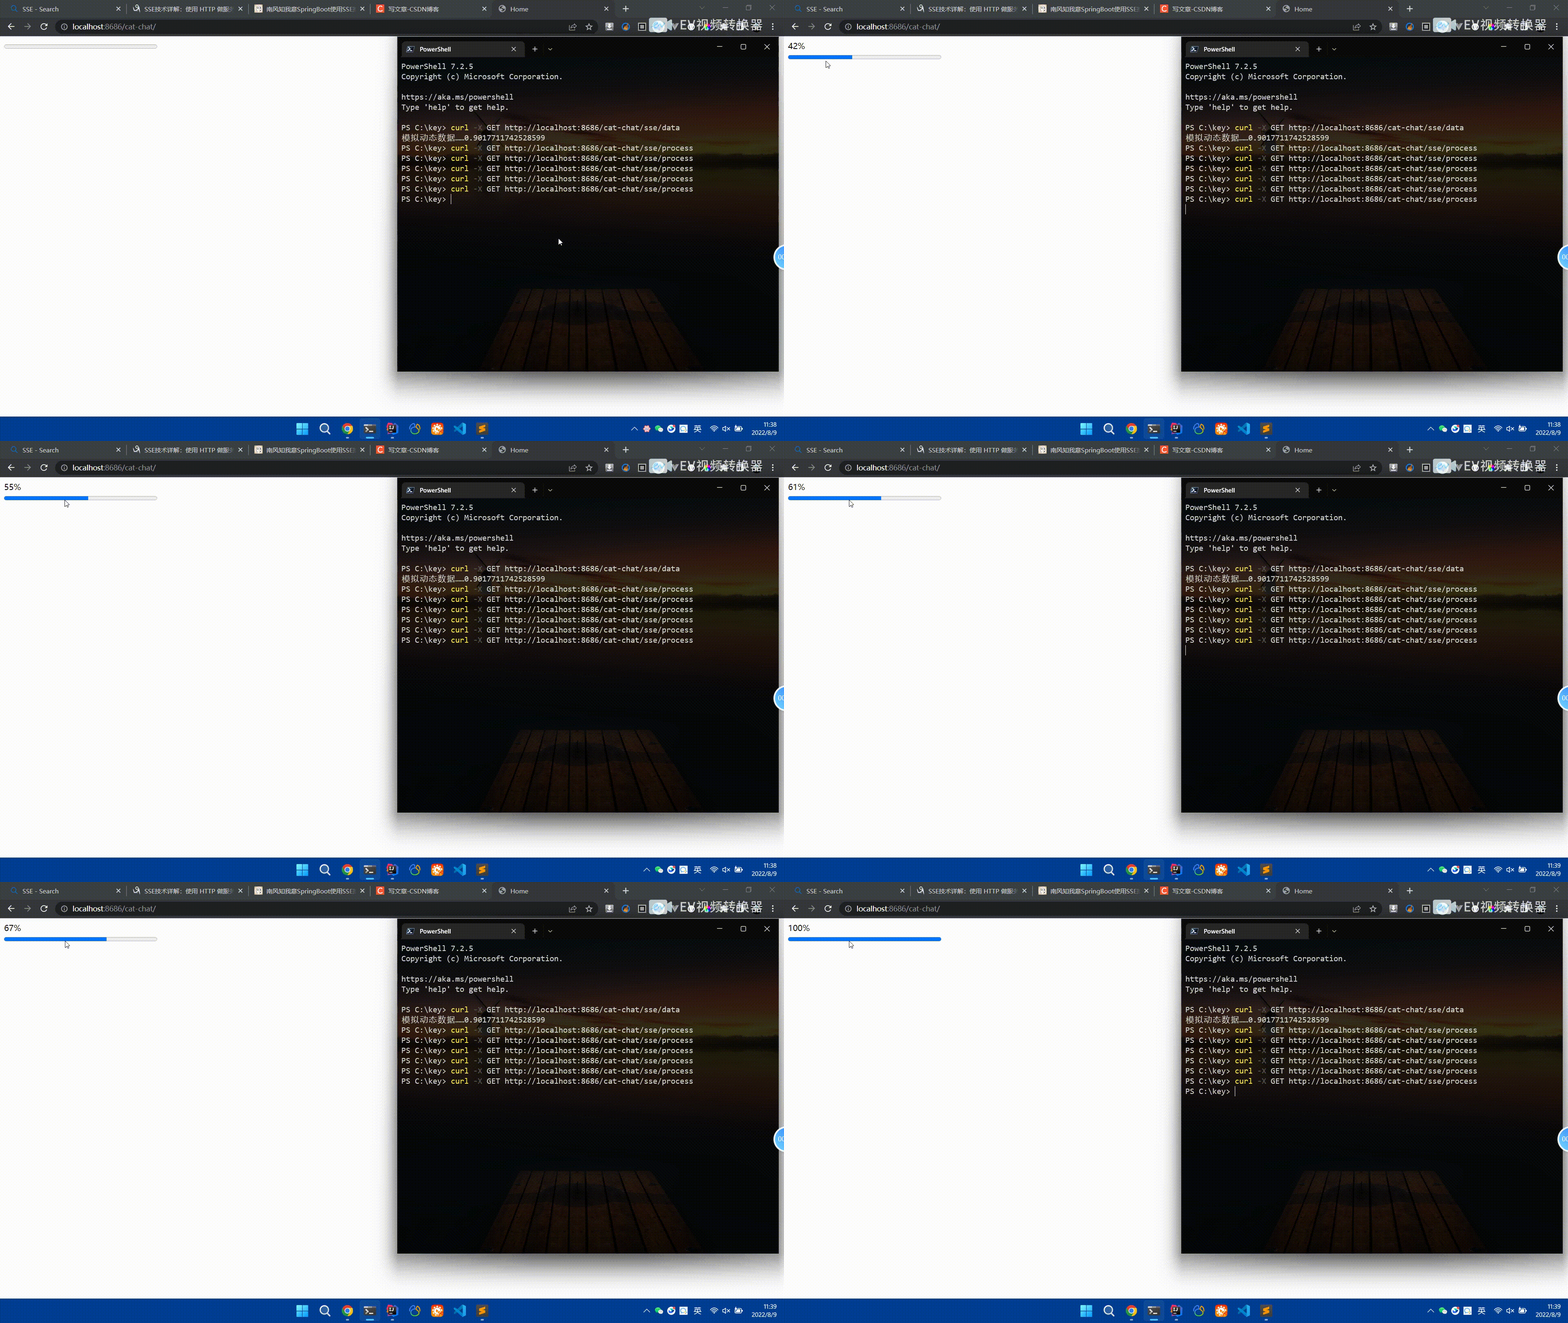 Spring Boot怎么使用SSE方式向前端推送数据May 10, 2023 pm 05:31 PM
前言SSE简单的来说就是服务器主动向前端推送数据的一种技术,它是单向的,也就是说前端是不能向服务器发送数据的。SSE适用于消息推送,监控等只需要服务器推送数据的场景中,下面是使用SpringBoot来实现一个简单的模拟向前端推动进度数据,前端页面接受后展示进度条。服务端在SpringBoot中使用时需要注意,最好使用SpringWeb提供的SseEmitter这个类来进行操作,我在刚开始时使用网上说的将Content-Type设置为text-stream这种方式发现每次前端每次都会重新创建接。最
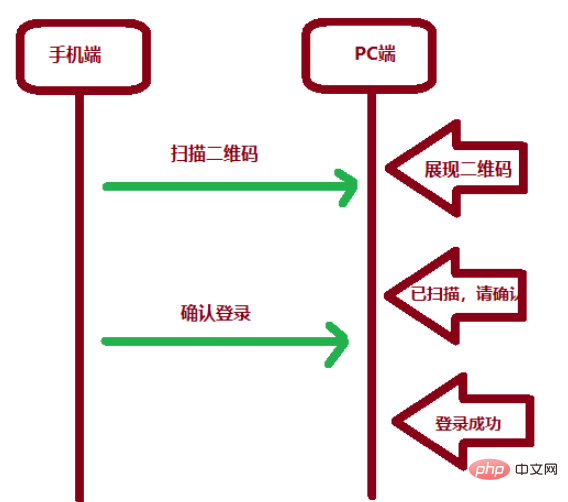 SpringBoot怎么实现二维码扫码登录May 10, 2023 pm 08:25 PM
一、手机扫二维码登录的原理二维码扫码登录是一种基于OAuth3.0协议的授权登录方式。在这种方式下,应用程序不需要获取用户的用户名和密码,只需要获取用户的授权即可。二维码扫码登录主要有以下几个步骤:应用程序生成一个二维码,并将该二维码展示给用户。用户使用扫码工具扫描该二维码,并在授权页面中授权。用户授权后,应用程序会获取一个授权码。应用程序使用该授权码向授权服务器请求访问令牌。授权服务器返回一个访问令牌给应用程序。应用程序使用该访问令牌访问资源服务器。通过以上步骤,二维码扫码登录可以实现用户的快
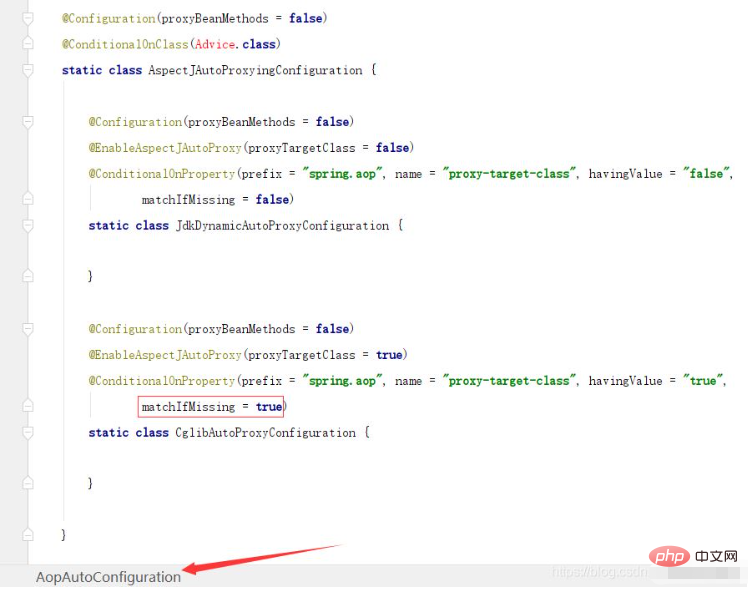 SpringBoot/Spring AOP默认动态代理方式是什么May 10, 2023 pm 03:52 PM
1.springboot2.x及以上版本在SpringBoot2.xAOP中会默认使用Cglib来实现,但是Spring5中默认还是使用jdk动态代理。SpringAOP默认使用JDK动态代理,如果对象没有实现接口,则使用CGLIB代理。当然,也可以强制使用CGLIB代理。在SpringBoot中,通过AopAutoConfiguration来自动装配AOP.2.Springboot1.xSpringboot1.xAOP默认还是使用JDK动态代理的3.SpringBoot2.x为何默认使用Cgl
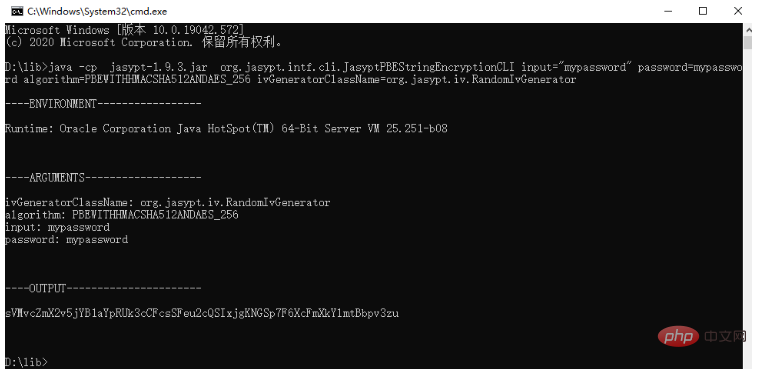 spring boot怎么对敏感信息进行加解密May 10, 2023 pm 02:46 PM
我们使用jasypt最新版本对敏感信息进行加解密。1.在项目pom文件中加入如下依赖:com.github.ulisesbocchiojasypt-spring-boot-starter3.0.32.创建加解密公用类:packagecom.myproject.common.utils;importorg.jasypt.encryption.pbe.PooledPBEStringEncryptor;importorg.jasypt.encryption.pbe.config.SimpleStrin
 使用Java SpringBoot集成POI实现Word文档导出Apr 21, 2023 pm 12:19 PM
知识准备需要理解ApachePOI遵循的标准(OfficeOpenXML(OOXML)标准和微软的OLE2复合文档格式(OLE2)),这将对应着API的依赖包。什么是POIApachePOI是用Java编写的免费开源的跨平台的JavaAPI,ApachePOI提供API给Java程序对MicrosoftOffice格式档案读和写的功能。POI为“PoorObfuscationImplementation”的首字母缩写,意为“简洁版的模糊实现”。ApachePOI是创建和维护操作各种符合Offic
 springboot怎么整合shiro实现多验证登录功能May 10, 2023 pm 04:19 PM
1.首先新建一个shiroConfigshiro的配置类,代码如下:@ConfigurationpublicclassSpringShiroConfig{/***@paramrealms这儿使用接口集合是为了实现多验证登录时使用的*@return*/@BeanpublicSecurityManagersecurityManager(Collectionrealms){DefaultWebSecurityManagersManager=newDefaultWebSecurityManager();
 SpringBoot项目打包发布到外部tomcat遇到的问题怎么解决May 10, 2023 pm 05:49 PM
先说遇到问题的情景:初次尝试使用springboot框架写了个小web项目,在IntellijIDEA中能正常启动运行。使用maven运行install,生成war包,发布到本机的tomcat下,出现异常,主要的异常信息是.......LifeCycleException。经各种搜索,找到答案。springboot因为内嵌tomcat容器,所以可以通过打包为jar包的方法将项目发布,但是如何将springboot项目打包成可发布到tomcat中的war包项目呢?1.既然需要打包成war包项目,首


Hot AI Tools

Undresser.AI Undress
AI-powered app for creating realistic nude photos

AI Clothes Remover
Online AI tool for removing clothes from photos.

Undress AI Tool
Undress images for free

Clothoff.io
AI clothes remover

AI Hentai Generator
Generate AI Hentai for free.

Hot Article

Hot Tools

Atom editor mac version download
The most popular open source editor

Dreamweaver CS6
Visual web development tools

Safe Exam Browser
Safe Exam Browser is a secure browser environment for taking online exams securely. This software turns any computer into a secure workstation. It controls access to any utility and prevents students from using unauthorized resources.

MantisBT
Mantis is an easy-to-deploy web-based defect tracking tool designed to aid in product defect tracking. It requires PHP, MySQL and a web server. Check out our demo and hosting services.

Zend Studio 13.0.1
Powerful PHP integrated development environment


