
Home >Operation and Maintenance >Safety >How to perform static analysis in Android
How to perform static analysis in Android

- WBOYWBOYWBOYWBOYWBOYWBOYWBOYWBOYWBOYWBOYWBOYWBOYWBforward
- 2023-05-11 22:28:121274browse
Android reverse engineering is the process of decompilation. Because the result of Android forward compilation cannot be understood, the premise of static analysis in CTF is to decompile the appearing files to a layer of source code that we can understand and perform static analysis.
0X01 Basic description
The logic code of Android application is developed by Java, so the first layer is java code
Java virtual machine JVM runs java file compilation The subsequent class file
The Android virtual machine Dalvik is not the class file generated after executing the Java virtual machine JVM compilation, but the smali file compiled after executing and re-integrating the dex file generated after packaging
APK: It is the compiled Android application installation package
dex file: It is the packaging file of the class file
smali file: It is the Dalvik bytecode file
class File: It is a JVM bytecode file
0X02 Tool usage
The Android question in CTF does not necessarily give you the complete compiled APK, it may be any file type during the compilation process, as follows Brother divides the following file types and uses tools to get the java source code that Brother Dou can understand
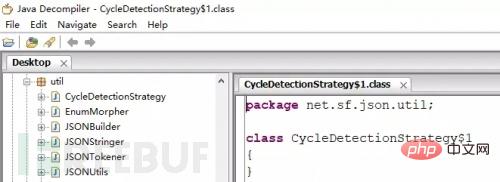
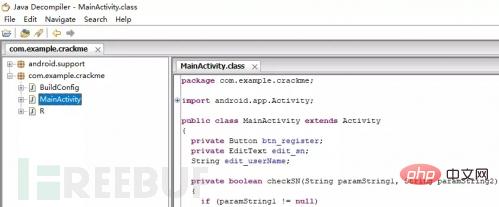
Type 1: class file
This situation is relatively simple, the recommended tool jd-gui
Just pull the class file in and you can see the java source code.
Type 2: APK program
After the Android project is compiled, we will get the APK installation package we want. The APK file is actually A compressed package.
Change the suffix to zip and unzip it. The unzipped file is as shown below:
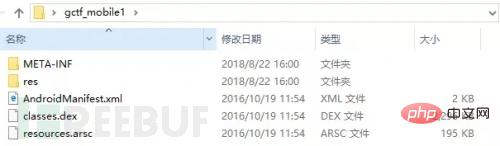
META-INF folder:
Stores apk signature information to ensure the integrity of the apk package and the security of the system.
res folder:
Stores resource files, including icon and xml files.
AndroidManifest.xml file:
Application configuration file, each application must be defined and included. It describes the application name, version, permissions, referenced library files and other information.
classes.dex file:
The file that can be loaded and run directly on the Dalvik virtual machine is compiled and generated by the IDE from the java file.
resources.arsc file>
Binary resource file, including strings, etc.
Recommended tools for decompiling APK: ApkIDE, JEB
1. JEB usage:
JEB directly imports the APK, and you will see the smali file after decompilation is completed.
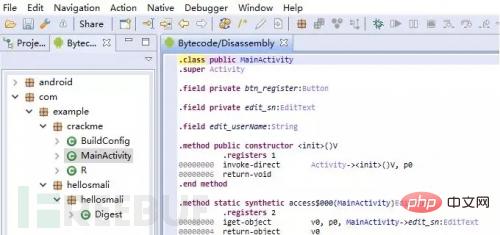
Many Android reverse engineering tools decompile to smali files.
JEB Select the smali file and press Q to see the java file.

Advantages: The code structure of the java file decompiled from the smali file is clear.
Disadvantages: Cannot be modified.
2. Use ApkIDE:
Project->Open Apk
Wait for decompilation to complete.

See the smali file.
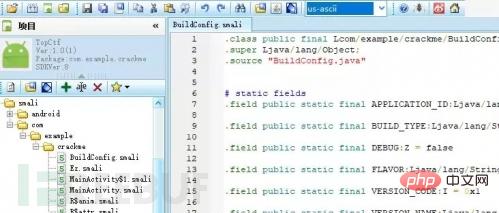
Select the smali file that requires Java source code and click the button below to open the Java source code.
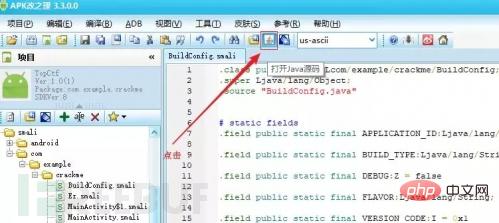
ApkIDE is associated with jd-gui. Clicking it will jump to jd-gui.
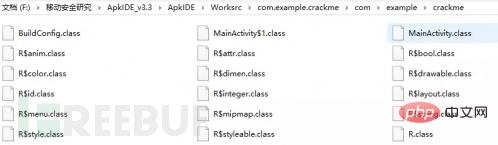
ApkIDE decompiles the APK into class and then uses jd-gui to get the Java source code.
You can see the decompiled class file in the project directory of ApkIDE's ApkIDE_v3.3\ApkIDE\Worksrc.
#Advantages: Powerful, you can modify the decompiled smali file and recompile to generate APK.
Disadvantages: The compiled java code is not clear enough.
3. Decompilation difference
Smali files are written in Smali syntax, and Smali syntax is a loose syntax
So the decompilation process is different, the tools are different, and the java source code is definitely different
The following is the result of reversing the same APK using the above two tools:

Brother Dou is a Java Development enthusiasts like JEB's reverse engineering results, which are more comfortable to watch.
Type 3: dex file
Recommended tool dex2.jar
classes.dex file, this is a bytecode package compiled from Android source code
Try to use the dex2.jar tool to get the java source code command as follows
.\d2j-dex2jar.bat C:\Users\lin\Desktop\classes.dex
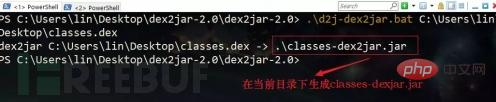
The jar file can be understood as a compressed package of the classes file, and the java virtual machine can be run directly
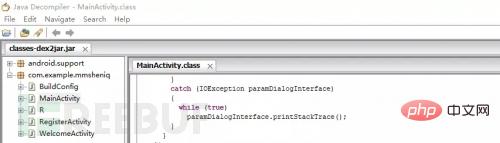
Use Jd-gui to open classes-dex2jar. jar, you can see the java source code
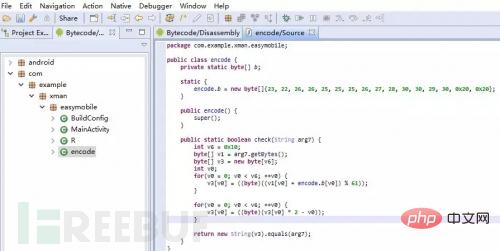
Type 4: smali file
It cannot be used when there is only a single smali file The above tools directly decompile
Brother Dou thought that ApkIDE can decompile an APK into a smali file, and add, delete, modify and check the smali file
So he used ApkIDE to open any complete APK and then add the smali file (the APK can be developed by yourself)
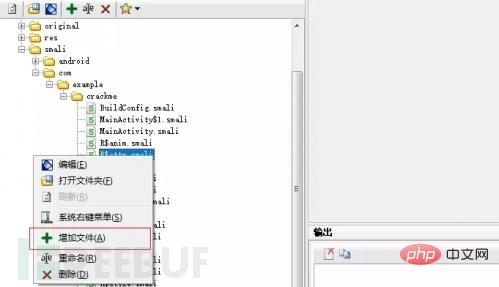
Add the smali file to the ApkIDE project.

Recompile to generate APK.

#After successful compilation, an APK will be generated in the original APK directory.

Then open it with JEB and other tools to see the Ezreal.smali file.
Other tools:
Editor: notepad, Sublime, etc.
Android emulator: Night God Simulation Device, etc.
0X04 Example analysis
Install the application into the simulator and check whether there are any prompts on the interface.
Enter characters in the text box and click the button to prompt an error. I guess it is used to determine the correct flag.

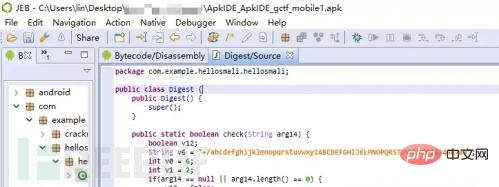
Use the JEB tool to compile it into a java file. Under the Android file is the sdk file. We want to analyze the source code file under the com package.
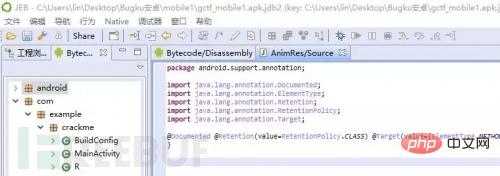
There are only three categories of code. First, analyze the program entry MainActivity to find the key code blocks.
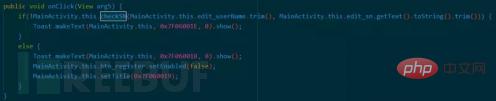
This if sentence is to determine whether the flag is correct.

# Search the class to see where this method is called.
The analysis shows that arg12 is the parameter to be entered in the interface. At this time, we know that the value of v5 is the flag we want.
The onCreate function calls the checkSN method and passes in two parameters:
MainActivity.this.edit_userName.trim()
MainActivity.this.edit_sn.getText().toString().trim()
//OnCreate is a special function in Android, used to "indicate that a window is being generated" .
//It does not generate a window, but only sets the properties of the window such as style, position color, etc. before the window is displayed.
public void onCreate(Bundle arg3) {
super.onCreate(arg3);
this.setContentView(0x7F040019);
this.setTitle( 0x7F06001D);
this.edit_userName = "Tenshine";
this.edit_sn = this.findViewById(0x7F0C0051);
this.btn_register = this.findViewById(0x7F0C0052) ;
this.btn_register.setOnClickListener(new View$OnClickListener() {
public void onClick(View arg5) {
if(!MainActivity.this.checkSN(MainActivity .this.edit_userName.trim(), MainActivity.this.edit_sn.getText().toString().trim())) {
Toast.makeText(MainActivity.this, 0x7F06001E, 0).show( );
}
Else {
Toast.maketext (mainactivity.this, 0x7f06001b, 0) .Show ();
## MainActivity.this. btn_register.setEnabled(false); MainActivity.this.setTitle(0x7F060019); } });}Analyze the value of v5. v5 is generated by v3 and v4. v4 is an int and is directly assigned to 0 for looping. You can use it directly and v3 is the toHexString method. The return value needs to be passed in, v1 is v1.update(arg11.getBytes()); generated arg11 is the passed in parameter "Tenshine"private boolean checkSN(String arg11, String arg12) {
boolean v7 = false;
if(arg11 != null) {
try {
if(arg11.length() == 0) {
return v7;
}
if(arg12 == null) {
return v7;
}
if(arg12.length() != 22) {
return v7;
}
MessageDigest v1 = MessageDigest.getInstance("MD5");
v1.reset();
v1.update(arg11.getBytes());
String v3 = MainActivity.toHexString(v1.digest(), "");
StringBuilder v5 = new StringBuilder();
int v4;
for(v4 = 0; v4
v5.append(v3.charAt(v4));
}
if(!"flag{" v5.toString() "}".equalsIgnoreCase(arg12)) {
return v7;
}
}
catch(NoSuchAlgorithmException v2) {
goto label_40;
}
v7 = true;
}
return v7;
label_40:
v2.printStackTrace();
return v7;
}
将上面的分析结果,取出生成v5的关系代码
都是纯java代码,不需要Android的包引入,只需引入java的依赖包。
import java.security.MessageDigest;
import java.security.NoSuchAlgorithmException;
public class Code {
static String toHexString(byte[] arg8, String arg9) {
StringBuilder v3 = new StringBuilder();
byte[] v0 = arg8;
int v5 = v0.length;
int v4;
for(v4 = 0; v4
String v2 = Integer.toHexString(v0[v4] & 255);
if(v2.length() == 1) {
v3.append('0');
}
v3.append(v2).append(arg9);
}
return v3.toString();
}
public static void main(String[] args)throws NoSuchAlgorithmException{
MessageDigest v1 = MessageDigest.getInstance("MD5");
v1.reset();
v1.update("Tenshine".getBytes());
String v3 = Code.toHexString(v1.digest(), "");
StringBuilder v5 = new StringBuilder();
int v4;
for(v4 = 0; v4
v5.append(v3.charAt(v4));
}
System.out.println("flag{" v5.toString() "}");
}
}
用IDEA编辑运行,拿到flag。

The above is the detailed content of How to perform static analysis in Android. For more information, please follow other related articles on the PHP Chinese website!