


Step one: Configure jdk environment variables consistent with the system (32-bit/64-bit)
(1) Download the jdk installation package from the official website:
Official website download address:

Choose the corresponding installation package according to your operating system (be sure to accept the license agreement)
(2) Install jdk:
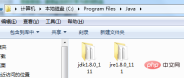
Install jdk. Select the installation directory. During the installation process, two installation prompts will appear. The first time is to install jdk, and the second time is to install jre. It is recommended to install both in different folders within the same java folder. (They cannot both be installed in the root directory of the java folder. An error will occur if jdk and jre are installed in the same folder)
The installation is completed as shown in the figure below
(3) Configure environment variables
Configure environment variables after installing jdk Computer→Properties→Advanced System Settings→Advanced→Environment Variables

System variables→New java-home variable.
Fill in the installation directory of jdk with the variable value (I am c:\programfiles\java\jdk1.8.0_111)

System variables→Look for path variables→ Edit
Enter %java-home%\bin;
at the end of the variable value (note whether there is a ; sign at the end of the variable value of the original path. If not, enter the ; sign first and then enter the above Code)

System variables→Create new classpath variable
Fill in the variable value .;%java-home%\lib;%java-home%\lib\ tools.jar (note the dot at the front)
System variables are configured.
Second step: Verify whether jdk is configured successfully (32-bit/64-bit)
Verify whether the configuration is successful. Run cmd and enter java -version (between java and -version There are spaces between them)
If the version information is displayed as shown in the figure, the installation and configuration are successful.
64-bit is as shown below, there will be a clear version comment, if not, it will be 32-bit


##Step Three: tomcat9 installation and configuration
(1) Download tomcat9 from the official website
Download the latest version of tomcat
Note that 32 is located in a 64-bit jdk, otherwise a specific error 1 will be reported when starting tomcat
(2) cmd command to configure tomcat

(3) Four ways to start tomcat
- Double-click startup.bat batch processing in the bin directory to run tomcat (The advantage of this is that you can see the running status, the database appears, and the code reports errors. Recommended)
- Run cmd as an administrator to run the net starttomcat9 command (9 is the version number)
- Run through the service in the task manager
- Double-click tomcat9w.exe in the bin directory to check in and click start to run tomcat. The demonstration picture is as follows:


(4) Successful demonstration

The above is the detailed content of How to configure Java environment variables and Tomcat server. For more information, please follow other related articles on the PHP Chinese website!

 How does IntelliJ IDEA identify the port number of a Spring Boot project without outputting a log?Apr 19, 2025 pm 11:45 PM
Start Spring using IntelliJIDEAUltimate version...
 How to elegantly obtain entity class variable names to build database query conditions?Apr 19, 2025 pm 11:42 PM
When using MyBatis-Plus or other ORM frameworks for database operations, it is often necessary to construct query conditions based on the attribute name of the entity class. If you manually every time...
 Java BigDecimal operation: How to accurately control the accuracy of calculation results?Apr 19, 2025 pm 11:39 PM
Java...
 How to use the Redis cache solution to efficiently realize the requirements of product ranking list?Apr 19, 2025 pm 11:36 PM
How does the Redis caching solution realize the requirements of product ranking list? During the development process, we often need to deal with the requirements of rankings, such as displaying a...
 How to safely convert Java objects to arrays?Apr 19, 2025 pm 11:33 PM
Conversion of Java Objects and Arrays: In-depth discussion of the risks and correct methods of cast type conversion Many Java beginners will encounter the conversion of an object into an array...
 How do I convert names to numbers to implement sorting and maintain consistency in groups?Apr 19, 2025 pm 11:30 PM
Solutions to convert names to numbers to implement sorting In many application scenarios, users may need to sort in groups, especially in one...
 E-commerce platform SKU and SPU database design: How to take into account both user-defined attributes and attributeless products?Apr 19, 2025 pm 11:27 PM
Detailed explanation of the design of SKU and SPU tables on e-commerce platforms This article will discuss the database design issues of SKU and SPU in e-commerce platforms, especially how to deal with user-defined sales...
 How to set the default run configuration list of SpringBoot projects in Idea for team members to share?Apr 19, 2025 pm 11:24 PM
How to set the SpringBoot project default run configuration list in Idea using IntelliJ...


Hot AI Tools

Undresser.AI Undress
AI-powered app for creating realistic nude photos

AI Clothes Remover
Online AI tool for removing clothes from photos.

Undress AI Tool
Undress images for free

Clothoff.io
AI clothes remover

Video Face Swap
Swap faces in any video effortlessly with our completely free AI face swap tool!

Hot Article
Hot Tools

Dreamweaver CS6
Visual web development tools

SAP NetWeaver Server Adapter for Eclipse
Integrate Eclipse with SAP NetWeaver application server.

MantisBT
Mantis is an easy-to-deploy web-based defect tracking tool designed to aid in product defect tracking. It requires PHP, MySQL and a web server. Check out our demo and hosting services.

Zend Studio 13.0.1
Powerful PHP integrated development environment

PhpStorm Mac version
The latest (2018.2.1) professional PHP integrated development tool

