Home >Common Problem >Fix: Recovery environment not found in Windows 11/10
Fix: Recovery environment not found in Windows 11/10
- WBOYWBOYWBOYWBOYWBOYWBOYWBOYWBOYWBOYWBOYWBOYWBOYWBforward
- 2023-04-28 16:25:065762browse
The recovery environment is an integral part of Windows and is usually turned on when your PC encounters a problem. Now, what if your system fails to boot into the recovery environment and displays a "Recovery Environment Not Found" error message? This can be a very serious problem for you as you cannot even reset or repair your system.
Fix 1 – Force boot the system into RE
If you are unable to boot into the Windows Recovery Environment, you can force boot the system into it.
1. Shut down your computer.
2. After making sure the device is completely turned off, tap the power button once to start the device. When you reach the manufacturer's logo screen, press and hold the power button again to completely shut down the device.
3. Repeat these force-boot-shutdown steps 2 more times.
4. For the third time, let the system boot normally. When the system starts, you will see the automatic repair screen turned on.
5. Now, click on the “Advanced Options” option.

Now you will notice all the settings and options of Windows Recovery Environment here. If you wish, you can perform a reset/repair and even boot the system in safe mode. This is a quick and easy alternative to access Windows RE.
Fix 2 – Create and use a Windows 11 MCT
You can create and use a bootable Windows 11 bootable drive to access the Windows Recovery Environment.
You will need a USB drive to create a bootable drive. During this process, the USB drive will be formatted and all data stored in the drive will be deleted. So, create a local backup of the data stored in the USB device, keep the USB device plugged in and start creating the MCT.
STEP 1 – DOWNLOAD AND CREATE WINDOWS 11 MCT
Download and create a Windows 11 bootable USB drive.
1. First, enter the Microsoft Software Download section.
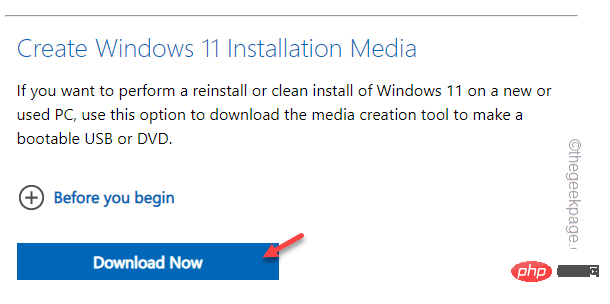
2. Now, scroll down to the “Create Windows 11 installation media” section.
3. To download the tool, click "Download Now".
#4. Now, choose a location to store the MCT creation tool.
5. Then, click "Save" to save the MCT file.
After the download process is completed, close the browser.
Now, the process of creating a bootable drive begins.
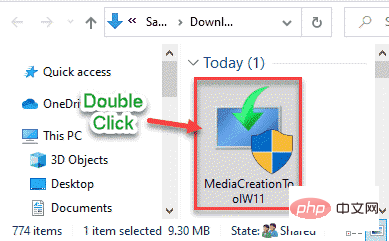
1. Open File Explorer and navigate to the directory containing the MCT creation tool.
2. After entering the directory, just double-click the " MediaCreationToolW11" file.
#3. You must state the terms and conditions. Click "Accept".

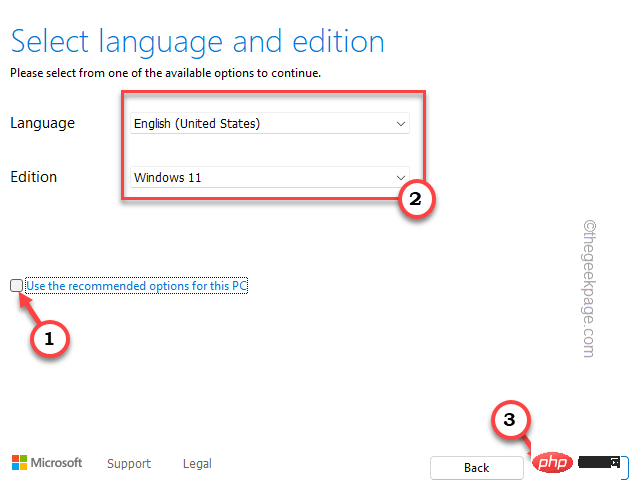
#4. In the next steps, you can select your operating system language and Windows version.
5. To do this, you must uncheck the "Use recommended options for this PC" option.
6. Click "Next" to continue.
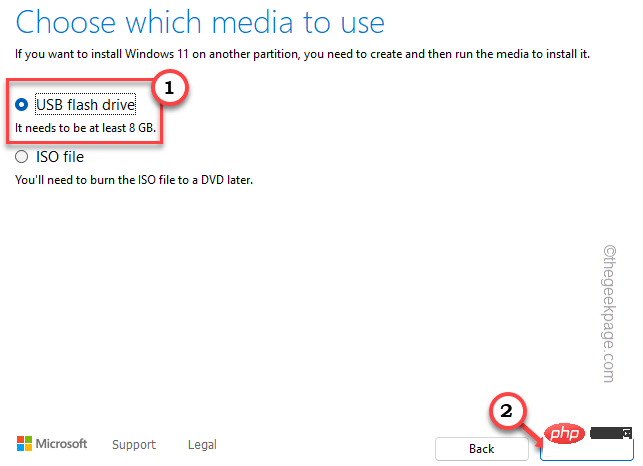
7. Now, this step is very critical. Select "USB Flash Drive".
8. Then, click "Next".
#9. In the next step, you will see all the drivers on your system.
10. Select the USB drive you want to use and click "Next" to continue.
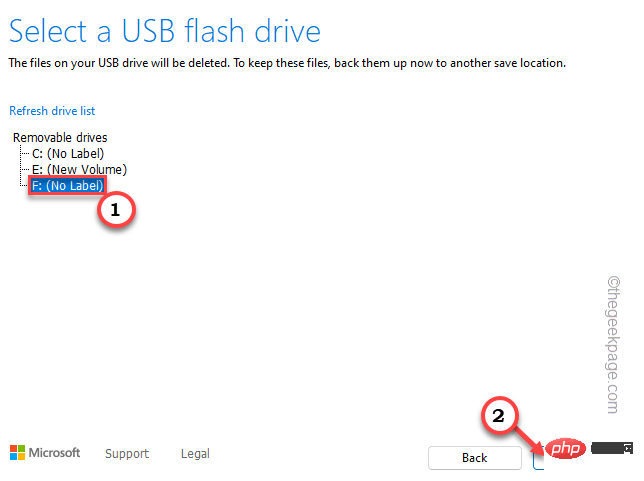
Now this will download and create the Windows 11 media to the USB drive.
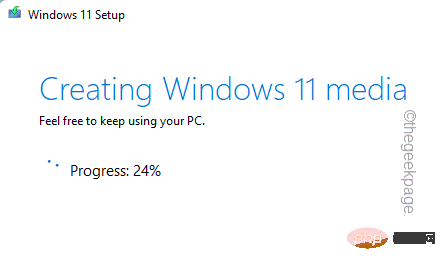
All you have to do is wait for the entire process to complete.
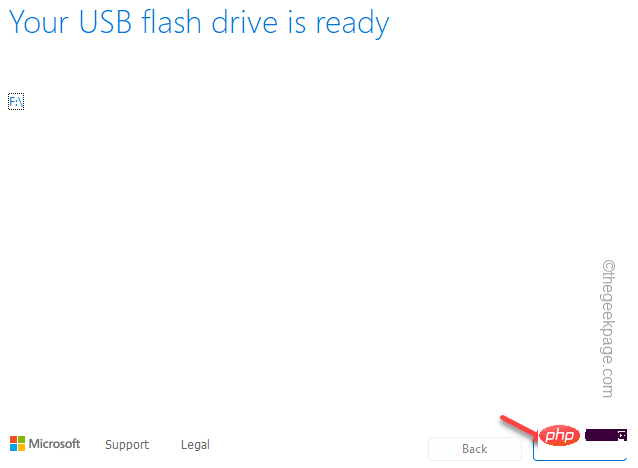
11. Once completed, click "Complete" to complete the process.
STEP 2 - USE IT TO ACCESS WINDOWS RE
Once completed, close everything and restart your computer.
1. When your system restarts, hold down the relevant boot key so that you can access the boot menu.
Manufacturer The key manufacturer that actually opens the Boot settings will vary. Therefore, pay careful attention to the keys assigned to your system. It can be any of these keys -
F2, Del, F12, F1, F9, F2, Esc

2. Once the boot menu opens, go to the "Startup" tab.
3. You will see a list of boot options and their priority. Use the arrow keys to select the USB drive and press Enter to boot with the drive.
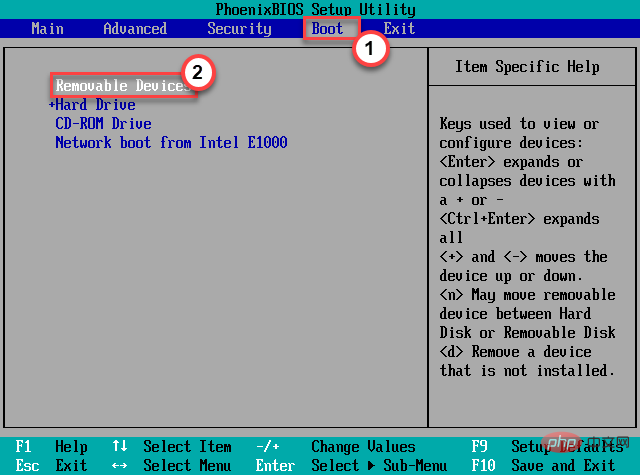
This will reboot the system using the USB drive.
5. After the computer boots from the USB drive, click Repair your computer.
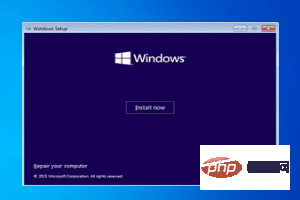
This will open the recovery environment.
Fix 3 – Enable Recovery Agent
If the Recovery Agent is disabled on your system, you will not be able to access Windows RE.
1. Simply click on the Windows icon on the middle taskbar. A search box will appear.
2. Enter "cmd" here. Once you see "Command Prompt" in the search results, right-click it and click "Run as administrator".
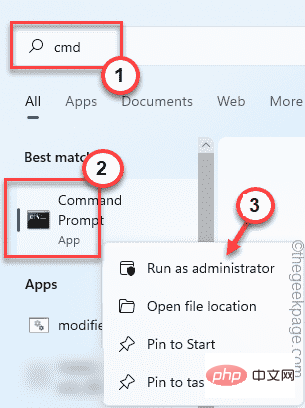
This way, you can open the command prompt with administrative rights.
3. Now, in the CMD screen, paste this command to know the current status of the recovery agent.
试剂c /信息
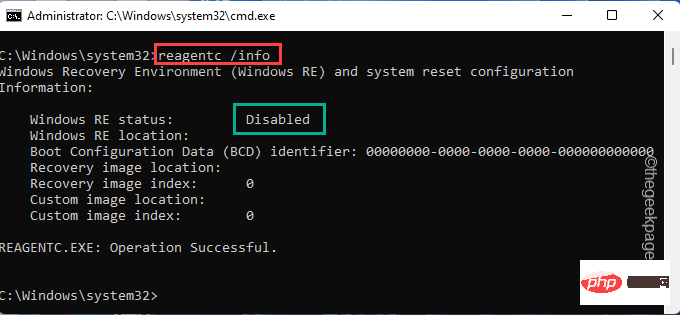
4. If you find that the recovery agent is disabled, you can easily enable it using the command.
试剂c /启用
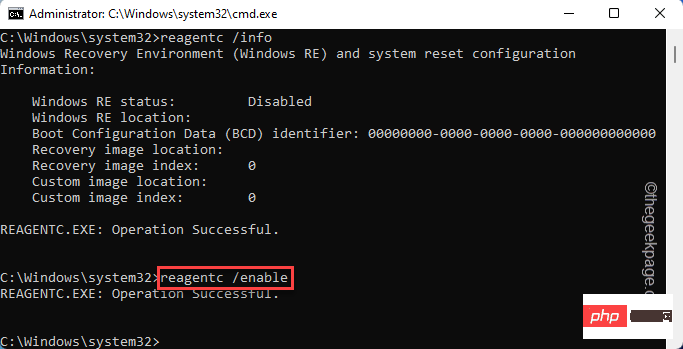
After enabling the recovery agent, close the command prompt window.
Restart the system and try opening the recovery environment again. Test if this works.
Fix 4 – Using Diskpart
If there are no other problems, you can use diskpart to delete the partition.
1. Go to the bottom of the screen, right-click the Windows icon, and click "Run".
2. Here, enter “ diskpart ” and click “ OK ” to open Diskpart
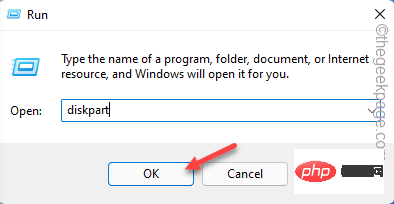
3 . When diskpart opens, enter these words and press Enter to see a list of all disks.
列出磁盘
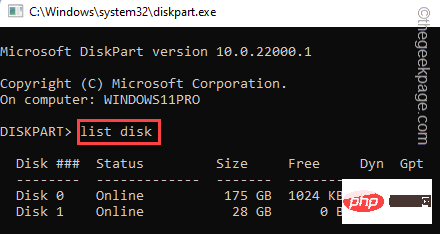
#4. There can be quite a few disks. Carefully select the disk on your system where the recovery partition is located.
[
If you don't know where the recovery partition is on your drive, you can use Disk Management.
A sort of. You just need to press the Windows key and the X key at the same time.
Bay. Then, click "Disk Management" to access.
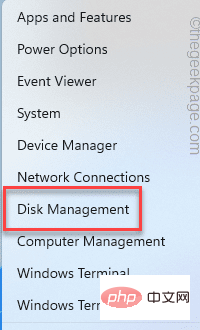
C. Here, pay careful attention to which disk has "Recovery Drive".
It is usually Drive 0.

]
5. Now, run this code to select a specific disk.
选择磁盘驱动器号
Replace "Drive Number" with the number you noted down earlier. In our case it's "0".
选择磁盘0
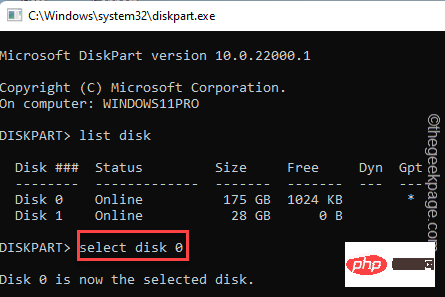
#6. After selecting the disk, you can view the partition list. Execute this command.
列表分区
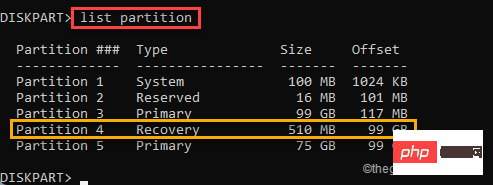
7. Now, look carefully, especially which partition says "Recovery Partition".
8. You must select a partition. Paste the command and modify it with the partition number.
Select partitionYour partition number
Replace "Your partition number" with the partition number of your system. In our case it is "4".
选择分区 4
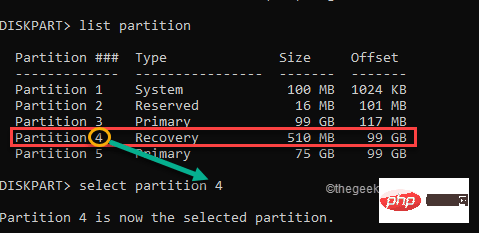
9. 最后,您可以从系统中删除这个损坏的分区。为此,只需输入这些单词并按Enter键。
删除分区覆盖

这样,您可以删除损坏的分区并解决问题。
完成此操作后重新启动计算机。恢复环境应该再次工作。
The above is the detailed content of Fix: Recovery environment not found in Windows 11/10. For more information, please follow other related articles on the PHP Chinese website!

