


[Organization and sharing] 7 popular React state management tools

![[Organization and sharing] 7 popular React state management tools](https://img.php.cn/upload/article/000/000/024/6448f30165876684.jpg?x-oss-process=image/resize,p_40)
Recently I am working on organizing the project technology stack;
As the team becomes larger, the number of people increases, and the number of projects increases;
The unified technology stack is A very necessary thing;

There are many React state management tools, but choosing a suitable state management tool is actually very important;
Follow me today Let me share with you some very popular React state management that I have compiled. I hope it will be helpful to you.
【 1. Mobx 】

Mobx
#MobX can run independently of React, but they usually Used together; the new version of mobx-react-lite library is very lightweight; when using it, you only need to use the exported observer package component; and then introduce the state;
import React from "react"
import ReactDOM from "react-dom"
import { makeAutoObservable } from "mobx"
import { observer } from "mobx-react-lite"

class Timer {
    secondsPassed = 0

    constructor() {
        makeAutoObservable(this)
    }

    increaseTimer() {
        this.secondsPassed += 1
    }
}

const myTimer = new Timer()

//被`observer`包裹的函数式组件会被监听在它每一次调用前发生的任何变化
const TimerView = observer(({ timer }) =>
           <span>Seconds passed: {timer.secondsPassed}
</span>)

ReactDOM.render(<TimerView timer={myTimer} />, document.body)
【 2. Redux 】

Redux
Redux is also a very popular state management tool, but it is more cumbersome than other state management tools; of course I like it People who use Redux will also find Redux very elegant;
import { createStore } from 'redux'

/**
 * This is a reducer - a function that takes a current state value and an
 * action object describing "what happened", and returns a new state value.
 * A reducer's function signature is: (state, action) => newState
 *
 * The Redux state should contain only plain JS objects, arrays, and primitives.
 * The root state value is usually an object. It's important that you should
 * not mutate the state object, but return a new object if the state changes.
 *
 * You can use any conditional logic you want in a reducer. In this example,
 * we use a switch statement, but it's not required.
 */
function counterReducer(state = { value: 0 }, action) {
  switch (action.type) {
    case 'counter/incremented':
      return { value: state.value + 1 }
    case 'counter/decremented':
      return { value: state.value - 1 }
    default:
      return state
  }
}

// Create a Redux store holding the state of your app.
// Its API is { subscribe, dispatch, getState }.
let store = createStore(counterReducer)

// You can use subscribe() to update the UI in response to state changes.
// Normally you'd use a view binding library (e.g. React Redux) rather than subscribe() directly.
// There may be additional use cases where it's helpful to subscribe as well.

store.subscribe(() => console.log(store.getState()))

// The only way to mutate the internal state is to dispatch an action.
// The actions can be serialized, logged or stored and later replayed.
store.dispatch({ type: 'counter/incremented' })
// {value: 1}
store.dispatch({ type: 'counter/incremented' })
// {value: 2}
store.dispatch({ type: 'counter/decremented' })
// {value: 1}
It is not easy to get started with Redux quickly, and you need to think about it carefully; but fortunately, redux officially launched the new Redux-tookit The steps for using Redux are greatly simplified.
【 3. Rematch 】

Rematch
Rematch continues the advantages of Redux, and the core concept is still based on Redux; but compared to Redux, it is simply too powerful! .
import { createModel } from "@rematch/core";
import { RootModel } from ".";

export const count = createModel<RootModel>()({
  state: 0, // initial state
  reducers: {
    // handle state changes with pure functions
    increment(state, payload: number) {
      return state + payload;
    },
  },
  effects: (dispatch) => ({
    // handle state changes with impure functions.
    // use async/await for async actions
    async incrementAsync(payload: number, state) {
      console.log("This is current root state", state);
      await new Promise((resolve) => setTimeout(resolve, 1000));
      dispatch.count.increment(payload);
    },
  }),
});
The following are some features of Rematch:
- Size less than 2kb
- No configuration required
- Reduce Redux boilerplate files
- Built-in side effect support
- React Devtools support
- TypeScript native support
- Support dynamic addition of reducers
- Support hot reload
- Allow Create multiple stores
- Support React Native
- Extensible plug-ins
Rematch’s store still continues some Redux writing methods, but overall it is much more streamlined . It’s also very easy to get started.
【 4. Recoil 】

Recoil
Recoil provides a new state management model— —Atom model, which can better handle complex state logic.
If you need to use Recoil in a component, you can place RecoilRoot somewhere in the parent component. It is best to set it as the root component:
import React from 'react';
import {
  RecoilRoot,
  atom,
  selector,
  useRecoilState,
  useRecoilValue,
} from 'recoil';

function App() {
  return (
    <RecoilRoot>
      <CharacterCounter />
    </RecoilRoot>
  );
}
A atom represents a state. Atom can be read and written from any component. The component that reads the atom value implicitly subscribes to the atom, so any update of the atom will cause the component corresponding to the atom to be re-rendered;
To use atom state, useRecoilState needs to be introduced in the component:
const textState = atom({
  key: 'textState', // unique ID (with respect to other atoms/selectors)
  default: '', // default value (aka initial value)
});

function CharacterCounter() {
  return (
    <div>
      <TextInput />
      <CharacterCount />
    </div>
  );
}

function TextInput() {
  const [text, setText] = useRecoilState(textState);

  const onChange = (event) => {
    setText(event.target.value);
  };

  return (
    <div>
      <input type="text" value={text} onChange={onChange} />
      <br />
      Echo: {text}
    </div>
  );
}
【 5. Hookstate 】

hookState
HookState is also a very simple state management tool library that is intuitive API for you to easily access the state;

Its main features include:
- Create global state
- Create internal State
- Nested state
- Partial state
- Empty state
HookState mainly includes two important Api HookState and useHookState.
If you need other functions, you can refer to other official APIs.
【 6. Jotai 】

Jotai
Jotai is a primitive and flexible state management for React Library. It is similar to Recoil, but has a smaller package size, a more minimalist API, better TypeScript support, wider documentation, and no experimental tags.
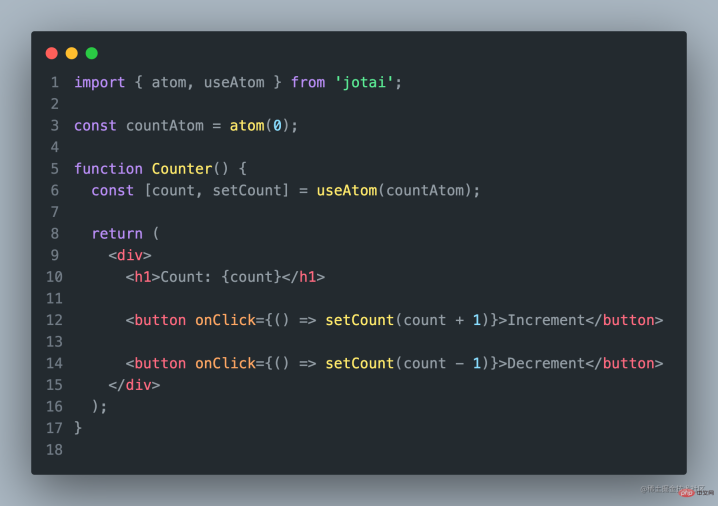
With Jotai, you can store state in a single store and use custom hooks to access and update state.
import { atom, useAtom } from 'jotai';

const countAtom = atom(0);

function Counter() {
  const [count, setCount] = useAtom(countAtom);

  return (
    <div>
      <h1 id="Count-nbsp-count">Count: {count}</h1>

      <button onClick={() => setCount(count + 1)}>Increment</button>

      <button onClick={() => setCount(count - 1)}>Decrement</button>
    </div>
  );
}
The above is the sample code for using Jotai. Using Jotai is very simple.
【 7. Zustand】

Zustand provides a simple way to manage state in React applications.
Its main features are ease of use and lightweight.

Zustand Code
使用Zustand,你可以将状态存储在一个单一的store中,并使用自定义的hooks来访问和更新状态。这使得状态管理变得非常简单和直观。
import create from 'zustand'

const useStore = create((set) => ({
  count: 0,
  increment: () => set((state) => ({ count: state.count + 1 })),
  decrement: () => set((state) => ({ count: state.count - 1 })),
}))

function Counter() {
  const { count, increment, decrement } = useStore()

  return (
    <div>
      <h1 id="Count-nbsp-count">Count: {count}</h1>
      <button onClick={increment}>Increment</button>
      <button onClick={decrement}>Decrement</button>
    </div>
  )
}
使用Zustand也非常的简单!
在这个例子中,我们使用 create 函数创建了一个新的store,
并定义了一个名为 count 的状态和两个更新状态的
函数 increment 和 decrement 。
然后,我们使用 useStore 自定义 hook 来访问和更新状态。
【以上7个状态管理工具各有特点】
考虑到团队人员技术的参差不齐,未来项目的可维护、延展性;
建议大家选择入门简单,上手快的工具;
因为之前最早我们选择的是Redux,现在再回头看原来的项目,简直难以维护了。
如果你的团队还是倾向于Redux,这里建议还是使用Rematch比较好。
如果是还没使用状态管理,又想用的,建议使用mobx吧!
(学习视频分享:编程基础视频)
The above is the detailed content of [Organization and sharing] 7 popular React state management tools. For more information, please follow other related articles on the PHP Chinese website!

 From Websites to Apps: The Diverse Applications of JavaScriptApr 22, 2025 am 12:02 AM
JavaScript is widely used in websites, mobile applications, desktop applications and server-side programming. 1) In website development, JavaScript operates DOM together with HTML and CSS to achieve dynamic effects and supports frameworks such as jQuery and React. 2) Through ReactNative and Ionic, JavaScript is used to develop cross-platform mobile applications. 3) The Electron framework enables JavaScript to build desktop applications. 4) Node.js allows JavaScript to run on the server side and supports high concurrent requests.
 Python vs. JavaScript: Use Cases and Applications ComparedApr 21, 2025 am 12:01 AM
Python is more suitable for data science and automation, while JavaScript is more suitable for front-end and full-stack development. 1. Python performs well in data science and machine learning, using libraries such as NumPy and Pandas for data processing and modeling. 2. Python is concise and efficient in automation and scripting. 3. JavaScript is indispensable in front-end development and is used to build dynamic web pages and single-page applications. 4. JavaScript plays a role in back-end development through Node.js and supports full-stack development.
 The Role of C/C in JavaScript Interpreters and CompilersApr 20, 2025 am 12:01 AM
C and C play a vital role in the JavaScript engine, mainly used to implement interpreters and JIT compilers. 1) C is used to parse JavaScript source code and generate an abstract syntax tree. 2) C is responsible for generating and executing bytecode. 3) C implements the JIT compiler, optimizes and compiles hot-spot code at runtime, and significantly improves the execution efficiency of JavaScript.
 JavaScript in Action: Real-World Examples and ProjectsApr 19, 2025 am 12:13 AM
JavaScript's application in the real world includes front-end and back-end development. 1) Display front-end applications by building a TODO list application, involving DOM operations and event processing. 2) Build RESTfulAPI through Node.js and Express to demonstrate back-end applications.
 JavaScript and the Web: Core Functionality and Use CasesApr 18, 2025 am 12:19 AM
The main uses of JavaScript in web development include client interaction, form verification and asynchronous communication. 1) Dynamic content update and user interaction through DOM operations; 2) Client verification is carried out before the user submits data to improve the user experience; 3) Refreshless communication with the server is achieved through AJAX technology.
 Understanding the JavaScript Engine: Implementation DetailsApr 17, 2025 am 12:05 AM
Understanding how JavaScript engine works internally is important to developers because it helps write more efficient code and understand performance bottlenecks and optimization strategies. 1) The engine's workflow includes three stages: parsing, compiling and execution; 2) During the execution process, the engine will perform dynamic optimization, such as inline cache and hidden classes; 3) Best practices include avoiding global variables, optimizing loops, using const and lets, and avoiding excessive use of closures.
 Python vs. JavaScript: The Learning Curve and Ease of UseApr 16, 2025 am 12:12 AM
Python is more suitable for beginners, with a smooth learning curve and concise syntax; JavaScript is suitable for front-end development, with a steep learning curve and flexible syntax. 1. Python syntax is intuitive and suitable for data science and back-end development. 2. JavaScript is flexible and widely used in front-end and server-side programming.
 Python vs. JavaScript: Community, Libraries, and ResourcesApr 15, 2025 am 12:16 AM
Python and JavaScript have their own advantages and disadvantages in terms of community, libraries and resources. 1) The Python community is friendly and suitable for beginners, but the front-end development resources are not as rich as JavaScript. 2) Python is powerful in data science and machine learning libraries, while JavaScript is better in front-end development libraries and frameworks. 3) Both have rich learning resources, but Python is suitable for starting with official documents, while JavaScript is better with MDNWebDocs. The choice should be based on project needs and personal interests.


Hot AI Tools

Undresser.AI Undress
AI-powered app for creating realistic nude photos

AI Clothes Remover
Online AI tool for removing clothes from photos.

Undress AI Tool
Undress images for free

Clothoff.io
AI clothes remover

Video Face Swap
Swap faces in any video effortlessly with our completely free AI face swap tool!

Hot Article
Hot Tools

SublimeText3 English version
Recommended: Win version, supports code prompts!

mPDF
mPDF is a PHP library that can generate PDF files from UTF-8 encoded HTML. The original author, Ian Back, wrote mPDF to output PDF files "on the fly" from his website and handle different languages. It is slower than original scripts like HTML2FPDF and produces larger files when using Unicode fonts, but supports CSS styles etc. and has a lot of enhancements. Supports almost all languages, including RTL (Arabic and Hebrew) and CJK (Chinese, Japanese and Korean). Supports nested block-level elements (such as P, DIV),

SublimeText3 Mac version
God-level code editing software (SublimeText3)

MinGW - Minimalist GNU for Windows
This project is in the process of being migrated to osdn.net/projects/mingw, you can continue to follow us there. MinGW: A native Windows port of the GNU Compiler Collection (GCC), freely distributable import libraries and header files for building native Windows applications; includes extensions to the MSVC runtime to support C99 functionality. All MinGW software can run on 64-bit Windows platforms.

Atom editor mac version download
The most popular open source editor

