Home >Common Problem >How to Fix WiFicx.sys Failed BSOD Error on Windows 10/11
How to Fix WiFicx.sys Failed BSOD Error on Windows 10/11
- PHPzforward
- 2023-04-17 17:22:031771browse
WiFiCx.sys is a Windows WiFi class extension driver that is a legitimate Windows component of the WiFi devices on your computer. However, recently a few users on Windows 11 complained of multiple Blue Screen of Death issues due to the WiFiCx.sys file. Typically, a human interface device, or HID, is responsible for this problem. Therefore, simply removing/uninstalling the device on your computer will resolve the issue.
Fix 1 – Remove Human Interface Device
In most cases, a Human Interface Device plugged into the system will cause a conflict and produce this issue.
Human interface devices include any accessories that are plugged into the system. Yes, this also includes any mouse, keyboard, headphones, or speakers connected to the system.
1. Disconnect the HID (assuming the speaker) from the computer.
2. Then, press the Windows key and X key at the same time.
3. Next, click "Device Manager" on the context menu to open it.
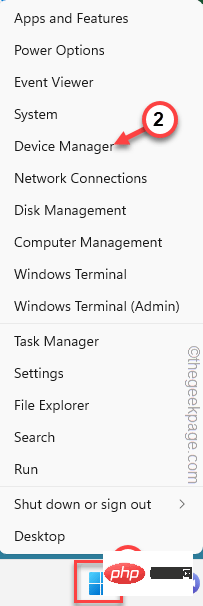
#4. Now, in this device manager, look for the driver you just detached.
Assume you have detached the speakers from the system. So, look for the speaker device in the list.
5. Once confirmed, right-click it and click "Uninstall Device".
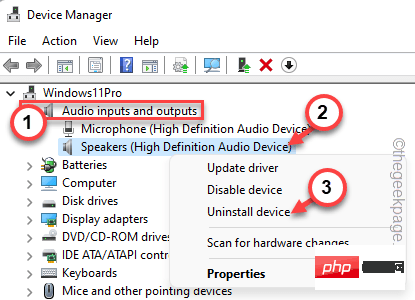
Now, perform the actions that prompt the BSOD problem.
In this way, remove and uninstall all device drivers one by one by repeating the steps to identify the culprit device.
NOTE –
Multiple users have recommended uninstalling WiFi or all network adapters from the system. So, try to uninstall these drivers and restart your system.
Fix 2 – Run Driver Verifier for non-MS drivers
You can run Driver Verifier on non-Microsoft drivers to scan and identify any faulty drivers.
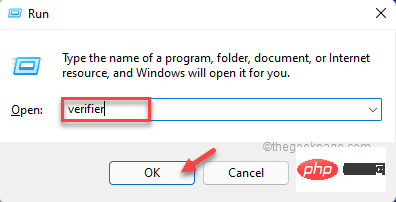
1. Simply press the Windows key and R key simultaneously to launch the Run box.
2. Then, write it in the box and press Enter .
verifier
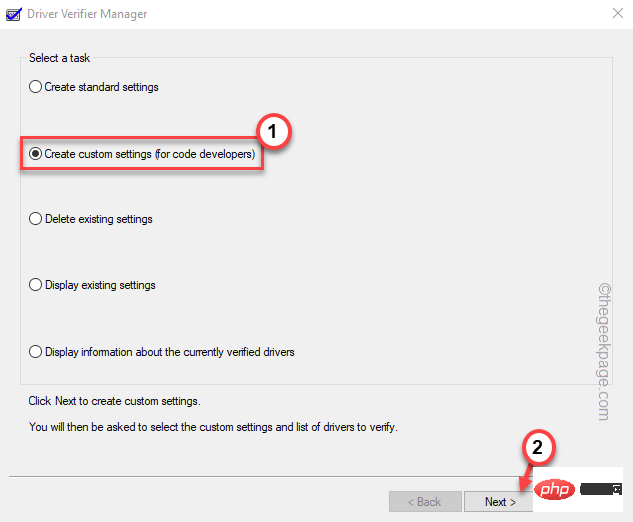
Create custom settings (for code developers) option.
4. Then, click "Next" to continue.
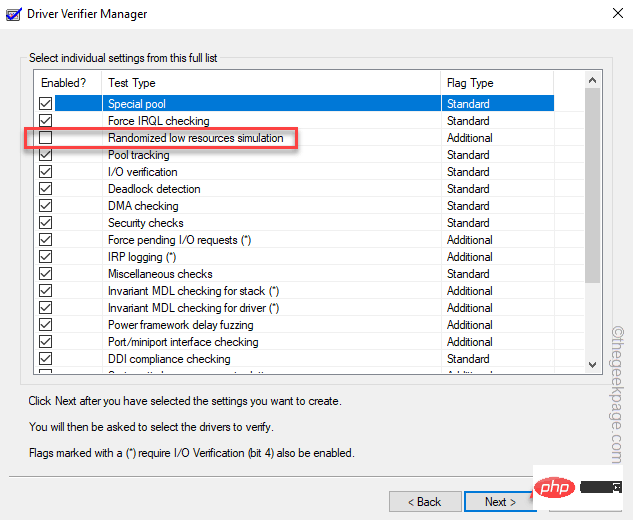
except the "Random Low Resource Simulation" test.
7. Finally, click "Next".
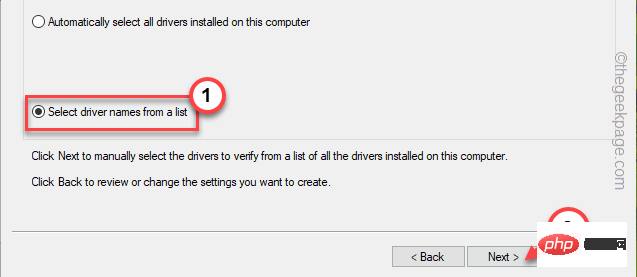
Select driver name from list option
9. Now, to To load all drivers, click "Next".
all third-party drivers one by one through the list.
11. Finally, click "Finish" to start the driver verification process.
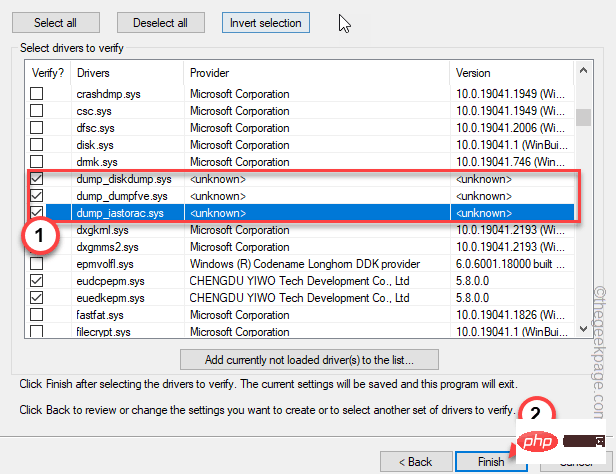
restart and start scanning all third-party drivers for corruption.
This process may take a while as all tests are run on the driver. Once the computer identifies the faulty driver. Fix 3 – Disable/Uninstall Antivirus Software Antivirus software on your system may also cause this issue. Third-party antivirus software may cause this problem. Therefore, you should disable or uninstall it from your computer. 1. You can open the "Programs and Features" page very easily. 2. Just press theWin key and R key at the same time. Then, write there and press the Enter key.
appwiz.cpl
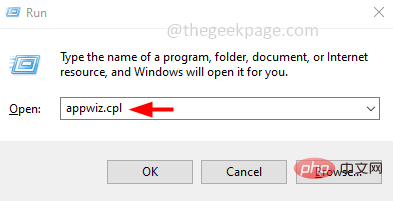
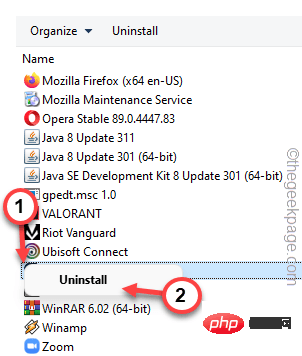
Uninstall" to uninstall the antivirus software from your computer.
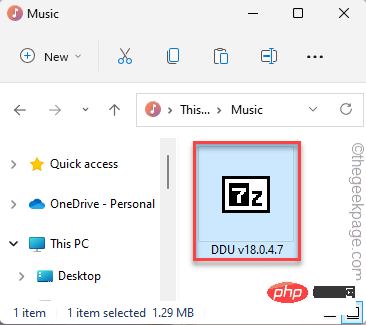
3.只需将“DDU v18.0.4.7”文件解压缩到系统上的某个位置,以便以后访问。
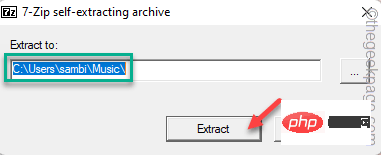
4. 您可以手动设置提取路径。
5.然后,点击“提取”。
现在,您可以轻松地从制造商的网站下载显卡驱动程序。我们已经展示了如何下载NVIDIA卡驱动程序的步骤。
1.首先,您需要打开NVIDIA驱动程序下载网站。
2. 然后,在框中输入有关显卡驱动程序规格的各种信息(如产品下载类型、语言等)。
3.完成后,点击“搜索”以获取图形卡。

4.进入下一页,您可以查看最新的驱动程序。
5.然后,“下载”签名以下载最新的图形驱动程序。

步骤2 –启动到安全模式并使用DDU
不能在正常模式下使用显示驱动程序卸载程序。因此,您必须将系统启动到安全和模式并清理图形驱动程序安装。
1.您可以使用Windows键+ I键一起打开“设置”页面。
2.点击“系统”设置以访问它。
3.然后,点击“恢复”选项进行探索。
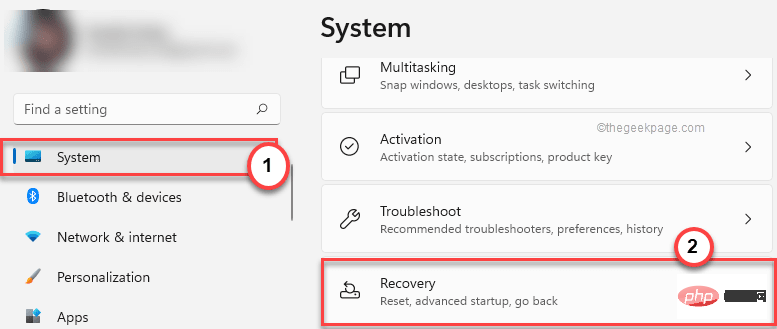
4.稍后,点击“高级启动”部分中的“立即重新启动”以重新启动系统。
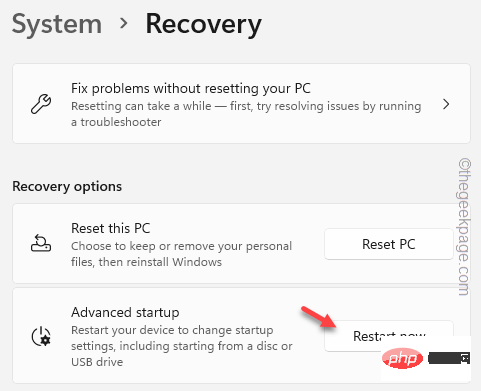
等到Windows启动进入恢复模式。
5.当您登陆恢复屏幕的第一页时,点击
“疑难解答”。
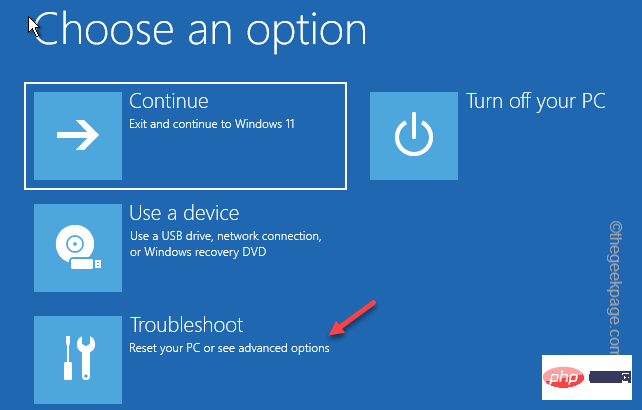
6.现在,单击“高级选项”继续。
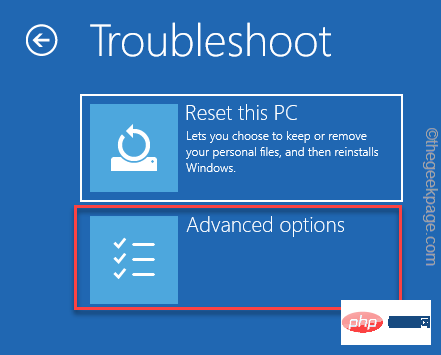
7.您可以在此处找到各种选项。
8.但是,您必须单击“启动设置”之一。
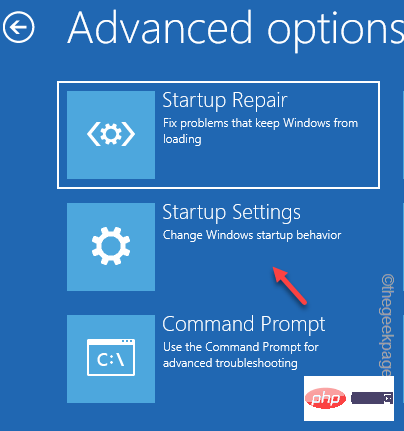
9.现在,点击“重新启动”以重新启动系统。
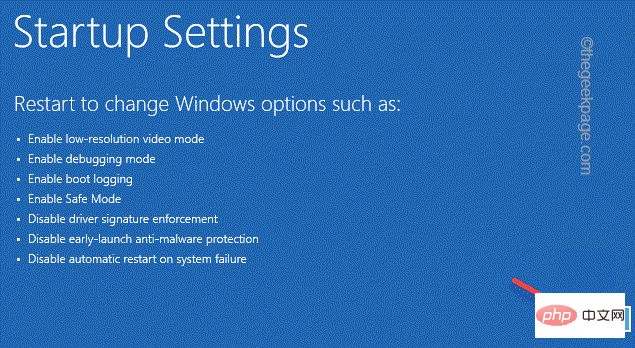
等到系统重新启动。
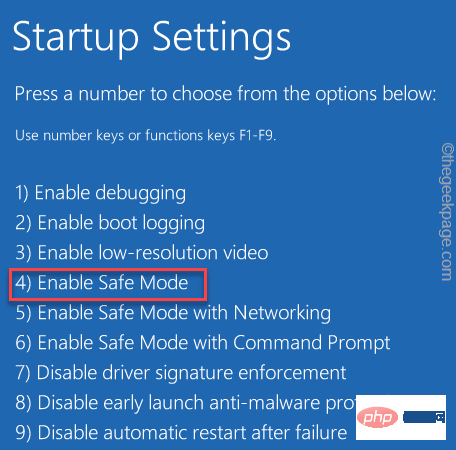
10.在这里,您可以看到启动设置的可用选项列表。
11.然后,只需按 F4 从键盘上。
这将以安全模式打开计算机。
耐心等待,直到Windows以安全模式启动。它与普通模式有何不同?在安全模式下,个性化被阻止,因此桌面显示为黑色。
第 3 步 – 使用 DDU
您现在可以使用显示驱动程序卸载程序来清理 NVIDIA 驱动程序安装并重新启动系统。
1.打开文件资源管理器并访问DDU文件的位置。
2. 打开 DDU 文件夹。
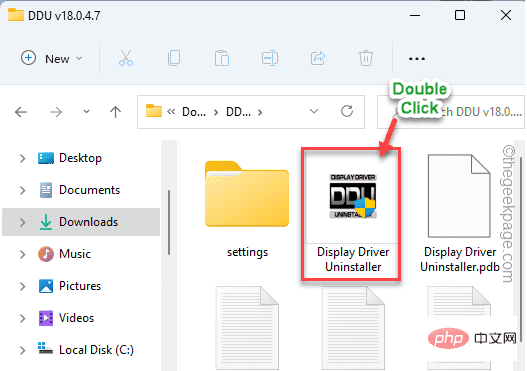
3.然后,双击“显示驱动程序卸载程序”以访问它。
4. 当 DDU 页面打开时,将“选择设备类型”设置为“GPU”。将下一个选项设置为“NVIDIA”。
5.稍后,要清理GPU文件并重新启动,请点击“清理并重新启动”。
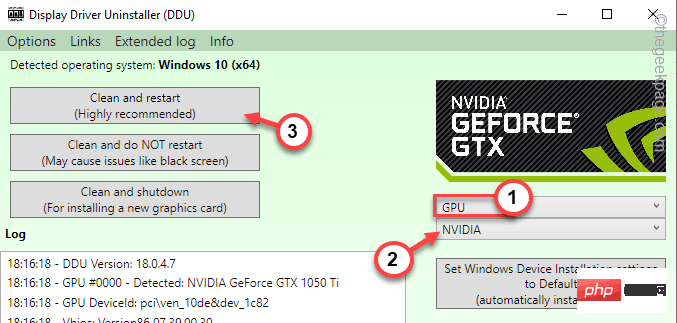
系统重新启动后,您可以使用下载的安装程序安装最新的图形驱动程序。
修复5 –运行SFC,DISM检查
在计算机上运行SFC和DISM扫描检查以解决此问题。
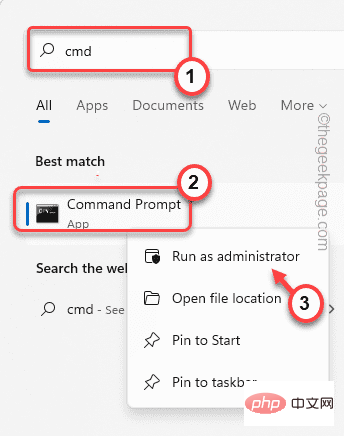
1.在搜索框中搜索“cmd”。
2.然后,右键单击“命令提示符”,然后点击“以管理员身份运行”以管理员身份打开CMD终端。
3.现在,将此DISM扫描命令粘贴到终端中,然后按 输入.
DISM.exe /Online /Cleanup-image /Restorehealth
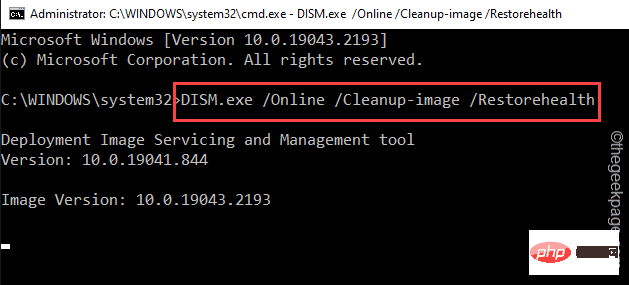
Windows 将运行 DISM 检查。
4.等待DISM扫描操作完成,编写此SFC扫描代码,然后按回车键运行SFC扫描。
sfc /scannow
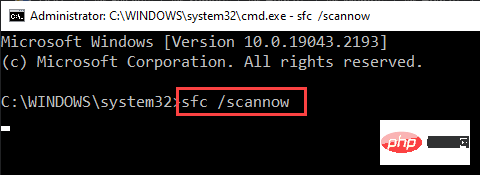
运行系统文件检查扫描工具后关闭终端页面。
Restart the computer. You will no longer see WiFiCx.sys BSOD.
Description
According to some users, Vanguard Anti Cheat (used by Valorant or other Riot Games) is the culprit. You can uninstall Pioneer Anti-Cheat directly.
The above is the detailed content of How to Fix WiFicx.sys Failed BSOD Error on Windows 10/11. For more information, please follow other related articles on the PHP Chinese website!

