
Home >Web Front-end >JS Tutorial >A brief analysis of how node links multiple JS modules
A brief analysis of how node links multiple JS modules

- 青灯夜游forward
- 2023-02-07 17:52:372431browse
Sometimes you have such questions: How are the various functional files combined and displayed in the browser? Why do we need a node environment? The following article will introduce to you how node links multiple JS modules together. I hope to be helpful!

1. Personal understanding
The browser itself can only do some display and user interaction functions, and its ability to operate the system is very limited. So, browsing The built-in running environment of the server obviously does not meet some more humane development modes, such as better distinguishing functional modules and realizing file operations. Then, the defects are obvious, for example: each JS file is relatively scattered and needs to be introduced separately in the html page. If a certain JS file needs For other JS libraries, it is very likely that an error will be reported because the html page is not introduced. In a project with huge functions, manually managing these function files is indeed a bit overwhelming.
So, how does node provide development in a more friendly way? In fact, as mentioned above, manual management of file dependencies will not only consume a lot of energy, but also cause omissions. So, would it be much better to manage it in an automated way? Yes, the operating environment of node has broadened the ability to operate the system. In other words, perhaps developers in the past also wanted to complete those mechanical and trivial tasks through some codes, but they only had ideas but no operations. Permissions, in the end we can only look back and sigh. Now, you can use some extended functions of node to process and organize the file, then add some automated code, and finally convert it into a complete JS file that can be recognized by the browser. , in this way, the contents of multiple files can be collected into one file. [Related tutorial recommendations: nodejs video tutorial, Programming teaching]
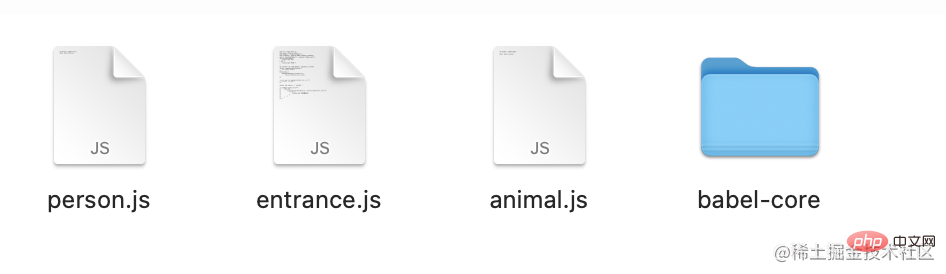
2. Create files
Create some JS first files, as shown below:
These files are created manually, babel-core This file is from the global node_modules Copied from inside, as shown below:
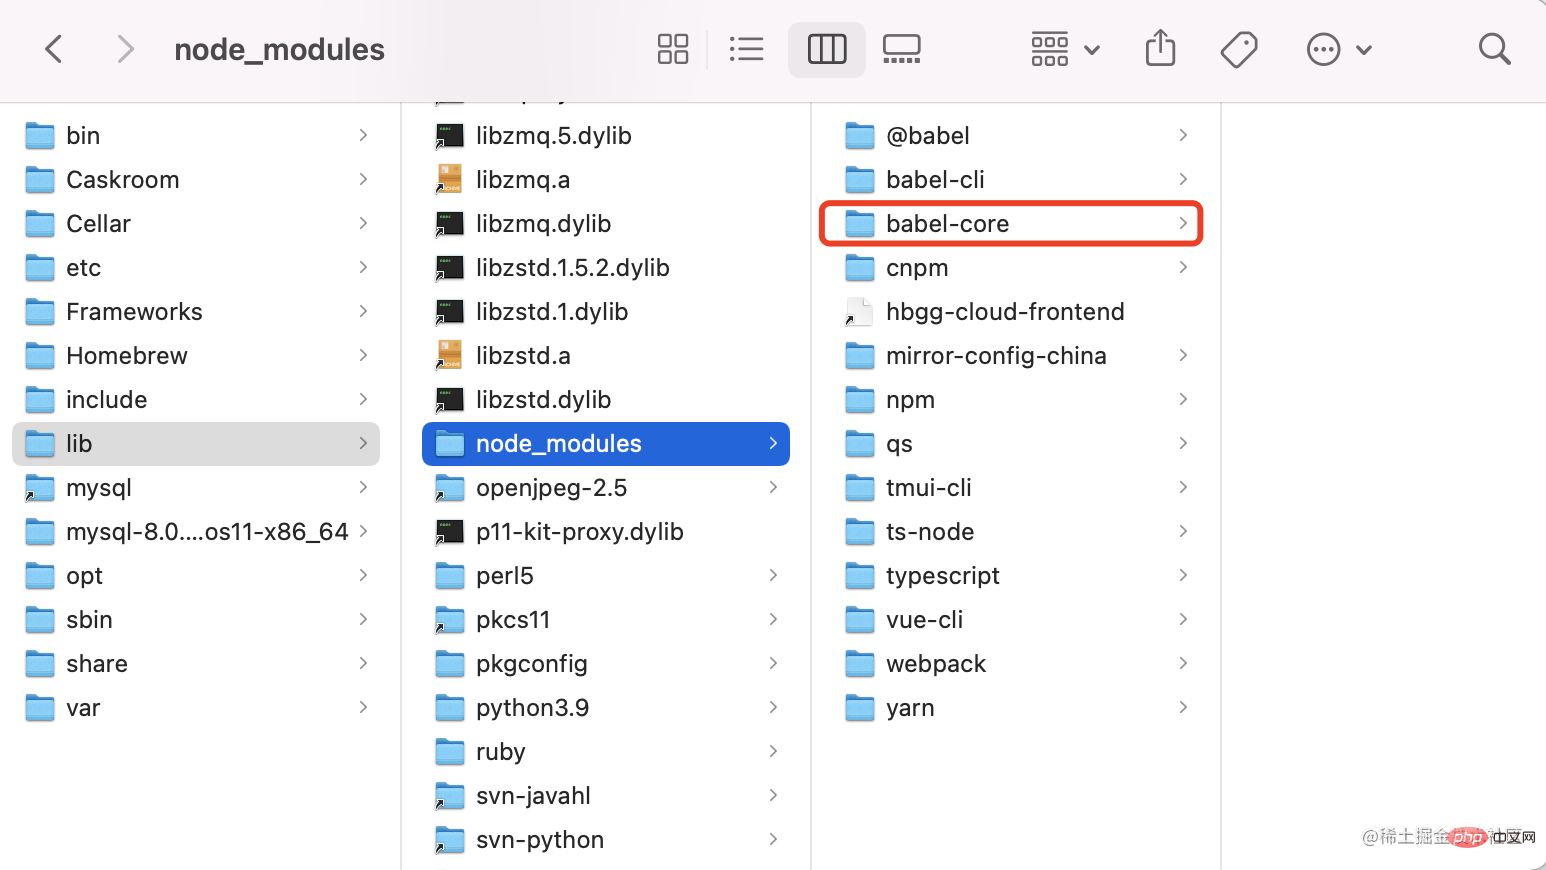
Why do you want to copy it? This is because whatever scaffolding does is actually to build it quickly, but how can we understand what it does? Then just copy it directly. node Except for some built-in modules, others need to find the relevant modules by specifying the require path, as shown in the following figure:

Use the require('./babel-core') method to parse the methods under a functional module.
1. Write the entry file and convert the ES6 code
##entrance.js As the entry file, its function is to set Where does the work begin? How to start? So, the work here refers to converting ES6 code to provide it for browser use.
//文件管理模块
const fs = require('fs');
//解析文件为AST模块
const babylon = require('babylon');
//AST转换模块
const { transformFromAst } = require('./babel-core');
//获取JS文件内容
let content = fs.readFileSync('./person.js','utf-8')
//转换为AST结构,设定解析的文件为 module 类型
let ast = babylon.parse(content,{
    sourceType:'module'
})
//将ES6转换为ES5浏览器可识别代码
le t { code } = transformFromAst(ast, null, {
    presets: ['es2015']
});
//输出内容
console.log('code:\n' + `${code}`)
The above code is very simple. The ultimate goal is to convert the person.js file of type module to ES5.
let person = {name:'wsl'}
export default person
The terminal runs the entry file, as shown below: node entrance.jsPrint the code, as shown below:
"use strict";
//声明了一个 __esModule 为 true 的属性
Object.defineProperty(exports, "__esModule", {
value: true
});
var person = { name: 'wsl' };
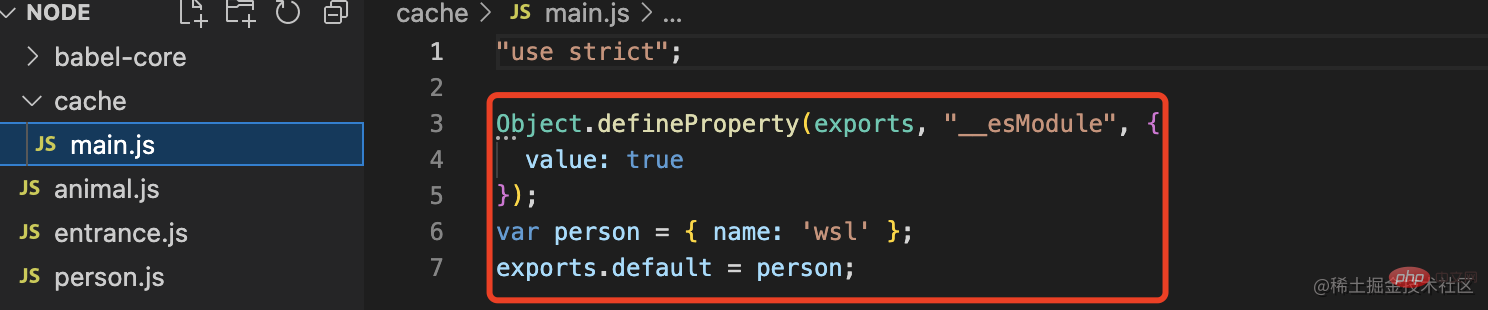
exports.default = person;Yes, you can see the printed code, which is The code that the browser can recognize, according to common sense, see if it can be run directly? Write this code into a js file through the fs function and let it be referenced by a page to see the effect:
fs.mkdir('cache',(err)=>{
    if(!err){
        fs.writeFile('cache/main.js',code,(err)=>{
            if(!err){
                console.log('文件创建完成')
            }
        })
    }
})
Again Run the command, as shown in the figure:

exports variable of the original code in a self-executing function, and then return it to the specified object.
//完善不严谨的code代码
function perfectCode(code){
    let exportsCode = `
    var exports = (function(exports){
    ${code}
    return exports
    })({})
    console.log(exports.default)`
    return exportsCode
}
//重新定义code
code = perfectCode(code)
Look at the main.js file after the output is improved
var exports = (function(exports){
    "use strict";
    Object.defineProperty(exports, "__esModule", {
    value: true
    });
    var person = { name: 'wsl' };
    exports.default = person;
    return exports
})({})
console.log(exports.default)
Run the browser, as shown in the figure:

现在浏览器运行正常了。
2、处理 import 逻辑
既然是模块,肯定会存在一个模块依赖另一个或其他很多个模块的情况。这里先不着急,先看看person 模块引入单一 animal 模块后的代码是怎样的?
animal 模块很简单,仅仅是一个对象导出
let animal = {name:'dog'}
export default animal
person 模块引入
import animal from './animal'
let person = {name:'wsl',pet:animal}
export default person
看下转换后的代码
"use strict";
Object.defineProperty(exports, "__esModule", {
  value: true
});
var _animal = require("./animal");
var _animal2 = _interopRequireDefault(_animal);
function _interopRequireDefault(obj) {
    return obj && obj.__esModule ? obj : { default: obj };
}
var person = { name: 'wsl', pet: _animal2.default };
exports.default = person;
可以看到,转换后会多一个未声明的 require 方法,内部声明的 _interopRequireDefault 方法已声明,是对 animal 导出部分进行了一个包裹,让其后续的代码取值 default 的时候保证其属性存在!
下面就需要对 require 方法进行相关的处理,让其转为返回一个可识别、可解析、完整的对象。
是不是可以将之前的逻辑对 animal 模块重新执行一遍获取到 animal 的代码转换后的对象就行了?
但是,这里先要解决一个问题,就是对于 animal 模块的路径需要提前获取并进行代码转换,这时候给予可以利用 babel-traverse 工具对 AST 进行处理。
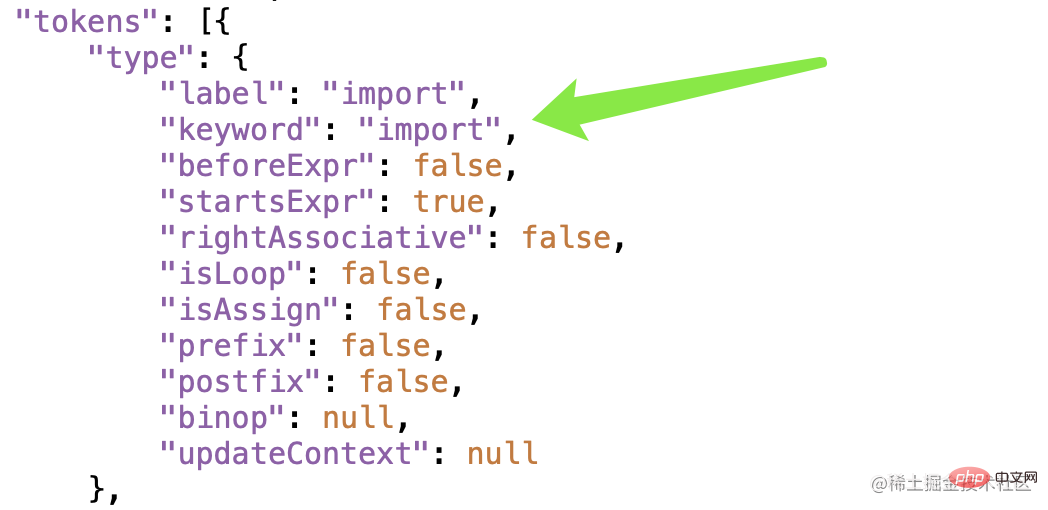
说到这里,先看一下 JS 转换为 AST 是什么内容?
这里简单放一张截图,其实是一个 JSON 对象,存储着相关的代码信息,有代码位置的、指令内容的、变量的等等。
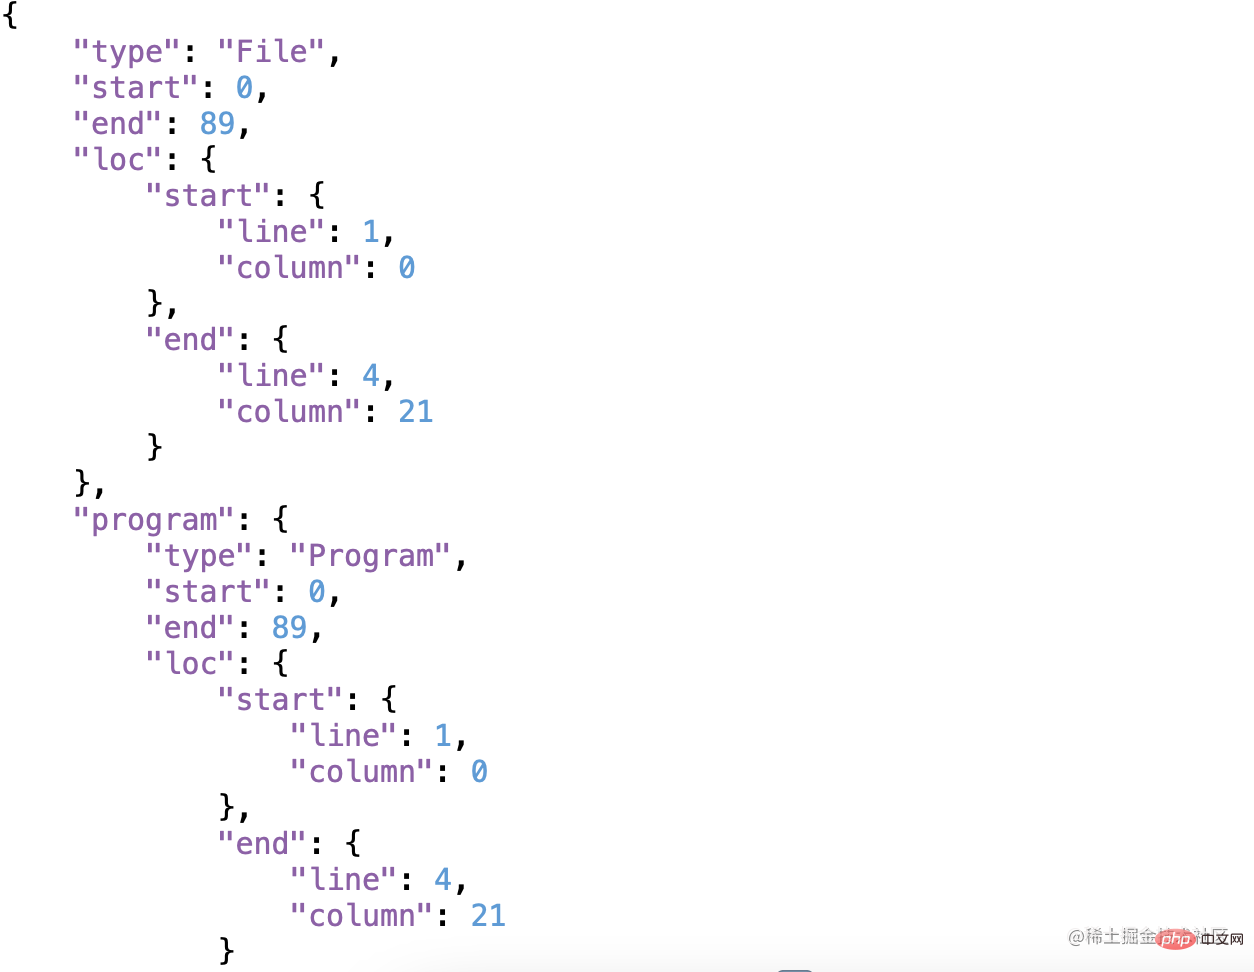
拿到它的目的其实就是找到import 对应节点下的引入其他模块的路径
通过 babel-traverse 找到 AST 里面 import 对应的信息
const traverse = require('babel-traverse').default;
//遍历找到 import 节点
traverse(ast,{
    ImportDeclaration:({ node })=>{
        console.log(node)
    }
})
输出看下节点打印的结构
Node {
  type: 'ImportDeclaration',
  start: 0,
  end: 29,
  loc: SourceLocation {
    start: Position { line: 1, column: 0 },
    end: Position { line: 1, column: 29 }
  },
  specifiers: [
    Node {
      type: 'ImportDefaultSpecifier',
      start: 7,
      end: 13,
      loc: [SourceLocation],
      local: [Node]
    }
  ],
  source: Node {
    type: 'StringLiteral',
    start: 19,
    end: 29,
    loc: SourceLocation { start: [Position], end: [Position] },
    extra: { rawValue: './animal', raw: "'./animal'" },
    value: './animal'
  }
}
可以看到 node.source.value 就是 animal 模块的路径,需要的就是它。
扩展入口文件功能,解析 import 下的 JS 模块,
添加 require 方法
//完善代码
function perfectCode(code){
    let exportsCode = `
        //添加require方法
        let require = function(path){
            return {}
        }

        let exports = (function(exports,require){
            ${code}
            return exports
        })({},require)
    `
    return exportsCode
}
这样转换完的 main.js 给不会报错了,但是,这里需要解决怎么让 require 方法返回 animal 对象
let require = function(path){
    return {}
}

let exports = (function(exports,require){
    "use strict";
    Object.defineProperty(exports, "__esModule", {
        value: true
    });

    var _animal = require("./animal");
    var _animal2 = _interopRequireDefault(_animal);
    function _interopRequireDefault(obj) { return obj && obj.__esModule ? obj : { default: obj }; }
    var person = { name: 'wsl', pet: _animal2.default };
    exports.default = person;
    return exports
})({},require)
下面就需要添加 require 方法进行 animal 对象的返回逻辑
//引入模块路径
let importFilesPaths = []
//引入路径下的模块代码
let importFilesCodes = {}

//获取import节点,保存模块路径
traverse(ast,{
    ImportDeclaration:({ node })=>{
        importFilesPaths.push(node.source.value)
    }
})

//解析import逻辑
function perfectImport(){
    //遍历解析import里面对应路径下的模块代码
    importFilesPaths.forEach((path)=>{
        let content = fs.readFileSync(path + '.js','utf-8')
        let ast = babylon.parse(content,{
            sourceType:'module'
        })
        let { code } = transformFromAst(ast, null, {
            presets: ['es2015']
        });
        //转换code
        code = perfectImportCode(code)
        importFilesCodes[path] = code
    })
}

//完善import代码
function perfectImportCode(code){
    let exportsCode = `(
        function(){
                let require = function(path){
                    let exports = (function(){ return eval(${JSON.stringify(importFilesCodes)}[path])})()
                    return exports
                }
                return (function(exports,require){${code}
                    return exports
                })({},require)
            }
        )()
    `
    return exportsCode
}

//完善最终输出代码
function perfectCode(code){
    let exportsCode = `
        let require = function(path){
            let exports = (function(){ return eval(${JSON.stringify(importFilesCodes)}[path])})()
            return exports
        }
        let exports = (function(exports,require){
            ${code}
            return exports
        })({},require)
        console.log(exports.default)
    `
    return exportsCode
}
上面的代码其实没有什么特别难理解的部分,里面的自执行闭包看着乱,最终的目的也很清晰,就是找到对应模块下的文件 code 代码进行自运行返回一个对应的模块对象即可。
看下转换后的 main.js 代码
let require = function(path){
    let exports = (function(){ return eval({"./animal":"(\n function(){\n let require = function(path){\n let exports = (function(){ return eval({}[path])})()\n return exports\n }\n return (function(exports,require){\"use strict\";\n\nObject.defineProperty(exports, \"__esModule\", {\n value: true\n});\n\nvar animal = { name: 'dog' };\n\nexports.default = animal; \n return exports\n })({},require)\n }\n )()\n "}[path])})()
    return exports
}

let exports = (function(exports,require){
    "use strict";
    Object.defineProperty(exports, "__esModule", {
    value: true
    });

    var _animal = require("./animal");
    var _animal2 = _interopRequireDefault(_animal);

    function _interopRequireDefault(obj) { return obj && obj.__esModule ? obj : { default: obj }; }


    var person = { name: 'wsl', pet: _animal2.default };
    exports.default = person;
    return exports
})({},require)
console.log(exports.default)
刷新浏览器,打印结果如下:

可以看到,pet 属性被赋予了新值。
三、完整的入口文件代码
const fs = require('fs');
const babylon = require('babylon');
const traverse = require('babel-traverse').default;
const { transformFromAst } = require('./babel-core');
//解析person文件
let content = fs.readFileSync('./person.js','utf-8')
let ast = babylon.parse(content,{
    sourceType:'module'
})

//引入模块路径
let importFilesPaths = []
//引入路径下的模块代码
let importFilesCodes = {}

//保存import引入节点
traverse(ast,{
    ImportDeclaration:({ node })=>{
        importFilesPaths.push(node.source.value)
    }
})

//person.js 对应的code
let { code } = transformFromAst(ast, null, {
    presets: ['es2015']
});

//解析import逻辑
function perfectImport(){
    importFilesPaths.forEach((path)=>{
        let content = fs.readFileSync(path + '.js','utf-8')
        let ast = babylon.parse(content,{
            sourceType:'module'
        })
        let { code } = transformFromAst(ast, null, {
            presets: ['es2015']
        });
        code = perfectImportCode(code)
        importFilesCodes[path] = code
    })
}

//完善import代码
function perfectImportCode(code){
let exportsCode = `
    (
    function(){
        let require = function(path){
        let exports = (function(){ return eval(${JSON.stringify(importFilesCodes)}[path])})()
            return exports
        }
        return (function(exports,require){${code}
            return exports
        })({},require)
        }
    )()
    `
    return exportsCode
}

//开始解析import逻辑
perfectImport()

//完善最终代码
function perfectCode(code){
    let exportsCode = `
        let require = function(path){
            let exports = (function(){ return eval(${JSON.stringify(importFilesCodes)}[path])})()
            return exports
        }
        let exports = (function(exports,require){
            ${code}
            return exports
        })({},require)
        console.log(exports.default)
    `
    return exportsCode
}

//最后的代码
code = perfectCode(code)

//删除文件操作
const deleteFile = (path)=>{
    if(fs.existsSync(path)){
        let files = []
        files = fs.readdirSync(path)
        files.forEach((filePath)=>{
            let currentPath = path + '/' + filePath
            if(fs.statSync(currentPath).isDirectory()){
                deleteFile(currentPath)
            } else {
                fs.unlinkSync(currentPath)
            }
        })
        fs.rmdirSync(path)
    }
}

deleteFile('cache')

//写入文件操作
fs.mkdir('cache',(err)=>{
        if(!err){
            fs.writeFile('cache/main.js',code,(err)=>{
            if(!err){
                console.log('文件创建完成')
            }
        })
    }
})
四、总结与思考
古代钻木取火远比现代打火机烤面包的意义深远的多。这个世界做过的事情没有对或错之分,但有做与不做之别。代码拙劣,大神勿笑[抱拳][抱拳][抱拳]
更多node相关知识,请访问:nodejs 教程!
The above is the detailed content of A brief analysis of how node links multiple JS modules. For more information, please follow other related articles on the PHP Chinese website!