Home >Web Front-end >PS Tutorial >How to use PS to change the background of the ID photo
How to use PS to change the background of the ID photo
- 藏色散人Original
- 2021-04-08 15:57:4533065browse
How to use ps to change the background of the ID photo: first open the ID photo to be processed in the ps software and copy a layer; then select the quick selection tool in the toolbar and select the white background of the ID photo ; Then use the delete key to delete the selected white color; finally create a new layer and use the fill tool to fill it with the new color.

The operating environment of this article: Windows 7 system, Dell G3 computer, Adobe Photoshop CS6.
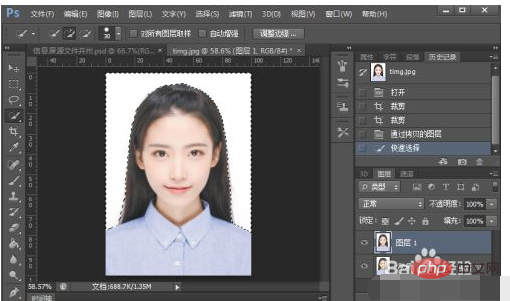
First open the ID photo you need to process in PS software, crop it to the appropriate size, and then CTRL J to copy a layer.

Select the copied layer and select the Quick Selection Tool in the toolbar.

Use the quick selection tool to select the white background of the ID photo. You need to select carefully here and do not select the main character.

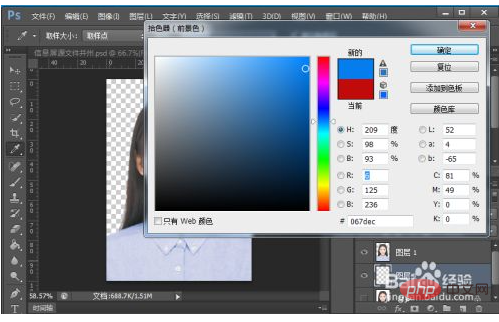
Delete the selected white point with the delete key, as shown in the picture

Create a new layer and drag it to Make the next layer of the character, then select the desired color (here it's blue) and fill it with the fill tool.

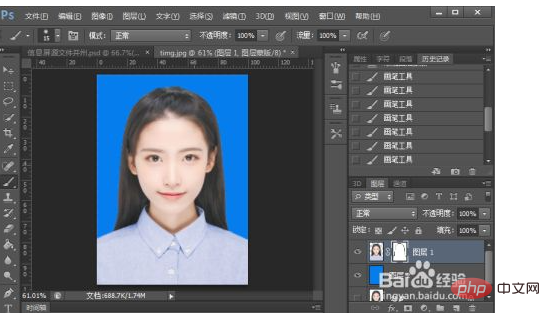
After filling in the color, we found that the edges of the hair will be a little white. Next, add a layer mask to the character layer, select the brush tool and carefully erase the white edges. .

#The picture will be like this after completion, and you will get the blue ID photo you need immediately.

【Recommended learning: ps video tutorial】
The above is the detailed content of How to use PS to change the background of the ID photo. For more information, please follow other related articles on the PHP Chinese website!

