Home >PHP Framework >ThinkPHP >Will you use thinkphp-queue in ThinkPHP5?
Will you use thinkphp-queue in ThinkPHP5?
- 藏色散人forward
- 2020-07-17 13:23:296240browse
The following tutorial column of thinkphp framework will introduce to you the method of using thinkphp-queue in ThinkPHP5. I hope it will be helpful to friends in need!

Recently, the editor received a message from friends in the group who didn’t know how to use php-queue when using the ThinkPHP5.0 framework (it’s really embarrassing, there are many comments about this on the Internet) tutorial). Haha, it doesn’t matter if you don’t want to refer to it. Let me go through it in detail~~ About what is a queue? What does the queue solve? What are the scenarios for queues? ...and so on. Developers should first understand these issues by themselves. In addition, this case only performs specific operations on the ThinkPHP framework.
1. Install thinkphp-queue
It is recommended to use Composer for installation, switch to the root directory of the project, and execute: composer require topthink/think-queue
2. Configure the storage environment of the message queue
The configuration file is located in application\extra\queue.php, as shown in the figure: 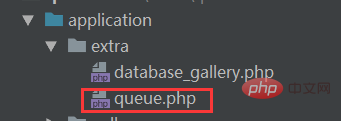
Use the Redis driver. If the Redis environment has not been installed, Please install it yourself, it is very simple, or you can use other types of drivers, as shown in the figure: 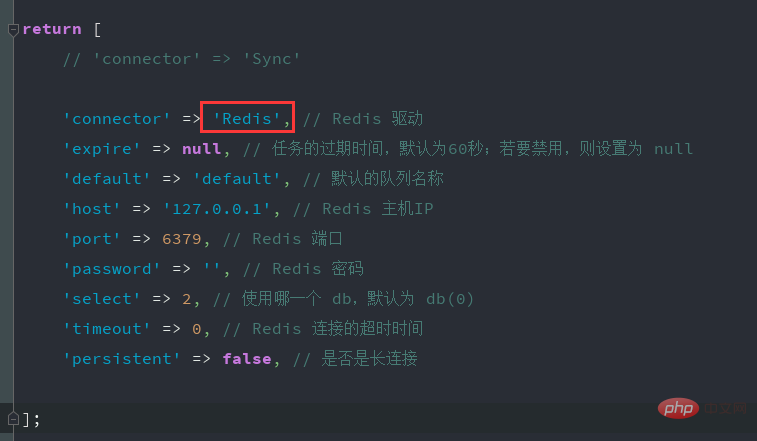
3. Task creation
We have the Index.php file under the index module , create a method named queue (does it have to be like this? Of course not, this tutorial is just an example, you can create a new module, and the method name can be other), as shown in the figure:

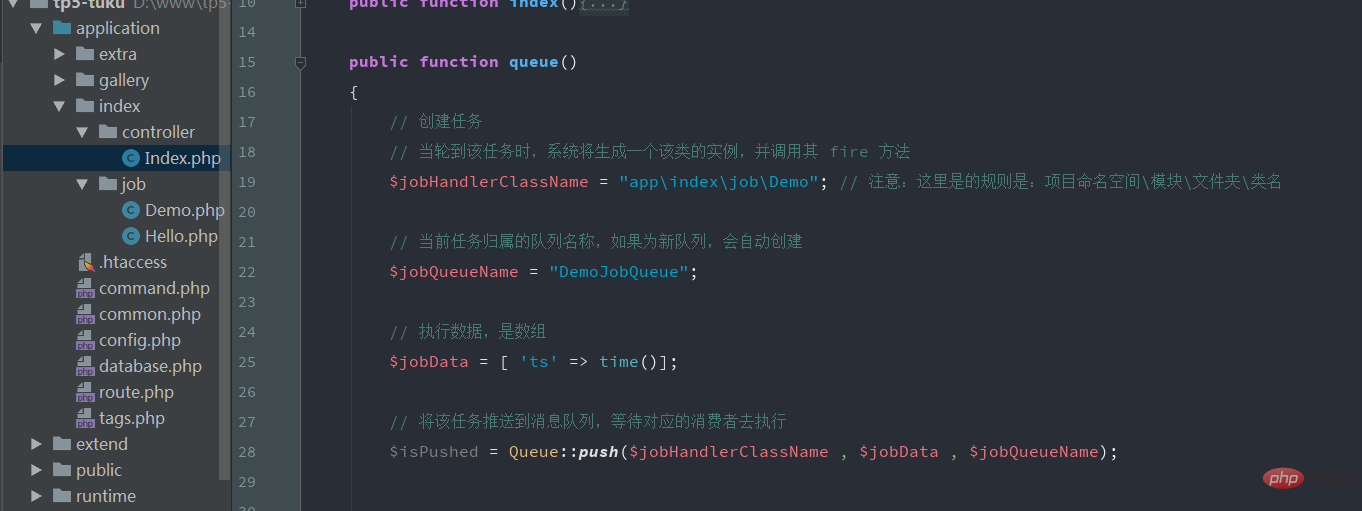
4. Task message consumption and deletion processing
We create a job file under the index module, which is used to process the consumption mode, as shown in the figure: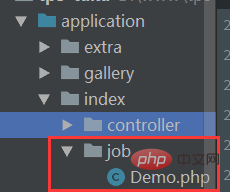
Under the Demo class, create a fire method, which is the method called by the message queue by default. As shown in the picture:
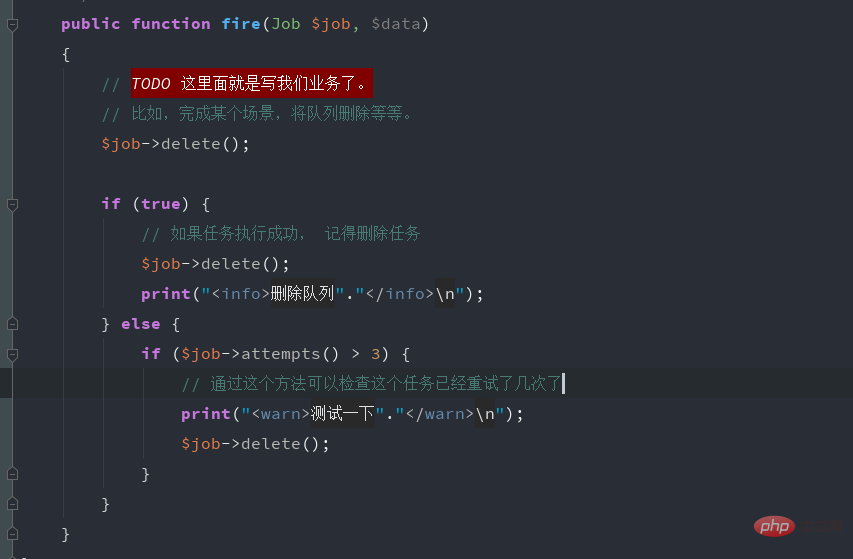
# The above is the creation of the completed task--"Push--"Consumption.
In the browser or terminal, execute our index/queue.html method to complete the creation and push. Regarding task consumption, you can refer to the command and switch to the root directory of the project in the terminal:
5. Monitor tasks and execute
php think queue:listen
php think queue:work –daemon(不加–daemon为执行单个任务)
. For specific optional parameters, you can enter the command and add –help to view.
can be used with supervisor to ensure that the process is resident
1.1 Command mode
queue:subscribe command [As of 2017-02-15, the author has not yet Implement this mode, skip]
-
queue:work command
work command: This command will start a work process to process the message queue.
php think queue:work --queue helloJobQueue
-
queue:listen command
listen command: This command will create a listen parent process, and then the parent process will pass
proc_open('php think queue :work')to create a work sub-process to process the message queue and limit the execution time of the work process.php think queue:listen --queue helloJobQueue
2.2 Command line parameters
-
Work mode
php think queue:work \
--daemon            //是否循环执行,如果不加该参数,则该命令处理完下一个消息就退出
--queue  helloJobQueue  //要处理的队列的名称
--delay  0 \        //如果本次任务执行抛出异常且任务未被删除时,设置其下次执行前延迟多少秒,默认为0
--force  \          //系统处于维护状态时是否仍然处理任务,并未找到相关说明
--memory 128 \      //该进程允许使用的内存上限,以 M 为单位
--sleep  3 \        //如果队列中无任务,则sleep多少秒后重新检查(work+daemon模式)或者退出(listen或非daemon模式)
--tries  2          //如果任务已经超过尝试次数上限,则触发‘任务尝试次数超限’事件,默认为0
-
Listen mode
php think queue:listen \
--queue  helloJobQueue \   //监听的队列的名称
--delay  0 \         //如果本次任务执行抛出异常且任务未被删除时,设置其下次执行前延迟多少秒,默认为0
--memory 128 \       //该进程允许使用的内存上限,以 M 为单位
--sleep  3 \         //如果队列中无任务,则多长时间后重新检查,daemon模式下有效
--tries  0 \         //如果任务已经超过重发次数上限,则进入失败处理逻辑,默认为0
--timeout 60         //创建的work子进程的允许执行的最长时间,以秒为单位
You can see that in listen mode, the
--deamonparameter is not included. The reason will be explained below
Linux starts the daemon process, taking tp5 as an example
nohup php think queue:work --daemon --queue 任务名称 &
 nohup php think queue:work --daemon --queue 任务名称 &
To check the number of tasks in Linux, you can enter: jobs -l

The above is the detailed content of Will you use thinkphp-queue in ThinkPHP5?. For more information, please follow other related articles on the PHP Chinese website!

