Home >CMS Tutorial >WordPress >wordpress theme installation tutorial
wordpress theme installation tutorial
- 爱喝马黛茶的安东尼Original
- 2019-07-19 09:27:522820browse

WordPress theme installation tutorial
Method 1: Enable background direct upload
1. Log in In the WordPress program background, click "Appearance" - "Theme" in the left menu bar, then the "Add button" appears on the right theme interface, click to enter the add theme page;
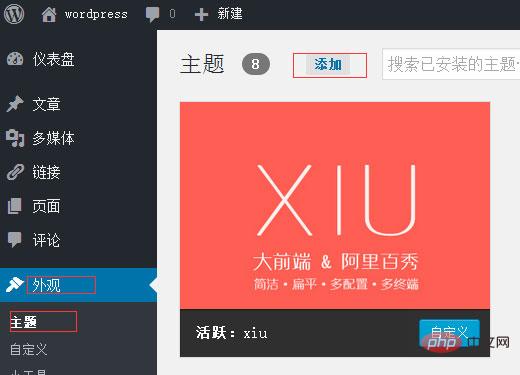
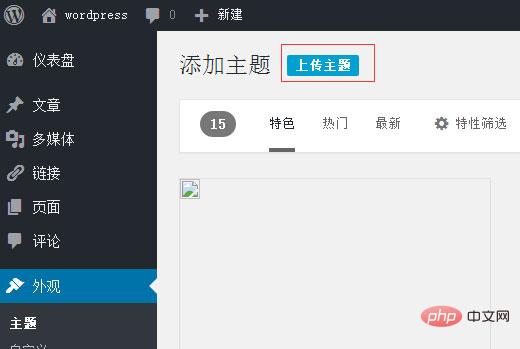
2. Enter the add theme page. There are many default themes to choose from, or you can upload them yourself. This article will upload a theme demonstration. Click "Upload Theme";
Related recommendations: "WordPress Tutorial"
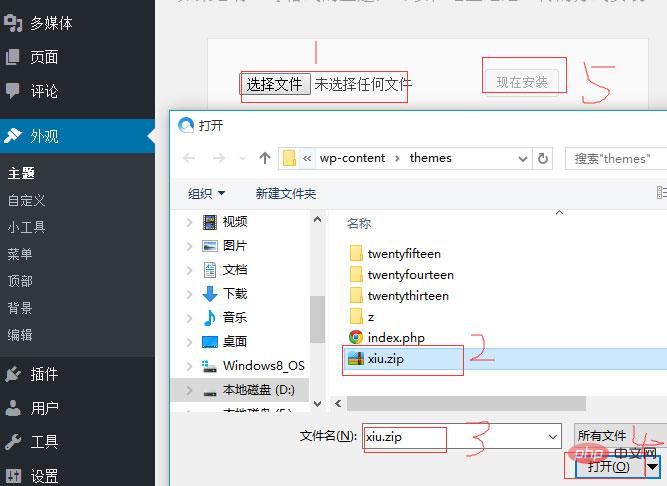
3. Select the local WordPress theme package (general It is a compressed package in zip format), and then upload it;
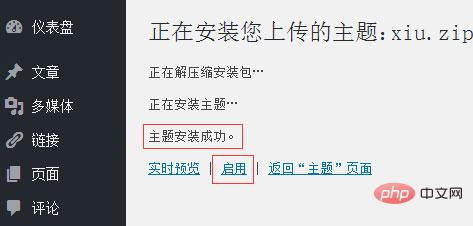
4. Wait for the upload and installation. After the theme is installed successfully, click "Enable" to install the new WordPress theme.
Method 2: Add a theme to the installation directory
1. Enter the WordPress installation directory through the control panel or FTP tool of the website space, and then find the theme installation path/ wp-content/themes, upload the WordPress theme compressed package to this directory and decompress it;
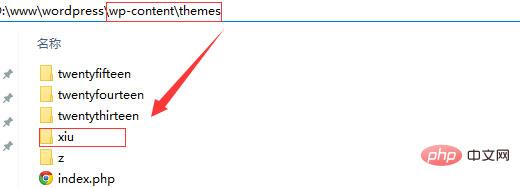
2. Log in to the WordPress backend, click "Appearance" - "Theme" on the right The newly uploaded theme will appear, click "Enable".

The above is the detailed content of wordpress theme installation tutorial. For more information, please follow other related articles on the PHP Chinese website!

