Home >Backend Development >PHP Tutorial >Introduction to the installation tutorial of wnmp under win10 system
Introduction to the installation tutorial of wnmp under win10 system
- 不言forward
- 2019-01-23 09:48:345803browse
This article brings you an introduction to the installation tutorial of wnmp under win10 system. It has certain reference value. Friends in need can refer to it. I hope it will be helpful to you.
When I first started learning PHP, I always used phpstudy. Later I found that many things would be more profound to understand if I configured and installed them individually, so I summarized the deployment tutorial for the development environment under Windows.
Install Nginx
First create a wnmp folder in the root directory of the C drive, and create a www folder in the folder
Access http ://nginx.org/en/download.html, download the Stable version of nginx, extract it into wnmp, and rename it to nginx
Create the vhost folder in the C:\wnmp\nginx\conf directory
Open C:\wnmp\nginx\conf\nginx.conf
Modify or add the following configuration
#打开错误日志记录
error_log  logs/error.log;
error_log  logs/error.log  notice;
error_log  logs/error.log  info;
pid        logs/nginx.pid;

#配置nginx根目录
location / {
  root   C:/wnmp/www;
  index  index.html index.htm;
  autoindex on;
  autoindex_exact_size off;
  autoindex_localtime on;
}

#让nginx支持PHP的设置
location ~ \.php$ {
  root   		   C:/wnmp/www;
   fastcgi_pass   127.0.0.1:9000;
   fastcgi_index  index.php;
   #这里$document_root指的是上面定义好的nginx根目录:C:/wnmp/www
   fastcgi_param  SCRIPT_FILENAME  $document_root$fastcgi_script_name;
   include        fastcgi_params;
}

#在http里面加入下面这一行扩展配置
include vhost/*.conf;
Install PHP
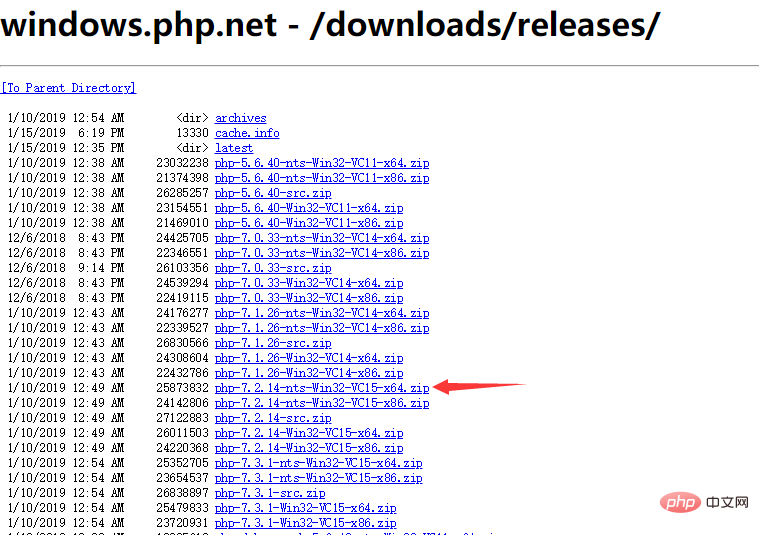
Visit https://windows.php.net/downloads/releases/
Choose the PHP version you want to install. I usually choose the arrow in the picture below to point to The kind of nts
最近尝试安装 php7.3.1 发现openssl版本可能影响到了composer安装,安装composer时错误提示如下:
composer SHA384 is not supported by your openssl extension
openssl版本好像是是1.1.1a
不得已重装了7.2,欢迎知道原因的大神解惑!

extension_dir = "C:\wnmp\php\ext"
extension=php_curl.dll
extension=php_gd2.dll
extension=php_mysqli.dll
extension=php_openssl.dll
extension=php_pdo_mysql.dll
date.timezone = Asia/Shanghai
enable_dl = On
cgi.force_redirect = 0
fastcgi.impersonate = 1
cgi.rfc2616_headers = 1
Associate nginx and phpCreate start.bat in the C:\wnmp\nginx directory with the following contentPS: The RunHiddenConsole.exe file in the following code is also in this directory for the purpose of starting the service Then automatically hide the command line windowBut here I don’t know how to upload this file. . . . . Welcome to leave comments
RunHiddenConsole.exe C:\wnmp\nginx\nginx.exe
echo nginx started
RunHiddenConsole.exe C:\wnmp\php\php-cgi.exe -b 127.0.0.1:9000 -c C:\wnmp\php\php.ini
echo php started
echo .......
Create stop.bat in the C:\wnmp\nginx directory with the following content
@ECHO OFF
taskkill /f /IM nginx.exe
taskkill /f /IM php-cgi.exe
EXIT
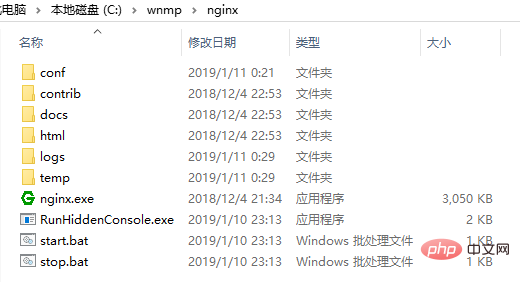
The directory structure is as follows


Install MYSQL
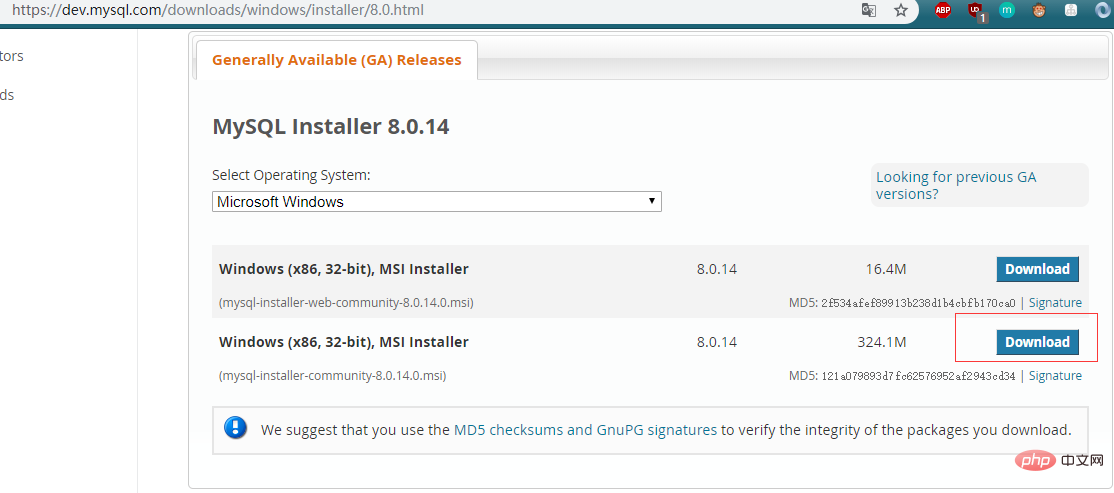
Visit https://dev.mysql.com/downloads/windows/installer/8.0.html to download the latest directly For version 8.0, it is recommended to download the complete installation package.
<span style="font-size: 14pt">#在命令行连接mysql,执行如下命令<br/></span><span style="font-size: 14pt"> show databases;
use mysql;
#修改加密规则
ALTER USER 'root'@'localhost' IDENTIFIED BY 'password' PASSWORD EXPIRE NEVER;
#更新密码(mysql_native_password模式)
ALTER USER 'root'@'localhost' IDENTIFIED WITH mysql_native_password BY 'password';
#刷新权限
flush privileges;</span>
Now you can use navicate to connect to the database. The WNMP environment installation is now complete. The above is the detailed content of Introduction to the installation tutorial of wnmp under win10 system. For more information, please follow other related articles on the PHP Chinese website!

