Home >Web Front-end >JS Tutorial >How to perform debugging in javascript
How to perform debugging in javascript
- 青灯夜游Original
- 2018-12-14 18:02:174162browse
The methods to perform debugging in JavaScript are: 1. Use the console.log() method to debug, which can display the results in the browser console; 2. Set breakpoints through the keyword "debugger" Step through each line of code.

The operating environment of this article: windows7 system, DELL G3 computer, javascript1.8.5.
The methods to perform debugging in JavaScript include: using the console.log() method, or using the keyword "debugger".
Sometimes the code may contain some errors. As a scripting language, JavaScript cannot display any error messages in the browser. However, these errors can affect the output. The best way to find these errors is to debug the code. Let’s start with the details. I hope it will be helpful to you.
We can use the built-in web browser debugger to easily debug the code and find errors. To perform debugging, we have two methods to use. Just choose one to use:
1. Use the console.log() method
2. Use the keyword "debugger"
Let’s introduce these two methods in detail:
Use the console.log() method
console. The log() method displays the results in the browser console. If there are any errors in the code, an error message will be generated.
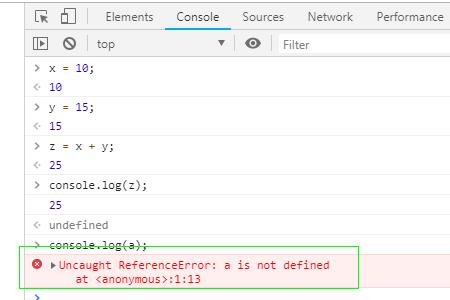
Example: Enter a result in the console and view the output
x = 10;
y = 15;
z = x + y;
console.log(z);
console.log(a);   //a没有什么定义,无法输出,会出错
Output:

Explanation: To open the console on the browser, you need to press the F12 key; or use the key combination: Ctrl Shift i.
Use the "debugger" keyword
In debugging, usually we will set breakpoints in the content of the code itself to step by step check each lines of code.
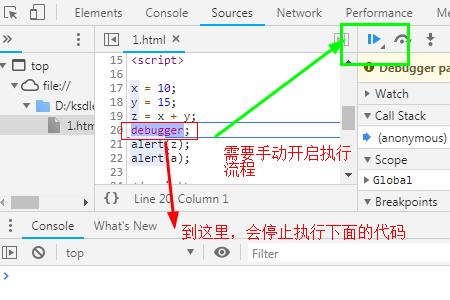
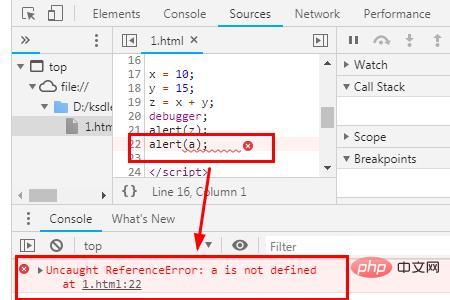
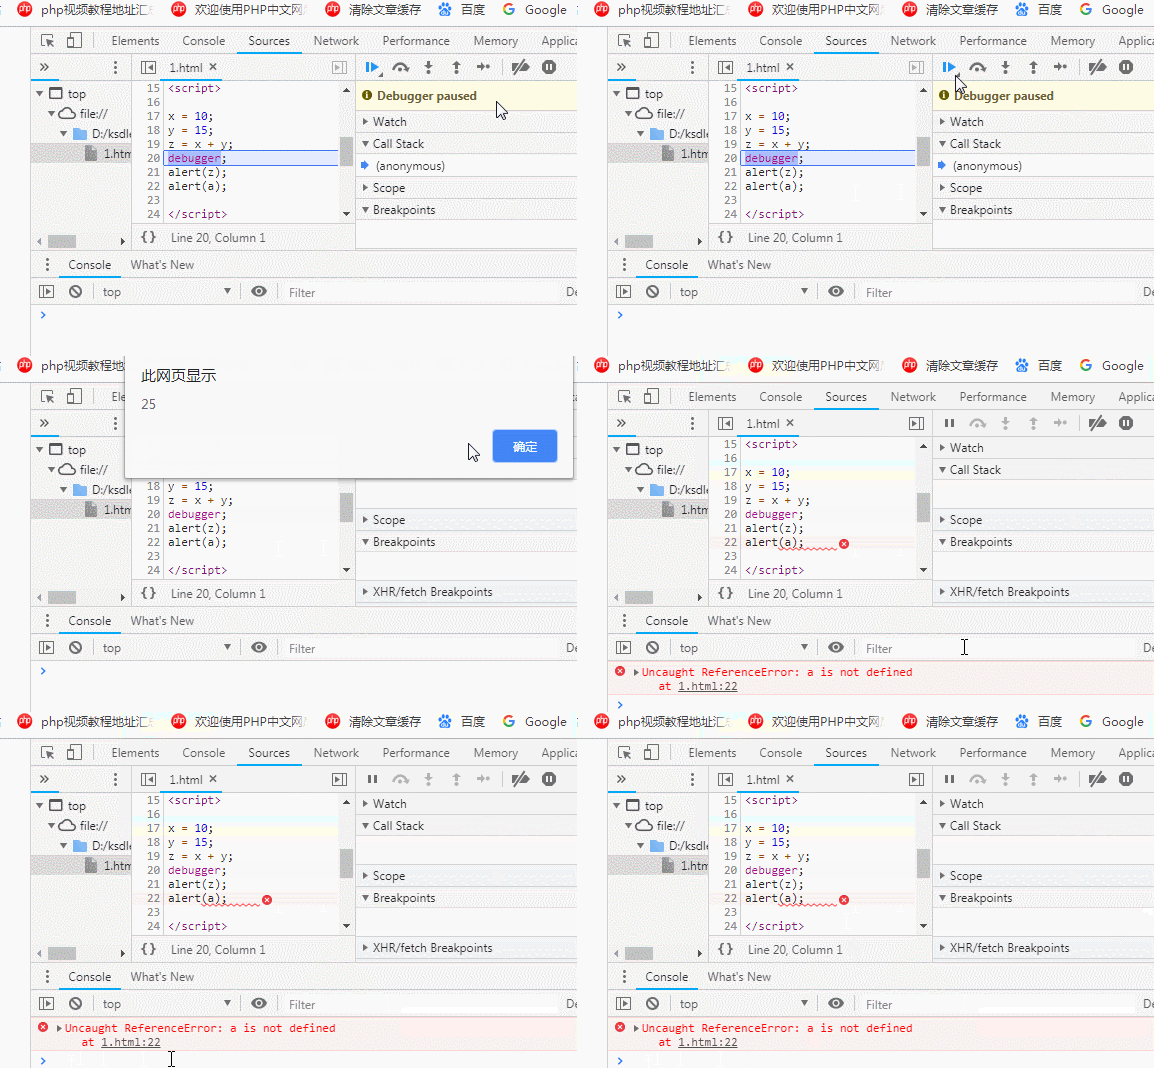
The debugger stops the execution of the program at the position of "debugger" keyword. We can then manually start the execution flow. If an exception occurs, the execution will stop again on that specific line.
x = 10;
y = 15;
z = x + y;
debugger;
alert(z);
alert(a);
Output:


javascript tutorial】
The above is the detailed content of How to perform debugging in javascript. For more information, please follow other related articles on the PHP Chinese website!
Related articles
See more- An in-depth analysis of the Bootstrap list group component
- Detailed explanation of JavaScript function currying
- Complete example of JS password generation and strength detection (with demo source code download)
- Angularjs integrates WeChat UI (weui)
- How to quickly switch between Traditional Chinese and Simplified Chinese with JavaScript and the trick for websites to support switching between Simplified and Traditional Chinese_javascript skills

